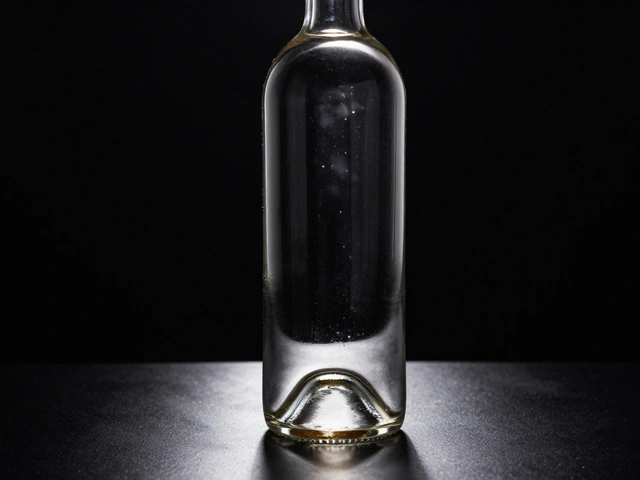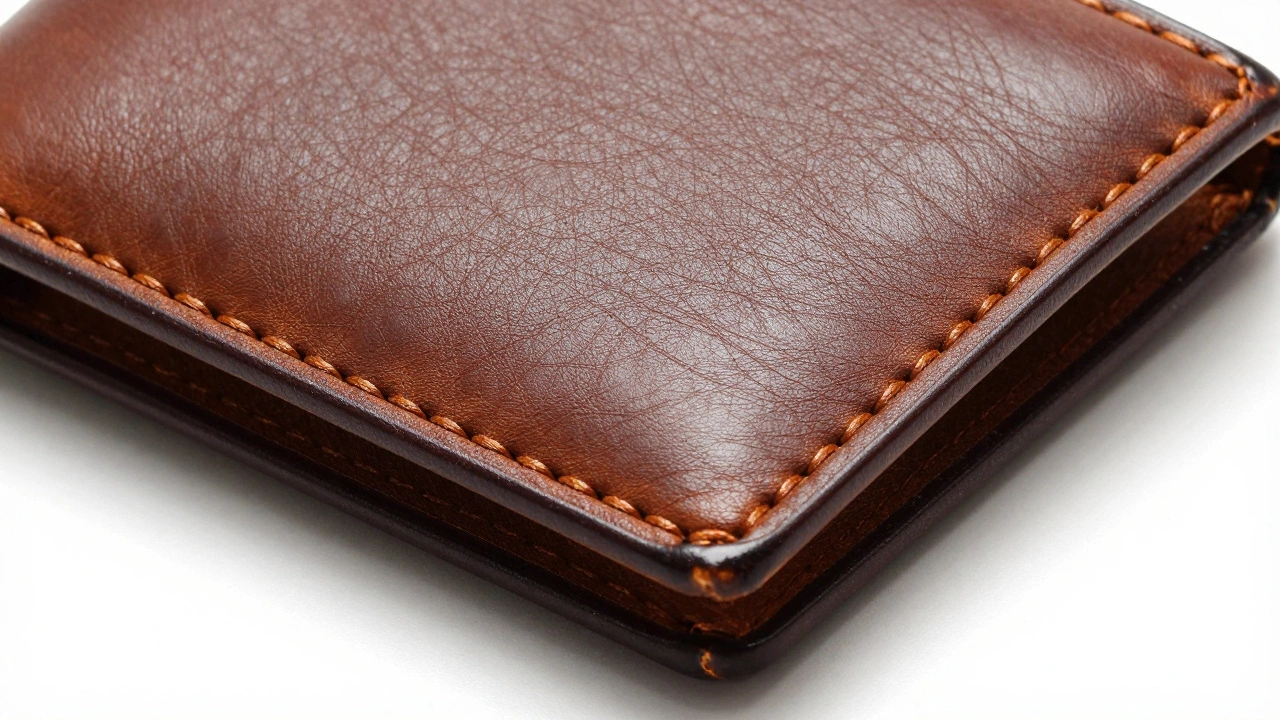
When you’re buying a leather wallet online, what makes you click "Add to Cart"? Is it the price? Maybe. But more often, it’s the way the light catches the stitching. The tiny grain in the leather. The way the edge is hand-burnished. You don’t see it in a flat, white-background shot. But in a close-up? That’s where the product comes alive.
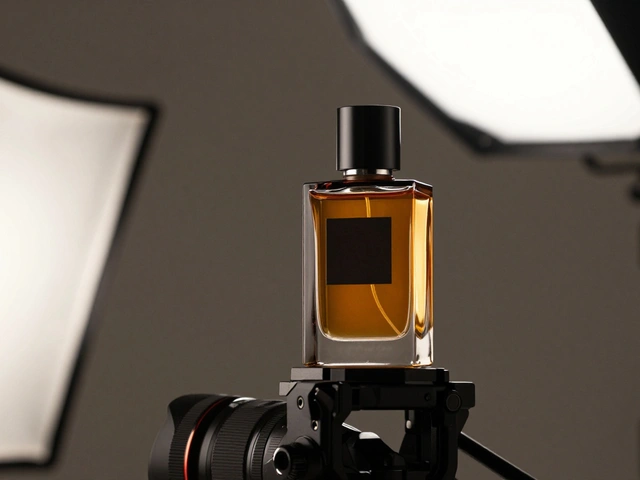
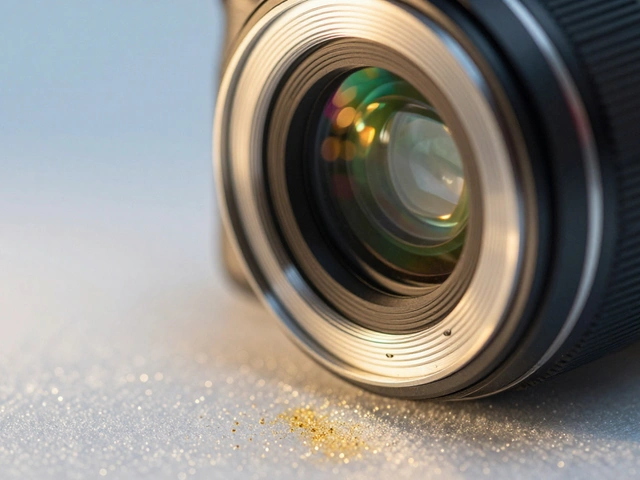
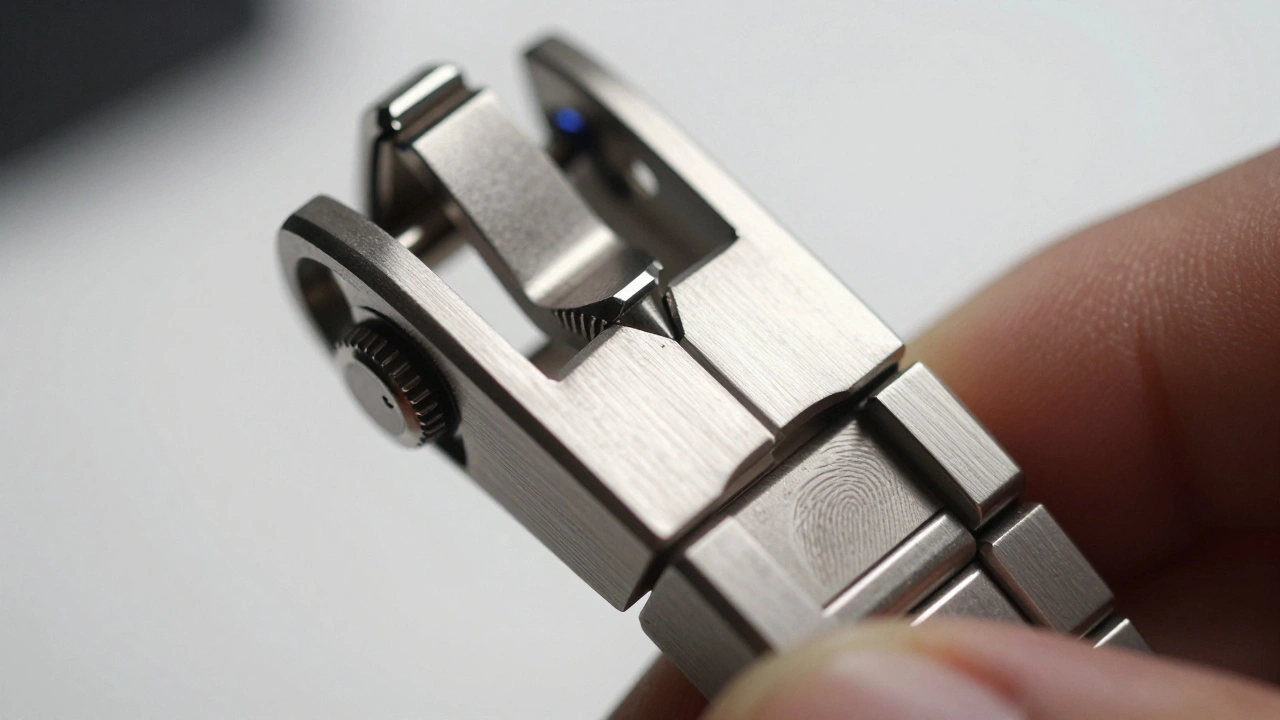
Close-up product photography isn’t just about zooming in. It’s about revealing what the product feels like - not just what it looks like. It’s the difference between seeing a watch and seeing the tiny grooves of its engraved dial, the way the metal catches the light at a 45-degree angle, the faint fingerprint of the artisan’s thumb on the clasp. This isn’t marketing fluff. It’s trust-building at the pixel level.
Why Close-Ups Sell More Than Full Shots
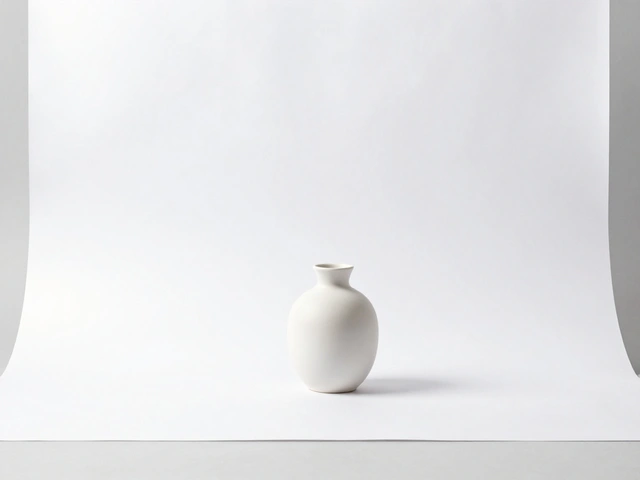
Most e-commerce sites lead with a clean, white-background product shot. That’s fine. But if that’s all you show, you’re leaving money on the table. Customers don’t just want to know what a product is. They want to know how it’s made. And that’s where close-ups win.
Think about jewelry. A single diamond can look like a sparkly dot in a standard photo. But zoom in? You see the way the facets reflect light differently - how one corner catches fire, how the setting holds it. That’s not decoration. That’s proof of quality. A study from the Journal of Consumer Behavior in 2024 found that shoppers were 47% more likely to complete a purchase when close-up texture shots were included alongside standard product images.
Same with tech. A smartphone’s port cover? Looks like a tiny plastic piece. But show the precision-machined edges, the slight bevel where the metal meets the glass, the way the rubber seal sits flush? That tells buyers this isn’t mass-produced junk. It’s engineered.
What You Need to Capture Texture and Detail
You don’t need a $5,000 studio. But you do need the right tools. Here’s what actually works:
- Macro lens - A true 1:1 macro lens (like a 100mm f/2.8) lets you get close without losing focus. It’s the only lens that gives you true life-size magnification on your sensor.
- Extension tubes - These cheap, no-optics tubes slide between your camera and lens. They let you focus closer than the lens normally allows. A set of three can turn a $200 standard lens into a macro beast. Just remember: they reduce light, so you’ll need more illumination.
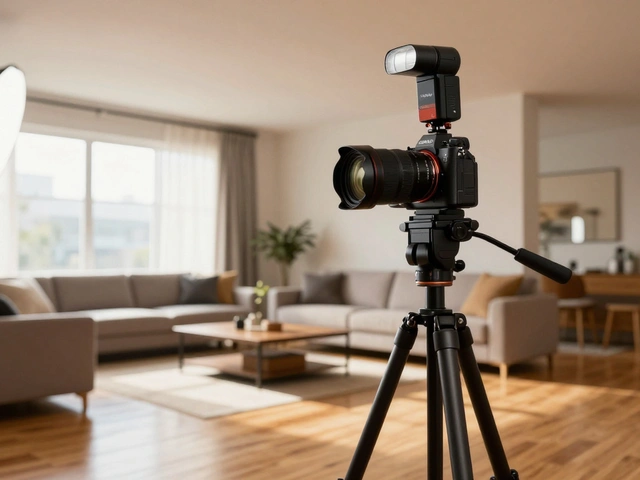
- Sturdy tripod - At 1:1 magnification, even your breath can blur the shot. A solid tripod with a geared head gives you micro-adjustments. No wobble. No guesswork.
- Remote shutter release - Pressing the button with your finger? Bad idea. Use a cable or wireless trigger. Even a 0.5-second delay can ruin a detail shot.
- Controlled lighting - Forget giant softboxes. For texture, you need direction. Use a single LED panel or small flash, angled at 30 degrees. Move it until shadows define the ridges. A tiny diffuser (like tracing paper over a lamp) softens the light just enough to reveal, not flatten.
One thing most beginners get wrong? They think more light = better. Nope. Too much light washes out texture. Too little, and you lose detail. The sweet spot? A single, carefully placed light source that casts subtle shadows across the surface. That’s what makes wood grain pop, metal shine, and fabric weave stand out.
Focus: The Silent Killer of Detail Shots
Here’s the brutal truth: the closer you get, the less of the product stays in focus. At f/2.8, a watch might have only 2 millimeters of sharpness. That means if you focus on the crown, the bezel is blurry. Focus on the band? The dial goes soft.
Manual focus is non-negotiable. Autofocus will hunt. It’ll lock onto dust, not the detail you want. Turn it off. Use live view. Zoom in to 10x. Slide the focus ring until the stitching, the engraving, the seam - whatever you’re highlighting - snaps into crisp clarity.
But what if you need the whole thing sharp? Enter focus stacking. This isn’t magic. It’s math. You take 5, 10, or even 20 photos, each focused on a slightly different plane. Then, software like Helicon Focus or Adobe Photoshop merges them into one image where everything - from front to back - is razor-sharp.
Yes, it takes time. One jewelry piece can take 45 minutes to shoot and stack. But for high-value items? It’s worth it. A client selling handmade watches told me their conversion rate jumped 32% after they started using stacked focus shots. Customers could finally see the entire movement, not just a slice of it.
Lighting That Reveals, Not Hides
Standard product lighting? White box. Even light. Zero shadows. It’s great for catalog shots. Terrible for texture.
For close-ups, you want contrast. You want depth. You want shadows that show the curve of a ceramic mug’s handle or the groove of a wooden flute’s finger holes.
Try this setup: Place your product on a white surface. Light the background separately with a soft, dim LED strip behind it. That keeps it clean. Then, use one small LED panel - no bigger than a paperback book - angled at 45 degrees to the product. Add a small reflector (a white card) on the opposite side to bounce back just a hint of light. That’s it.
Why does this work? Because you’re not trying to eliminate shadows. You’re using them as tools. A shadow under a button, along a seam, or inside a gear tells the eye: this is real. This has dimension.
One pro tip: Use a black card to block stray light. It sounds weird, but if you’re shooting a shiny metal surface, a black card placed just out of frame can kill unwanted reflections. It’s like a stealthy light thief.
What to Shoot - And What to Skip
Not every detail deserves a close-up. You’re not taking a photo album. You’re telling a story. So pick your shots wisely.
Here’s what works:
- Jewelry: The setting of the stone, the clasp mechanism, the engraving inside the band.
- Cosmetics: The texture of a cream, the way a lipstick glides, the pigment density in a powder.
- Tech: Port edges, button tactile response, cable termination, heat vents.
- Clothing: Stitching pattern, fabric weave, thread tension, zipper teeth.
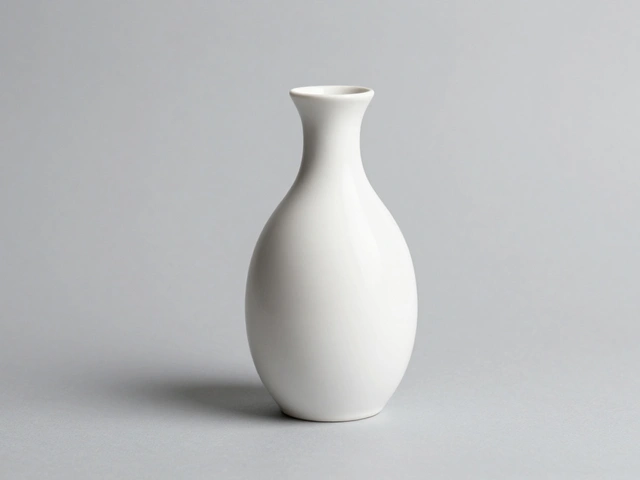
- Handmade goods: Tool marks, brush strokes, uneven glaze, fingerprints in clay.
Here’s what you should skip:
- Blurry, out-of-focus shots that look like mistakes.
- Overly dramatic lighting that makes the product look like a sci-fi prop.
- Shots with dust, lint, or scratches - they’re visible now. Clean the product before you shoot.
Always pair your close-ups with one full shot. Show the whole thing. Then let the details tell the story. That’s the combo that converts.

Common Mistakes (And How to Fix Them)
You’ll make mistakes. Everyone does. Here are the top three - and how to fix them fast:
- Mistake: Too much magnification. You’re so close, you can’t see the whole button. Fix: Back up. Clarity > extreme close-up. You want to see the detail, not just a tiny part of it.
- Mistake: The background is dirty. Dust looks like a crater at 1:1 scale. Fix: Wipe the surface with an anti-static brush. Use a microfiber cloth. Shoot on a fresh, clean surface every time.
- Mistake: Lighting changes between shots. One close-up looks warm, another blue. Fix: Lock your white balance. Use manual settings. Take a test shot. Adjust. Don’t guess.
One thing I’ve seen over and over: photographers rush the setup. They think, "I’ll fix it in post." But you can’t add texture that wasn’t there. You can’t create depth if the light didn’t cast a shadow. You can’t fake craftsmanship. The camera doesn’t lie.
The Real Goal: Trust Through Detail
At the end of the day, close-up product photography isn’t about being fancy. It’s about honesty. When you show the stitching, the grain, the hand-finished edge - you’re saying: "This took time. This took care. This isn’t just another product. This is made by someone who knows what they’re doing."
Customers don’t just buy products. They buy stories. And the best stories are told in the details.
Do I need a macro lens to do close-up product photography?
Not necessarily. You can use extension tubes with a standard lens to get close enough for many product details. But if you want true 1:1 magnification, consistent focus, and the ability to shoot at different distances without losing quality, a dedicated macro lens (like a 100mm f/2.8) is the best long-term investment. Extension tubes are great for testing, but a macro lens gives you professional results faster and more reliably.
How do I avoid blurry photos when shooting close-ups?
Blurry close-ups usually come from camera shake or poor focus. Use a tripod, a remote shutter release, and shoot in manual focus. Turn off autofocus and use live view zoomed in to 10x to fine-tune your focus point. If you’re still getting blur, increase your shutter speed - but make sure your lighting is strong enough to compensate. A shutter speed of 1/125s or faster is usually safe for static product shots.
What aperture should I use for product detail shots?
It depends on what you want to show. For shallow depth of field - like highlighting just the center of a ring - use f/2.8 to f/4. For showing more of the product in focus - like an entire watch face - use f/8 to f/11. If you need everything sharp from front to back, use focus stacking instead of trying to force everything into focus with a tiny aperture. Small apertures can cause diffraction, which reduces sharpness.
Can I use natural light for close-up product photography?
Yes - but only if you control it. A window with indirect light can work well for soft, even texture shots. But natural light changes. Clouds move. The sun shifts. That means your lighting won’t be consistent across shots. For professional results, especially if you’re shooting multiple products or need uniformity across a product line, controlled artificial light (LED panels or flashes) is far more reliable.
How many close-up shots should I take per product?
Three is the sweet spot: one for the main detail (like a clasp or seam), one for a secondary feature (like texture or material grain), and one that shows the product in context (like a hand holding it). More than five can overwhelm customers. Less than two leaves them guessing. Always pair your close-ups with a full white-background shot so customers understand the whole thing.