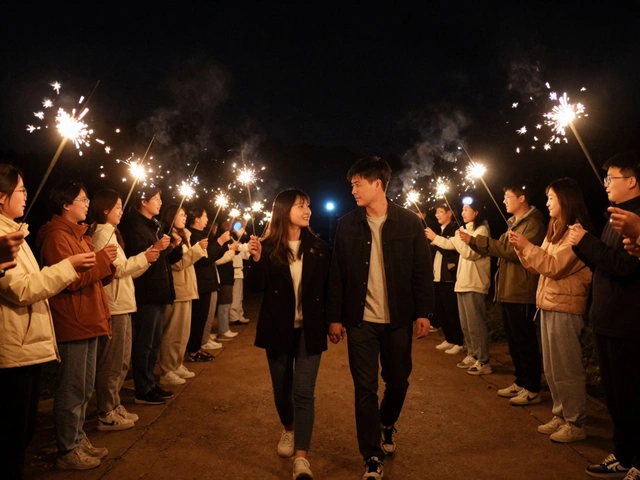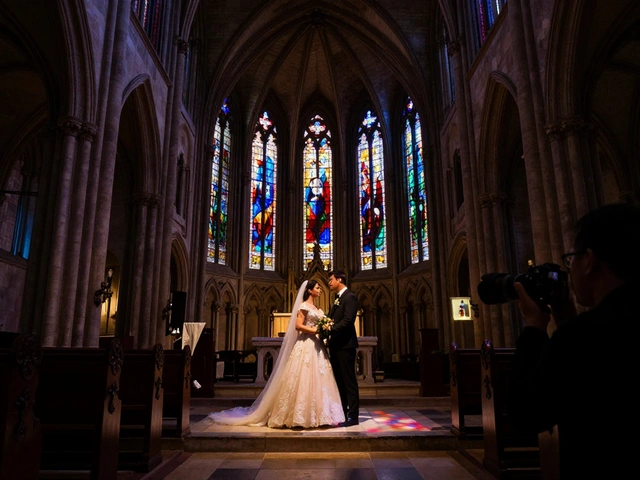
There’s something magical about a wedding exit lit by sparklers. The glow trails through the air like falling stars, couples laugh as they walk through a tunnel of light, and the whole moment feels timeless. But if you’ve ever tried to capture this, you know it’s not as simple as pointing and shooting. Sparkler wedding photos demand precision, planning, and a serious eye for safety. It’s not just about getting the shot-it’s about making sure no one gets hurt in the process.
Why Darkness Is Your Best Friend
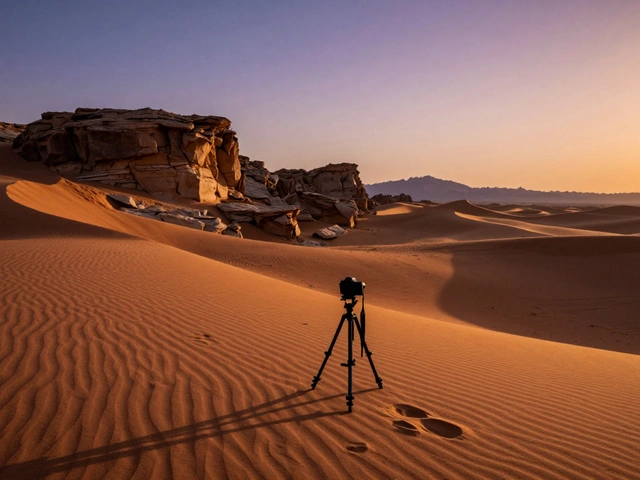
You can’t take great sparkler photos in daylight. Not even close. Sparklers burn bright, but they’re still tiny lights. If there’s even a sliver of ambient light-streetlamps, porch lights, a fading sunset-their glow gets swallowed. That’s why timing matters more than your camera settings.Most photographers agree: wait until it’s fully dark. Not just twilight. Not just after sunset. Pitch black. That’s when the sparklers pop. Rebecca Carpenter, a wedding photographer in Oregon, says she’s lost entire shoots because the couple insisted on doing the exit at 8:15 p.m. when the sky was still blue. By 8:45, when it was truly dark, the sparklers finally looked like fireworks. Plan for at least 10-20 minutes of darkness after sunset. Coordinate with the couple. Tell them: "If we do this at 8:30, we get magic. At 8:15, we get disappointment."
Camera Settings That Actually Work
Forget auto mode. Sparkler photography lives in manual. Here’s what works based on real-world results from photographers who’ve done this hundreds of times.- Aperture: f/2.0 to f/2.8. Wide enough to let in light, narrow enough to keep faces sharp. Too wide (f/1.4), and only one eye stays in focus. Too narrow (f/5.6), and you’ll need to crank ISO to the roof.
- Shutter Speed: 5 to 10 seconds for tunnel shots. For light-painting (writing "LOVE" in the air), 8 seconds is the sweet spot. For quick exit shots where the couple walks fast, 2-4 seconds works if you’re handheld.
- ISO: Start at 1600. You’ll likely need to go up to 3200 or even 6400. Noise is inevitable. That’s why post-processing noise reduction in Lightroom is non-negotiable.
- Focusing: Use a single autofocus point in the center. Don’t let the camera hunt for faces in the dark. Focus on the bride’s forehead, then switch to manual focus. Tape a piece of glow tape to the lens barrel so you remember where focus is set.
- White Balance: Auto white balance will turn skin tones blue. Always set it manually to 3200K-3500K. If you shoot in RAW, you can fix it later-but don’t rely on that.
Andy Saywell, a Portland-based photographer, uses a hybrid method: manual shutter and aperture, Auto ISO. He says it lets the camera adjust for changing light as guests light sparklers one by one. But he always checks the histogram after the first shot. If the left side is crushed, you’re underexposed. If the right side spikes, you’re blowing out the sparklers.
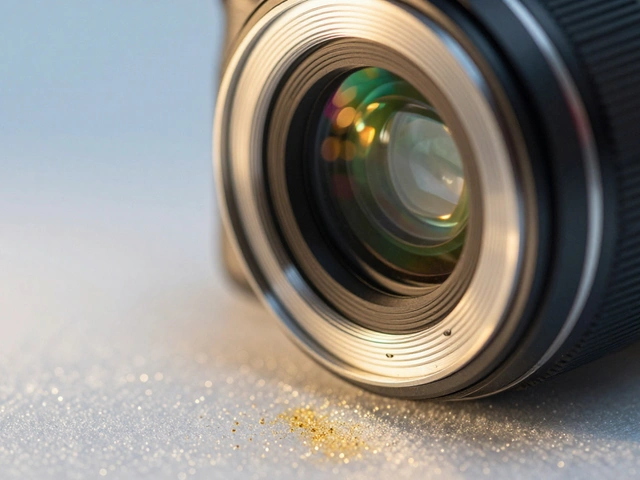
Which Lens to Use-and Why
Wide angles aren’t just trendy-they’re necessary. You need to fit the whole tunnel, the couple, and the guests in one frame. That’s why 20mm to 24mm is the gold standard.Why not 50mm? Because you’ll be too far back. Your couple will look tiny. The sparklers will look like distant fireflies. A 24mm lens lets you stand 10 feet away and still capture everything. Rachel Lahlum, who’s shot over 200 sparkler exits, says she never uses anything longer than 24mm. If you’re shooting tight portraits of just the couple holding sparklers, a 35mm can work-but only if you’re close. And you’ll need more light.
The Five Ways to Shoot Sparklers
There’s no one-size-fits-all. Different setups need different techniques.- Intimate Couple Portrait: Just the two of them, holding sparklers. Get close. Shoot at f/2.0. Have them smile, kiss, or hold sparklers near their faces. Capture hands, faces, and sparks. Take 5-10 shots. They’ll want to see all of them.
- Group Photo: Guests form a semi-circle around the couple. Each guest holds at least two sparklers. Use f/4.0, 8-second exposure. This is the hardest because you need faces to be visible. Too dark? Lighten with off-camera flash. Too bright? Dim the sparklers.
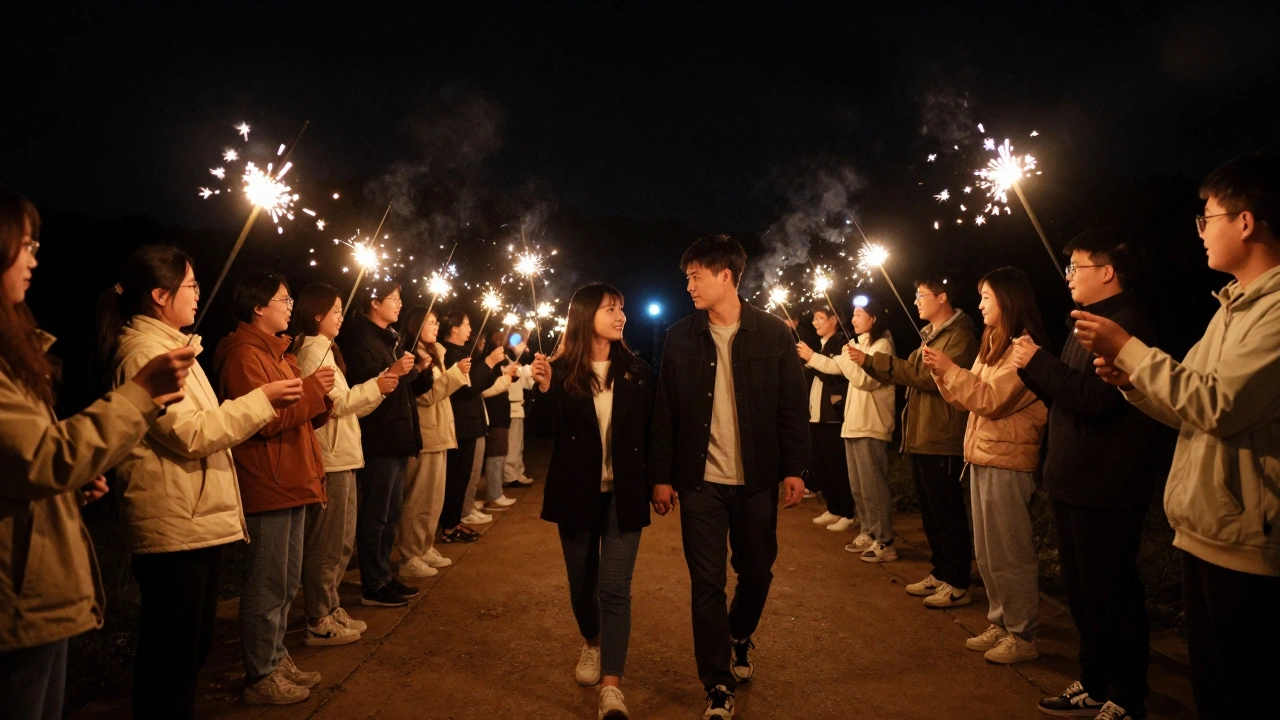
- Exit Tunnel: Guests line up in two rows facing each other. The couple walks through. Sparklers must be lit from the outside, pointing inward. This creates a glowing corridor. Use 20mm, 10-second exposure. Make sure there’s at least 4 feet between the lines so the couple doesn’t bump anyone.
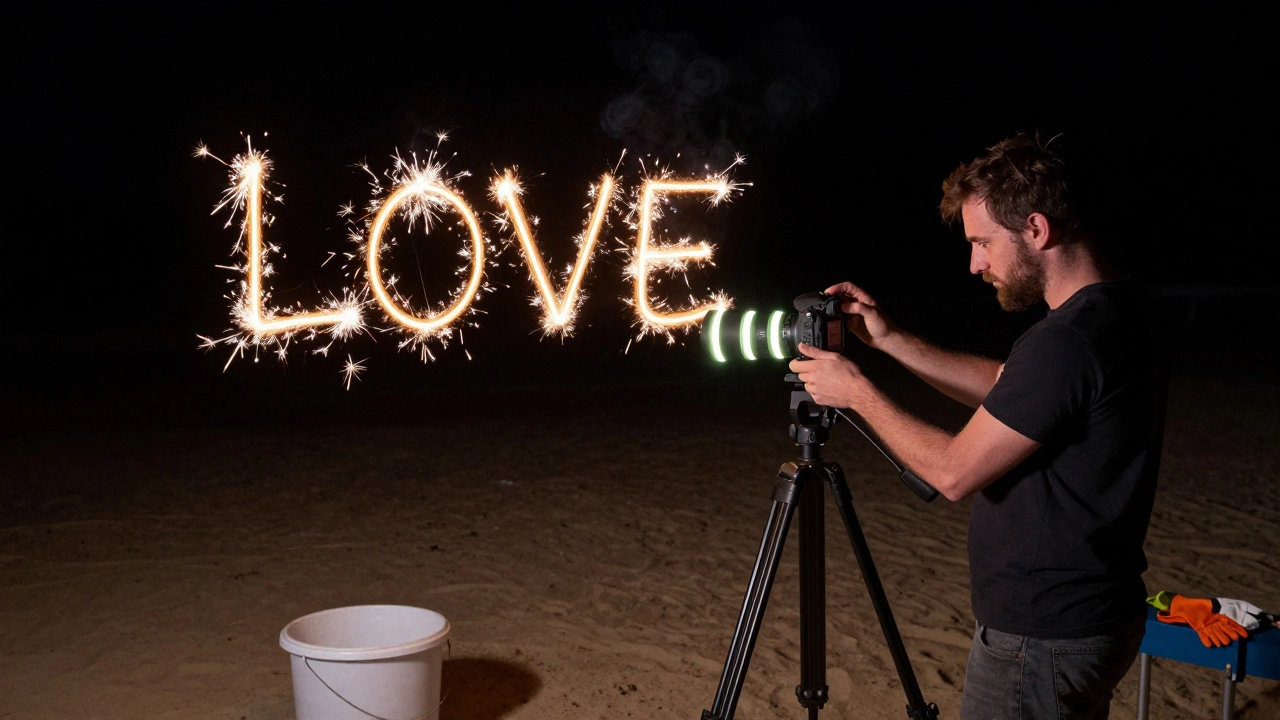
- Light-Painting: One person writes "LOVE" or "2026" with a sparkler. Use a tripod. 8-second exposure. Have the writer start at the edge and move slowly. Practice once before the wedding. If they rush, the letters get messy.
- Composite Shot: Take two photos: one with fast shutter (1/1000s) to freeze sparkler sparks, and one with long exposure (8s) to capture the scene. Layer them in Photoshop. This gives you crisp sparkles without blowing out skin tones. It’s extra work-but clients notice the difference.
Lighting Beyond Sparklers
Sparklers alone aren’t enough. You need to lift the couple’s faces out of the shadows.Here’s what works:
- Off-camera flash: Place one on a stand to the side, angled slightly down. This lifts shadows without washing out the sparklers.
- Bounce flash: If you’re indoors or under a canopy, bounce off a white wall or reflector. Soft light = more flattering skin tones.
- LED panel: Andy Saywell holds a small LED panel in his left hand, raised high. It adds a subtle glow to the couple’s face without overpowering the sparklers.
- Backlight: A flash behind the couple, aimed at their hair, adds separation from the background. It makes them look like they’re glowing from within.
Pro tip: Use a flashlight to focus before the shot. Point it at the couple’s face, lock focus, then turn it off. Don’t let guests see the flashlight-it ruins the mood.
Sparkler Selection: Size Matters
Not all sparklers are created equal. Short ones? Useless. You need length.Ask the couple to get 36-inch sparklers. Not 12-inch. Not 18-inch. 36-inch. That’s the minimum. Why? Because it takes 45 seconds for one to burn fully. A 12-inch sparkler burns out in 15 seconds. By then, the couple is halfway through the tunnel, and the light’s gone.
Get two per guest. One burns out. The second keeps the tunnel glowing. Katch Silva says he’s seen weddings where guests were handed one sparkler each-and half the tunnel went dark halfway through. The photo looked like a tunnel with dead ends.
And don’t use novelty sparklers. No hearts. No stars. No colors. Stick to gold. They’re brighter, longer-lasting, and look better in photos. Silver sparklers? Too dim. Colored ones? They cast weird tones on skin.
Safety: You Can’t Ignore This
This isn’t optional. Sparklers burn at 2,000°F. That’s hotter than lava. And at the end of a wedding, people are tired, tipsy, and distracted.Here’s what you must do:
- Assign a safety person: Not the photographer. Not the DJ. A friend or family member who’s sober. Their job: watch for sparklers near fabric, hair, or flammable decor. They also hand out water bottles and tell guests to hold sparklers down, away from others.
- No lighters: Have guests light sparklers off each other. It’s faster and safer. Lighters mean more flames, more dropped sparks, more panic.
- Keep a bucket of sand nearby: For extinguishing used sparklers. Don’t let guests throw them on the ground. Even if they’re out, they’re still hot enough to melt shoes.
- Warn guests: Say it loud: "Hold your sparkler low. Don’t wave it. Don’t point it at people. Don’t run." Repeat it three times.
- Protect yourself: Wear long sleeves. A jacket. Even gloves. You’ll get sparks on your arms. Courtney, a photographer in Texas, says she’s burned her forearm three times. "You will get burned," she says. "It’s just physics."
Some venues ban sparklers entirely. Always check. Fire codes vary by city. In Portland, outdoor events require a permit if sparklers are used. Don’t assume it’s fine. Ask the venue. Get it in writing.
Post-Processing: Where the Magic Happens
Your in-camera shots will be noisy, blue, and uneven. That’s normal.- Fix white balance: Use the eyedropper tool on a neutral gray area. If there isn’t one, set it manually to 3400K.
- Reduce noise: Lightroom’s Noise Reduction slider works wonders. Luminance at 40-50, Color at 25-30. Don’t overdo it or you’ll lose detail.
- Enhance sparklers: Use the Adjustment Brush to slightly boost clarity and texture on the sparkler trails. Don’t touch the faces.
- Composite shots: If you shot two images (fast + long exposure), layer them. Set the sparkler layer to "Screen" or "Lighten" blend mode. Mask out the background. Now you’ve got perfect sparkles without overexposed skin.
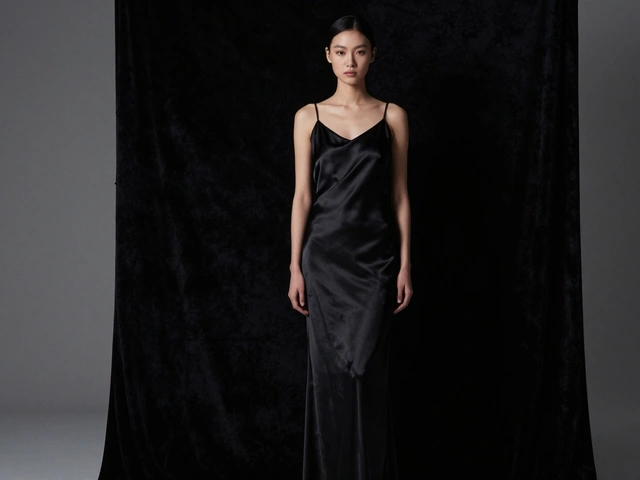
One photographer I know saves 30% of his time by shooting all sparkler photos against a black backdrop. He crops out the background in post and layers the sparkler glow onto the main image. It’s faster than fixing 50 photos with blue skin tones.
What Not to Do
- Don’t use a flash on the couple during the tunnel shot. It kills the glow. You’ll lose the magic.
- Don’t let guests light sparklers indoors. Even if it’s a barn or tent. One sparkler near dry hay = disaster.
- Don’t rush the couple. Tell them: "Go slow. Stop halfway. Kiss. Let the light catch you." The best shots happen when they pause.
- Don’t trust the couple to manage sparklers. They’re emotional. They’ll forget. You need a plan B.
Alternatives If Sparklers Are Too Risky
Some venues won’t allow sparklers. Some couples are nervous. That’s okay. Here are safer options that still look stunning:- LED light wands: Battery-powered, no heat, no burn risk. Glow in blue, white, or gold. They’re less sparkly, but they’re consistent.
- Propane torches (controlled): Only if you have a fire marshal on-site. They create long, dramatic flames. Not for beginners.
- String lights: Guests hold fairy lights or LED garlands. It’s softer, but it’s safe. Great for families with kids.
- Flameless candles: Battery-powered, real-looking flames. Perfect for indoor exits.
One couple in Seattle switched to LED wands after a sparkler nearly set their veil on fire. They got 47 photos. Every one was perfect. No burns. No panic. Just magic.
Can I use sparklers indoors at a wedding?
No. Sparklers should never be used indoors-even in barns or tents. They emit sparks that can ignite dry wood, fabric, or hay. Many venues ban them outright for fire safety reasons. If you want indoor sparkler-style photos, use LED light wands or flameless candles instead.
How many sparklers do I need per guest?
At least two per guest. One sparkler burns out in about 45 seconds. If you’re doing a tunnel or group shot, guests need a second one to keep the light going. Shorter sparklers (under 24 inches) burn too fast and leave dark gaps in the photo. Always choose 36-inch gold sparklers.
What’s the best camera setting for sparkler exit photos?
Use f/2.0 to f/2.8, ISO 1600-3200, and shutter speed of 5-10 seconds. Set white balance manually to 3400K. Focus on the couple’s face before the shot, then switch to manual focus. Use a tripod if you’re doing light-painting or group shots. For fast exits, handheld works if your shutter speed is 2-4 seconds.
Do I need a flash for sparkler photos?
Yes, but not always on the camera. Off-camera flash or bounce flash helps lift shadows on the couple’s faces without washing out the sparklers. A small LED panel held by the photographer can also add subtle fill light. Never use direct flash on the sparklers themselves-it kills the glow.
What should I do if a guest gets burned?
Have a first aid kit ready with burn gel and sterile gauze. Cool the burn under running water for 10-15 minutes. Don’t pop blisters. If the burn is larger than a coin or goes deeper than the skin, seek medical help. Always have a designated safety person on-site to prevent burns before they happen. Never assume it won’t happen-sparklers are hot enough to melt plastic.
Sparkler photos are unforgettable. But they’re also one of the riskiest moments of the night. The difference between a stunning photo and a disaster? Preparation. Know your settings. Know your sparklers. Know your safety plan. And never, ever skip the last step: talk to the couple before the wedding. Make sure they’re ready-not just for the photos, but for the responsibility.