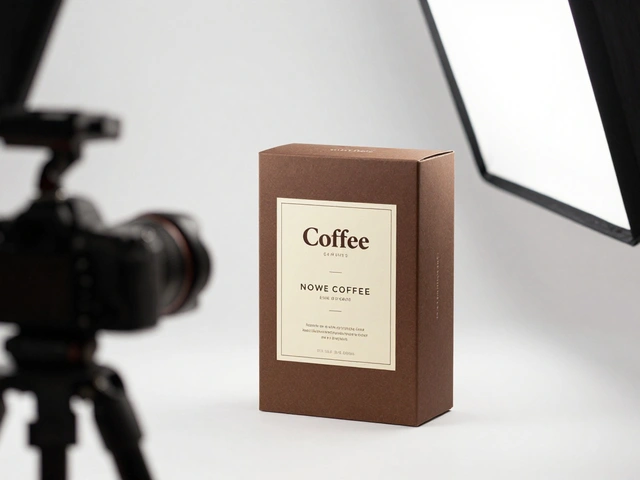
When you’re taking product photos, what you want most is for the customer to stop scrolling and look at your item. Not just glance - really look. That’s where depth of field comes in. It’s not just a technical term you read in manuals. It’s the difference between a photo that gets ignored and one that makes someone reach for their wallet.
What Depth of Field Actually Does
Depth of field is the zone in your photo that looks sharp. Everything in front of or behind that zone? Blurry. You control this with your camera settings, mostly the aperture - that’s the hole in your lens that lets light in. A wide aperture (like f/2.8) gives you a narrow depth of field. Only a small slice of the product stays sharp. The rest melts away. A small aperture (like f/11) gives you deep depth of field. Everything from the front of the product to the back wall stays crisp.Why does this matter? Because people don’t buy products. They buy the feeling the product gives them. A blurry background removes distractions. A sharp product becomes the center of attention. It’s not magic. It’s psychology.
Shallow Focus: When Less Is More
Shallow depth of field - that’s the look where only one part of the product is in focus. Think of a coffee mug. You focus on the rim where the lip touches the mouth. The handle? Soft. The logo? Clear. The background? A dreamy blur of color. That’s intentional.This technique works best for single items with a clear focal point: jewelry, watches, skincare bottles, or a single piece of clothing. It’s perfect for highlighting texture - the weave of a sweater, the gloss of a lip balm, the curve of a wine glass. The blur doesn’t hide detail. It directs your eye.
Here’s how you get it:
- Use a low f-number: f/1.8 to f/5.6
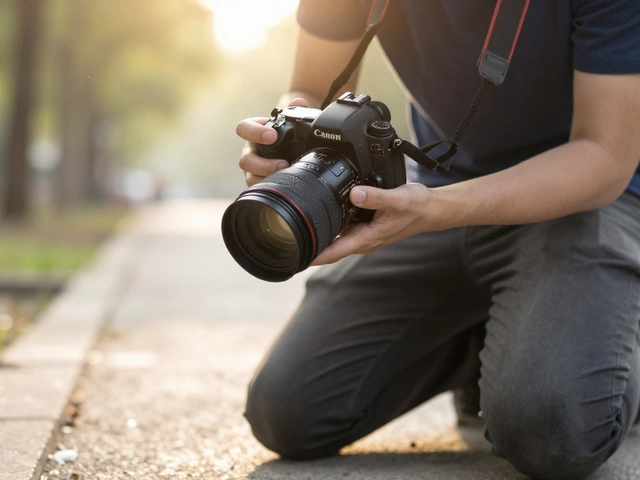
- Get close to your subject - the closer, the blurrier the background
- Use a longer lens - 50mm or longer helps compress the background
- Put space between your product and the backdrop - at least 3-5 feet
One mistake beginners make? Placing the product right against the backdrop. That kills the blur. You need distance. Even two extra feet makes a huge difference. If you’re shooting a shoe on a white table, slide it forward so the edge of the table isn’t visible. Let the background fall away.
Deep Focus: When You Need to Show Everything
Not every product wants to be a solo artist. Sometimes, you need to show how it works. A kitchen gadget with 12 parts. A backpack with 7 pockets. A smart thermostat with buttons, screens, and vents. In these cases, shallow focus hides what the customer needs to see.Deep depth of field - f/8 to f/16 - keeps all of it sharp. You can see the screw threads, the fabric stitching, the tiny logo on the side. This is critical for technical products, DIY kits, or anything that needs to prove its build quality.
How do you get it?
- Use f/11 or higher
- Stand further back
- Use a wider lens - 35mm or 24mm
- Keep your product and background close together
But here’s the catch: deep focus can feel flat. If everything’s sharp, nothing stands out. That’s why many pros use a hybrid approach. They shoot at f/8 - enough to keep the whole product in focus - but still use lighting and composition to guide the eye. A highlight on the dial. A shadow under the edge. That’s how you create hierarchy without blur.

Smartphone Secrets for Shallow Focus
You don’t need a DSLR. An iPhone 8 Plus or newer has Portrait Mode built in. Open the camera app. Tap Portrait. Now tap your product on the screen. A little sun icon appears. Drag it up to brighten, down to darken. That’s it.Portrait Mode uses software to fake depth. It’s not perfect. But for social media, Etsy, or Instagram, it’s more than enough. The trick? Don’t get too close. Move back until the phone says “Depth Detected.” Then, slowly move forward. There’s a sweet spot - usually 6 to 10 feet away - where the background blurs naturally and the product stays crisp.
Try the lighting modes too. Natural Light keeps it real. Studio Light adds even brightness. Contour Light? That’s for drama. Use it on a watch to cast a subtle shadow across the face. It adds dimension without needing extra gear.
Color, Composition, and Control
Shallow focus isn’t just about blur. It’s about control. If your brand uses purple as a signature color, don’t ignore it. Place a purple ribbon, a purple coaster, or even a purple shadow behind the product. Let the blur carry your brand’s tone.On the flip side, if your product is bright white, don’t put it against a white wall. You’ll lose contrast. Use a soft gray or muted blue. The blur will pick up that color and make the product pop.
One pro tip: shoot from slightly above. It’s natural. It shows the product’s top surface. And it keeps the background low in the frame - easier to blur.

Editing: The Final Touch
You can’t fix bad focus in editing. But you can enhance what’s already there. In Lightroom or Photoshop, bump up clarity by +5 to +10. That makes textures sharper without touching the blur. Add a tiny vignette - just -5 - to gently darken the edges. It pulls the eye inward.Don’t overdo it. A little sharpening goes a long way. Too much, and the blur looks fake. Too little, and the product looks dull. Test your images at 100% zoom. If the edge of the product looks jagged, dial back the sharpening.
When to Use Which
Here’s a simple guide:- Use shallow focus: Single items, luxury goods, food, cosmetics, fashion, jewelry. Anything with one standout feature.
- Use deep focus: Electronics, tools, multi-part products, instructions, packaging with text, flat lays with multiple items.
- Use a mix: If you’re showing a product in use - like a coffee maker next to a cup - focus on the cup. Let the machine be slightly soft. It tells a story.
There’s no one-size-fits-all. Test both. Take 10 shots of the same product: 5 with shallow focus, 5 with deep. Compare them side by side. Ask yourself: Which one makes me want to touch it? Which one makes me understand how it works?
Real-World Example
Last year, a small candle company in Portland switched from deep focus to shallow focus. Their candles were photographed on white backgrounds, everything sharp. Sales flatlined. Then they tried one shot: a single candle, focused on the flame, the wax blurred into soft gold. The background? A hint of burnt orange from a nearby cloth. Within two weeks, that image became their top-selling product photo. Why? Because it didn’t just show a candle. It showed the feeling of a quiet evening.That’s the power of depth of field. It’s not about sharpness. It’s about storytelling.