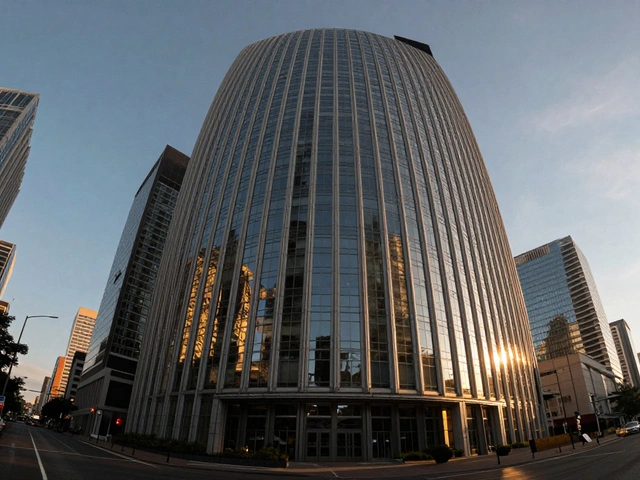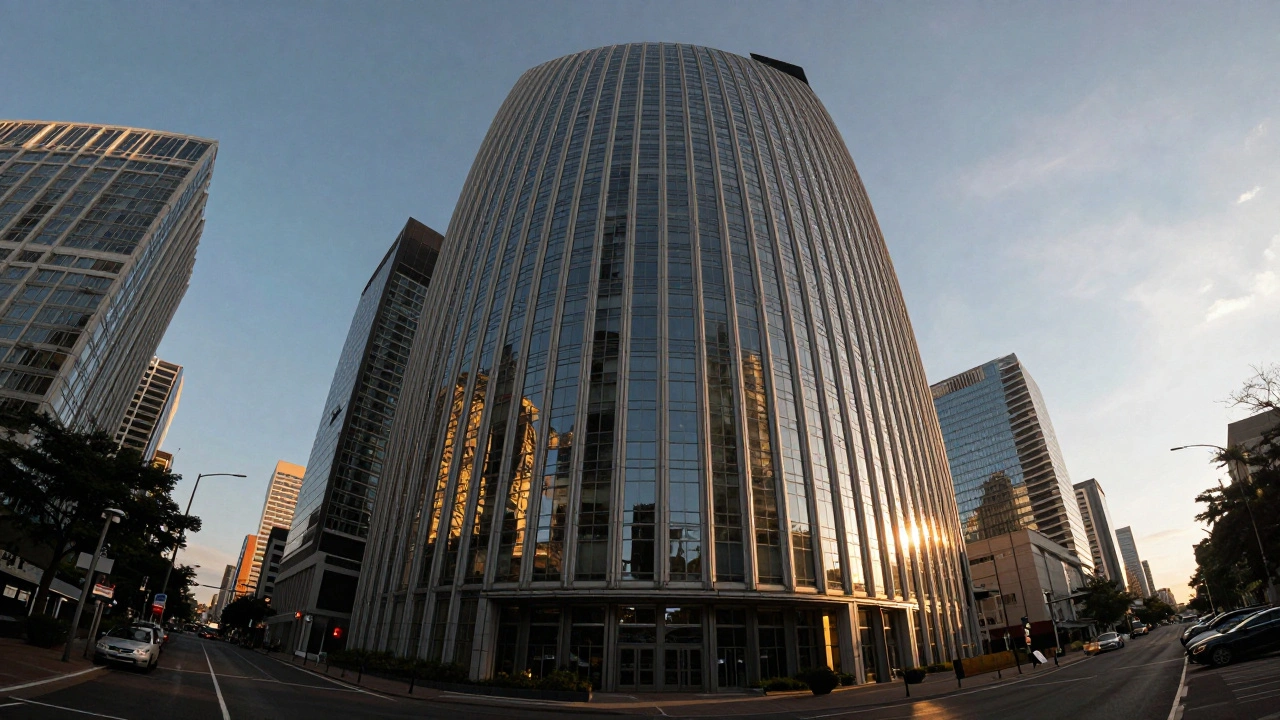
Ever taken a photo of a tall building, only to have it look like it’s leaning backward or melting at the edges? Or noticed weird purple and green lines around your subject’s hair in bright sunlight? These aren’t mistakes you made shooting-they’re lens corrections you’re missing. Almost every lens, even expensive ones, bends light in ways that create distortions. The good news? You can fix them in minutes with tools built into the editing software you probably already use.
What You’re Actually Fixing
Three problems show up again and again in photos because of how lenses are built:- Barrel distortion: Lines curve outward, making buildings look swollen in the middle. It’s worst with wide-angle lenses.
- Vignetting: The corners of your image get darker than the center. It’s subtle but makes photos feel unbalanced.
- Chromatic aberration: Purple or green fringes around high-contrast edges-think dark tree branches against a bright sky.
How Lightroom Does It Automatically
If you shoot in RAW, Lightroom is your best friend. Open any photo, go to the Develop module, and find the Lens Corrections panel. There’s a checkbox labeled Enable Profile Corrections. Turn it on. Lightroom reads your camera’s metadata-what model you used, what lens, even the aperture setting-and pulls up a pre-built correction profile. These profiles were made by testing thousands of real lenses. Adobe knows exactly how a Canon EF-S 10-18mm f/4 IS STM distorts light at 12mm and f/8. So it auto-adjusts. In 9 out of 10 cases, that’s all you need. No sliders. No guesswork. Just one click, and your building stops looking like a funhouse mirror. The corners even out. The fringes vanish. It’s like magic, but it’s just math.When Auto Isn’t Enough
Sometimes, automatic correction misses the mark. Maybe you’re using an old lens not in Adobe’s database. Or you shot with a third-party lens like a Sigma or Tamron. Or you want to tweak the look-maybe you like a little natural vignette but not too much. That’s where the Manual controls come in. Below the profile section, you’ll see three sliders:- Distortion: Slide left to fix barrel distortion (puffed-out look). Slide right if you’ve got pincushion distortion (squeezed-in look).
- Vertical Perspective: Tilt the whole image to straighten leaning buildings. Dragging this slider pushes the top or bottom of your frame up or down.
- Amount (for vignetting): Lighten or darken the corners. Most people slide it right to brighten dark edges.
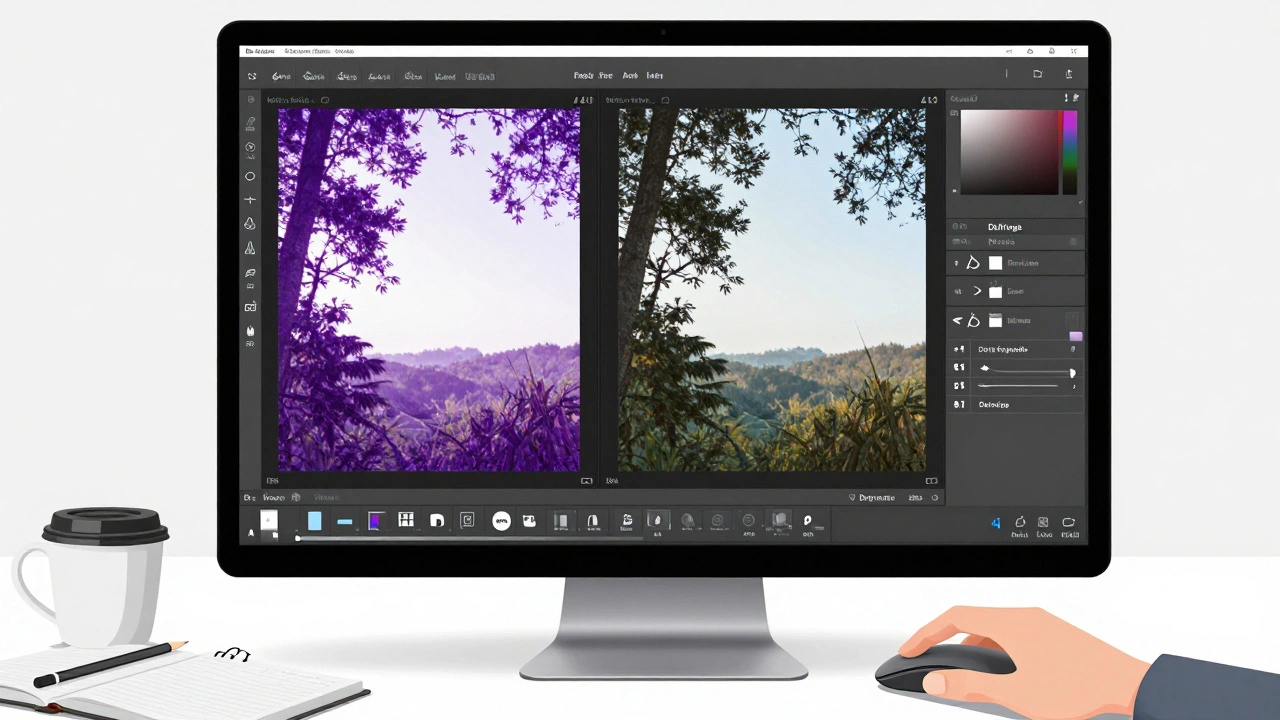
Fixing Color Fringes Like a Pro
Chromatic aberration is the sneakiest one. It doesn’t show up in the camera screen. You only notice it when you zoom in on your computer. That purple halo around your subject’s head? It’s distracting, even if it’s just a few pixels wide. In Lightroom’s Manual panel, find the Defringe section. Click the eyedropper and select either Purple Fringe or Green Fringe-or both. Then adjust the Amount slider until the color disappears. If it’s still there, tweak the Hue slider. Sometimes the fringe isn’t pure purple-it’s more lavender or magenta. The Hue slider lets you match it exactly. You can do this in Photoshop too. Go to Filter > Lens Correction. Under the Color tab, use the eyedropper and sliders the same way. But Lightroom’s tool is faster, non-destructive, and built for photographers-not designers.Why This Matters for Real Estate and Architecture
If you shoot homes, offices, or cityscapes, lens correction isn’t optional. It’s mandatory. A crooked doorway or a leaning wall makes a property look poorly designed-even if it’s perfectly straight in real life. Real estate photographers rely on this. A photo with uncorrected distortion looks amateurish. Buyers notice. Agents notice. The difference between a listing that sells in 10 days and one that sits for months? Often, it’s a corrected lens. Even if you’re not a pro, if you take photos of your apartment for Airbnb or your kid’s school building for a newsletter, fixing distortion makes your images look more professional. You don’t need a $3,000 lens. You just need to know how to use the sliders.What About Photoshop?
Photoshop has its own Lens Correction filter under Filter > Lens Correction. It works similarly: auto-profiles, manual sliders, perspective tools. But it’s more suited for single-image edits, not batch processing. Lightroom is better for editing 50 photos from a single shoot. Photoshop is better if you’re doing heavy retouching on one image-say, removing power lines or stitching panoramas. The tools overlap, but Lightroom’s workflow is smoother for photographers who shoot a lot. There’s also a manual trick in Photoshop: Edit > Transform > Warp. You can drag corners and edges to bend the image yourself. It’s powerful, but it’s slow. You’re essentially drawing the correction. Most people don’t need it. Stick to the Lens Correction filter unless you’re fixing a weirdly warped vintage photo.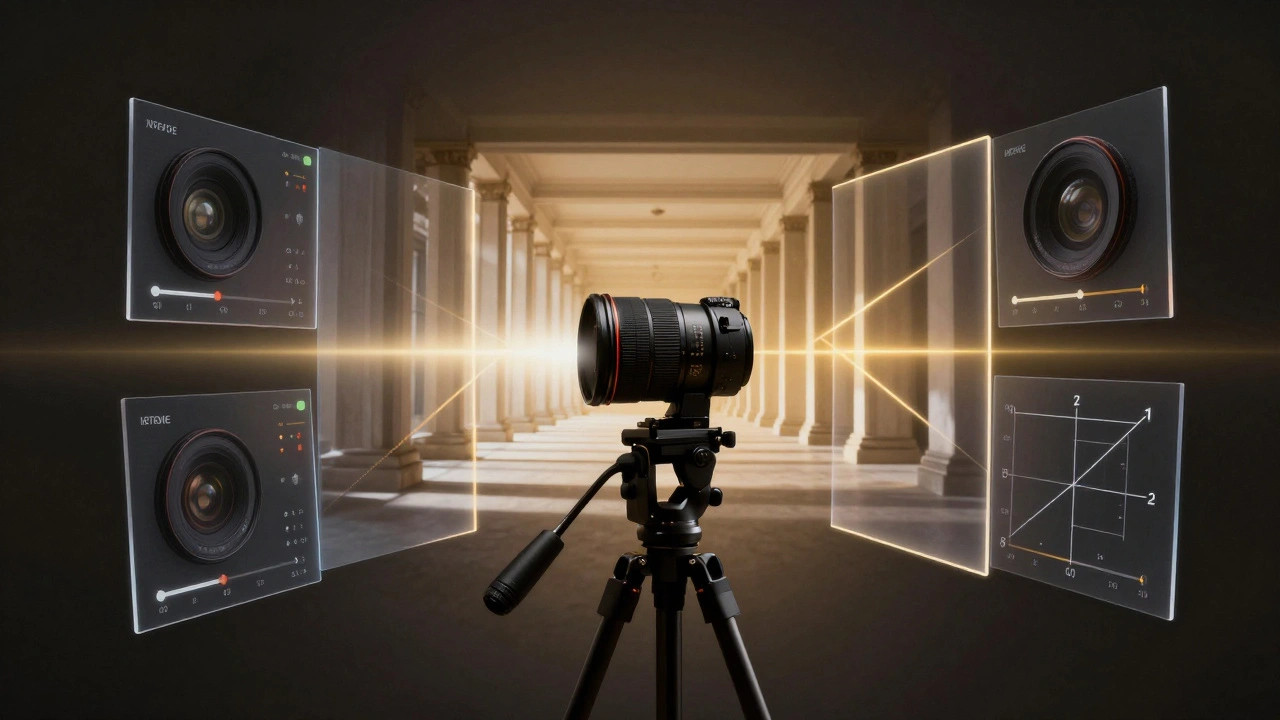
Mobile Editing? Yes, It’s There Too
You don’t need a laptop. Adobe Photoshop Express (the free mobile app) has lens correction built in. Open your photo, tap Adjustments, then Optics. You’ll see sliders for distortion and vignetting. It’s simplified, but it works. Perfect for quick fixes before posting to Instagram. Other apps like Affinity Photo and Corel’s RAW Lab do the same thing. The tech is everywhere now. Even Canon and Nikon cameras have in-camera lens correction you can turn on before you shoot. But if you shoot RAW, you’re better off fixing it later. Why? Because you can undo it. You can tweak it. You can compare before and after. That’s the power of post-processing.Pro Tips You Won’t Find in Tutorials
- Always check your corrections at 100% zoom. What looks fine at 50% zoom can still have ghost fringes.
- Don’t over-correct. A tiny bit of natural distortion can make wide-angle shots feel dynamic. Sometimes, 80% correction looks better than 100%.
- If you’re editing portraits, check for chromatic aberration around hair and jewelry. It’s common with f/1.8 or wider apertures.
- Save your presets. Once you find settings that work for your lens, save them as a preset in Lightroom. Apply it to all future photos from that lens.