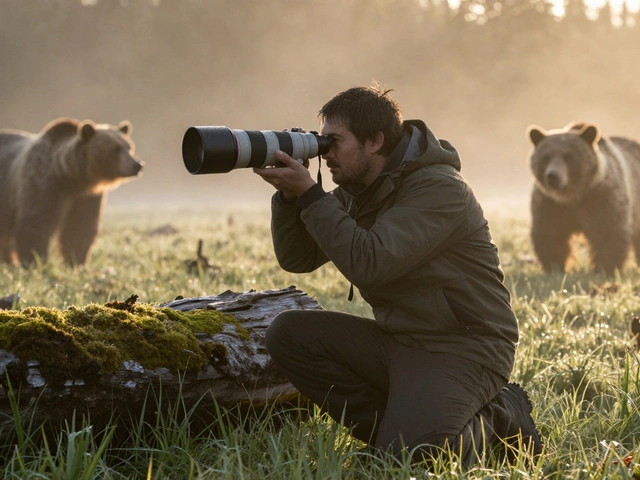
Ever watched a hawk dive through the sky and wondered why your photo came out blurry? It’s not your lens. It’s not your luck. It’s your shutter speed.
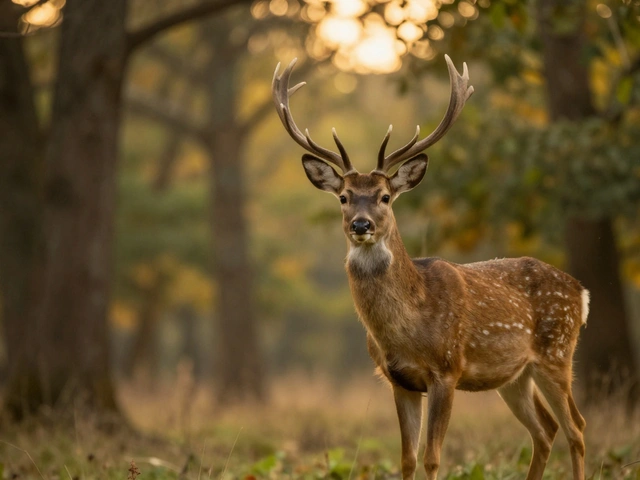
Wildlife photography isn’t about capturing what an animal looks like-it’s about capturing what it does. A deer leaping over a log. A hummingbird mid-flap. A fox sprinting through snow. These moments last a fraction of a second. If your shutter speed is too slow, you’re not photographing action-you’re photographing motion blur.
Why Shutter Speed Matters More Than Anything Else
In wildlife photography, sharpness isn’t optional. Fur, feathers, claws, wings-they all have texture. That’s what makes the image feel real. A blurry wolf might look like a smudge. A crisp one? You can count every strand of its winter coat.
Here’s the truth: most beginners think a 500mm lens is the magic tool. It’s not. The real magic is knowing when to shoot at 1/1000s versus 1/4000s. A 500mm lens on a tripod with 1/250s might work. But handholding that same lens? You’re asking for trouble.
That’s why the old rule-shutter speed equals focal length-is outdated. If you’re shooting a 600mm lens, 1/600s might be enough to stop camera shake. But it won’t stop a bird’s wing. You need more.
Shutter Speed Guide by Animal Type
Not all animals move the same way. You can’t use the same setting for a sleeping bear and a kingfisher diving into water. Here’s what works in real conditions:
- Large, slow-moving animals (moose, bison, bears resting): 1/200s to 1/400s. These animals aren’t sprinting. You can afford a little slower speed, especially if you’re shooting from a vehicle.
- Running animals (wolves, cheetahs, deer): 1/800s to 1/1250s. Their legs blur fast. At 1/500s, you’ll see motion in the limbs. At 1/1000s, every muscle is frozen.
- Birds in flight (eagles, herons, hawks): 1/1600s to 1/2000s. This is the baseline. Anything slower, and the wings look like smears.
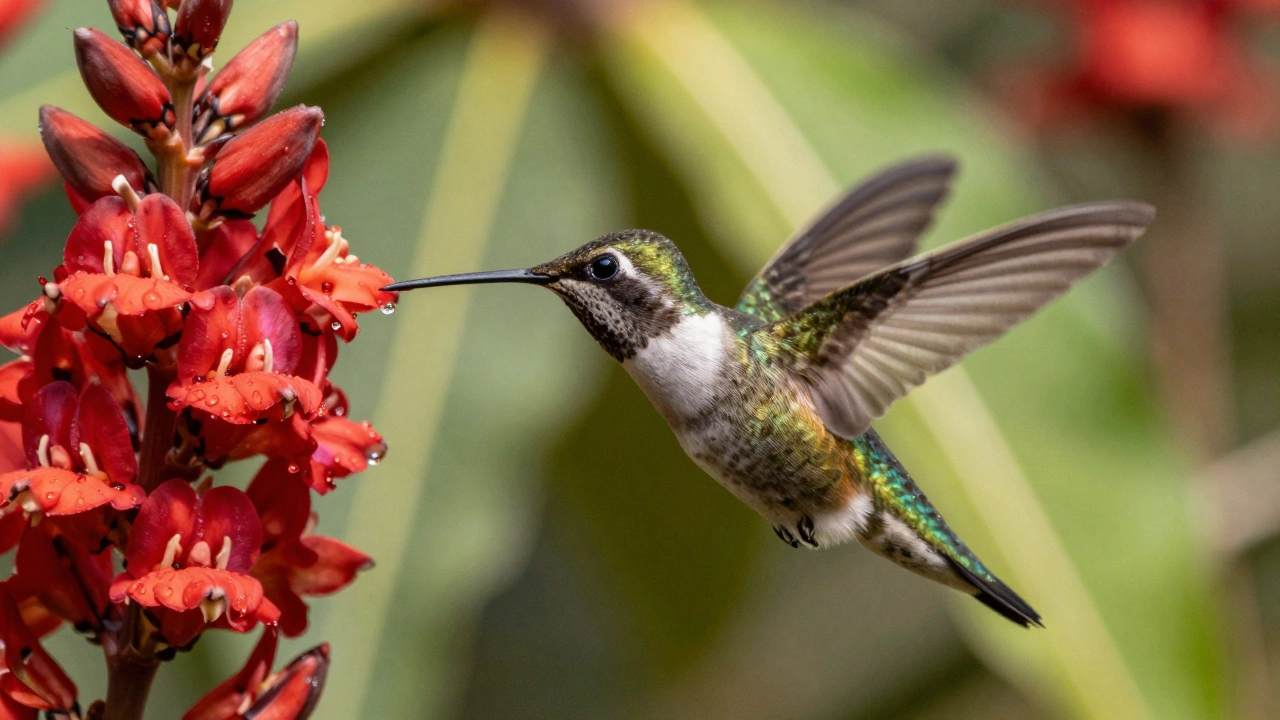
- Small, fast birds (kingfishers, hummingbirds, warblers): 1/3200s to 1/4000s. These birds flap 10-20 times per second. At 1/2000s, you might catch one wing mid-flap. At 1/4000s, both wings are sharp. And if they’re diving into water? You need 1/4000s to freeze the splash.
- Animals moving toward you (a lion charging, a deer running straight at the lens): Add 20-30% to your usual speed. Why? Because the camera’s autofocus struggles to keep up. The subject moves faster across your sensor than you think.
Why Your Camera’s Auto Mode Fails You
Many people switch to “Sports Mode” and think they’re done. But auto modes don’t know what you’re shooting. If your camera thinks you’re photographing a soccer game, it might pick 1/1000s. That’s fine for a runner. But for a hummingbird? You’ll miss it.
Aperture Priority (A or Av mode) is better. Set your aperture to f/5.6 or f/6.3 for good depth of field and light intake. Set your ISO to 800. Let the camera choose the shutter speed. Now it’s forced to pick something fast enough. But even then, it might drop to 1/800s for a bird. You need to override it.
The best approach? Manual mode with auto ISO. Set your shutter speed to 1/2500s. Set your ISO to auto, max at 6400. Let the camera handle brightness, but you control the freeze. This is how professionals do it.
Handholding vs. Tripod: The Hidden Factor
When you’re shooting from a car, boat, or hillside, your body isn’t still. Even a slight sway ruins sharpness. That’s why you need to bump up your shutter speed by at least one stop when moving.
Example: You’re photographing elk from a safari truck. Normally, you’d use 1/800s. But because the truck bounces? Use 1/1600s. Same with shooting from a kayak-water movement adds motion you can’t predict. Faster shutter = fewer ruined shots.
And don’t forget lens vibration reduction. It helps with camera shake, but it won’t stop an animal from moving. It’s a tool for steadiness, not motion freeze.
The Panning Trick: When You Want Motion, Not Freeze
Not every shot needs to be frozen. Sometimes, you want to show motion. That’s where panning comes in.
Panning means moving your camera with the subject. You keep the animal sharp, but the background blurs-giving a sense of speed. It’s cinematic. But it needs slow shutter speeds:
- Large mammals walking or trotting: 1/10s to 1/30s. You’ll need a steady hand or a monopod.
- Birds in flight: 1/30s to 1/60s. Too slow, and the bird blurs. Too fast, and you lose the motion effect.
Here’s the catch: you have to use a small aperture to balance exposure. If you’re at 1/60s and f/4, your image will be too bright. So you close down to f/16 or even f/22. That means you need more light. Shoot at dawn or dusk. Or raise your ISO to 1600. It’s a trade-off.
Panning isn’t easy. You’ll delete 20 shots before you get one good one. But when it works? It’s unforgettable.
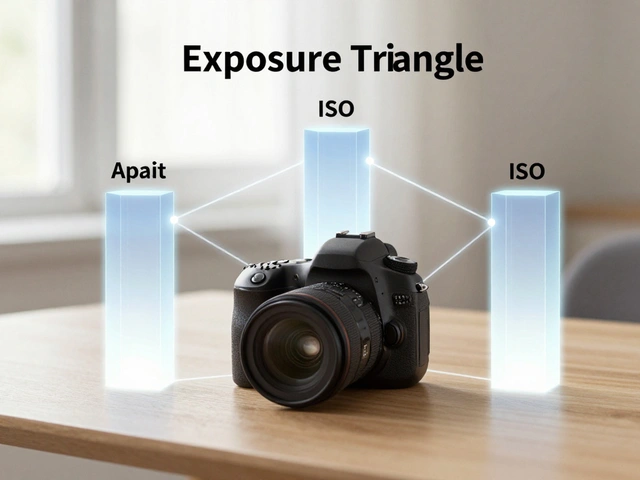
ISO, Aperture, and the Exposure Triangle
You can’t talk about shutter speed without talking about ISO and aperture. They’re a team.
Want 1/4000s? You need light. Wide aperture (f/2.8-f/5.6) helps. But if you’re shooting a bird in a bush, you need depth of field. So you go to f/8. Now you’re losing light. So you raise ISO to 1600 or 3200.
Modern cameras handle high ISO well. Noise at 3200 is acceptable. At 6400? Still usable if you’re shooting RAW. Don’t be afraid to push it. A noisy 1/4000s shot is better than a clean 1/500s blur.
Rule of thumb: ISO 400-800 for daylight. ISO 1600-3200 for dawn/dusk. ISO 6400+ for night or heavy shadows. Always shoot RAW. You’ll thank yourself later.
Lighting Conditions: When the Sun Fails You
Wildlife doesn’t wait for good light. A bear might walk out of the trees at 7:45 a.m., when the light is still soft. A hawk might take flight at 4:30 p.m., when shadows are long.
Low light doesn’t mean you give up. It means you adapt. If you’re stuck at 1/250s because of dim light, you’re risking blur. So:
- Use the widest aperture your lens allows.
- Boost ISO without fear.
- Wait for the animal to pause-even for a second.
- Shoot in bursts. One frame might be sharp.
Some photographers avoid shooting in low light. That’s fine. But if you want to capture dawn or dusk behavior, you need to embrace the challenge.
What Happens When You Get It Wrong
I’ve lost hundreds of shots because I was too slow.
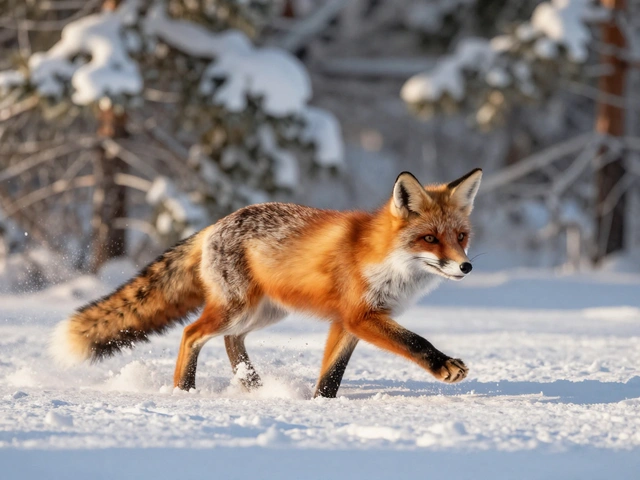
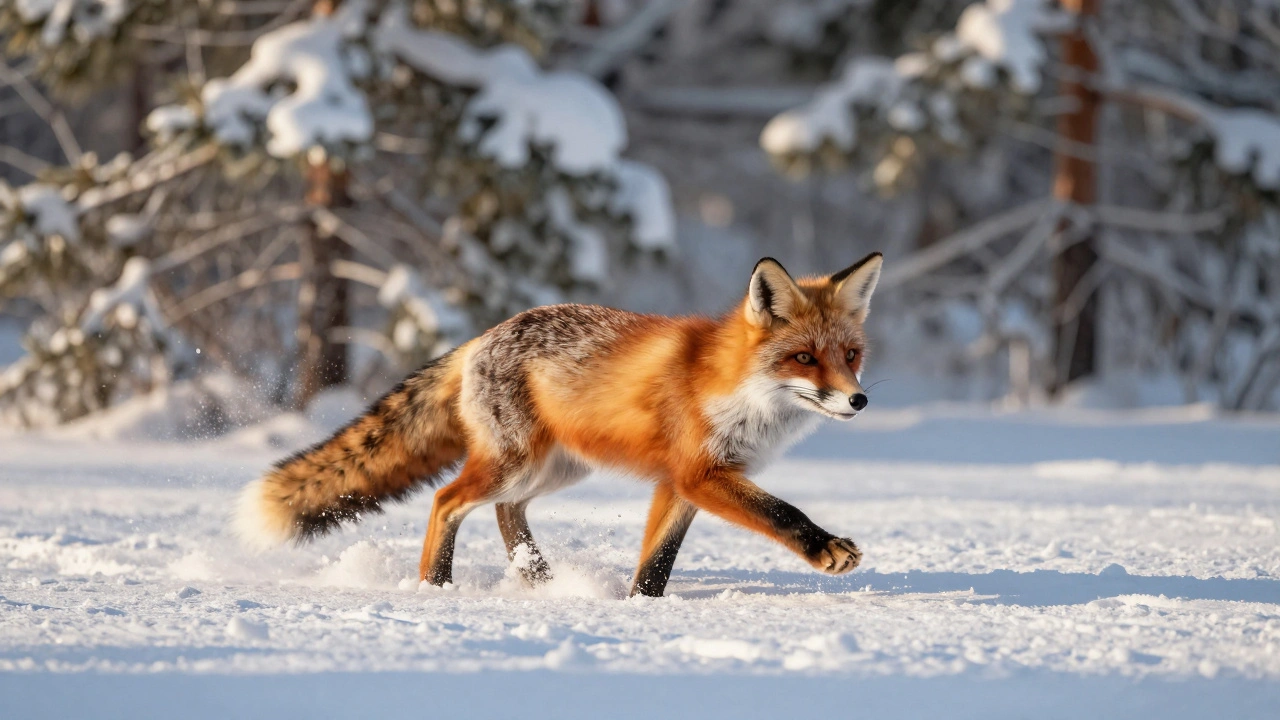
Once, I was photographing a red fox in snow. I set my shutter to 1/800s. It ran. I got 12 shots. Every one had a blur in the tail. I thought, “It’s fast, but not that fast.” Then I checked the footage-its tail was flicking at 15 times per second. I needed 1/2000s. I missed the moment.
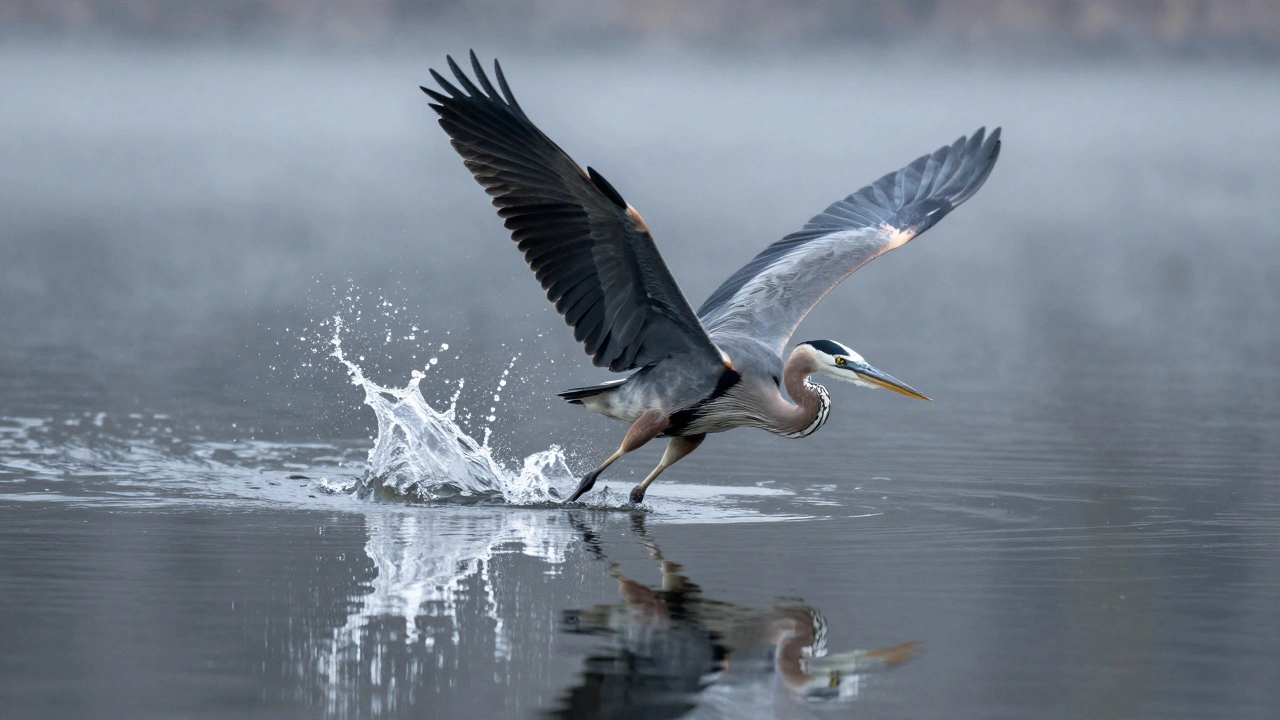
Another time, I shot a great blue heron at 1/1000s. The wing looked fine. But when I zoomed in? The feathers at the tip were smeared. I didn’t realize the bird was banking hard. I needed 1/2500s.
These aren’t rare mistakes. They’re universal. The best photographers make them too. They just learn faster.
Pro Tip: Add 20% to Your Minimum Speed
Here’s something no one tells you: always add a safety margin.
If you think 1/1600s is enough for a hawk? Use 1/2000s. If you think 1/1000s is fine for a running wolf? Go to 1/1250s. That 20% buffer catches the sudden leap, the quick turn, the gust of wind that pushes the bird sideways.
It’s not about being perfect. It’s about being ready.
Final Thought: Speed Is a Skill, Not a Setting
There’s no one-size-fits-all shutter speed in wildlife photography. It changes with the animal, the light, the lens, and your own movement. You learn it by doing. By failing. By watching your images and asking: Why is this blurry?
The fastest shutter speed won’t save you if you’re not in the right place. But the right shutter speed, used at the right moment, turns a snapshot into a story.
What’s the fastest shutter speed I should use for birds in flight?
For most birds in flight, start at 1/1600s to 1/2000s. For small, fast birds like kingfishers, hummingbirds, or swallows, use 1/3200s or 1/4000s. These speeds freeze wing motion and capture sharp details in feathers. If the bird is diving into water, 1/4000s is the minimum to freeze the splash.
Can I use 1/500s for wildlife photography?
Only for slow-moving or stationary animals. A resting bear, a grazing elk, or a perched owl can work at 1/500s. But if the animal is walking, running, or flying, 1/500s will blur the motion. For anything with movement, aim for 1/800s or faster.
Should I use aperture priority or manual mode?
Aperture Priority (Av/A mode) works well for beginners because it lets you control depth of field while the camera picks shutter speed. But for full control, use Manual mode with Auto ISO. Set your shutter speed to what you need (like 1/2500s), set your ISO to auto (max at 6400), and let the camera adjust brightness. This gives you the most reliable results in changing light.
How do I stop camera shake when using a long lens?
Use a shutter speed at least double your focal length. For a 500mm lens, aim for 1/1000s or faster. Use image stabilization if your lens has it. Hold the camera steady with both hands, tuck your elbows in, and breathe out just before pressing the shutter. If possible, use a monopod for long sessions. But remember: stabilization helps with camera shake-it won’t freeze animal movement.
Is ISO 6400 too high for wildlife photos?
Not at all. Modern cameras handle ISO 6400 very well, especially when shooting in RAW. A sharp image at ISO 6400 is better than a blurry one at ISO 400. Don’t avoid high ISO to protect noise-you avoid it to protect motion. Noise can be reduced in editing. Motion blur cannot.
What’s the best way to practice freezing motion?
Start with backyard birds. Use your longest lens and shoot at 1/2000s or faster. Practice tracking them. Review your shots at 100% zoom. See where the blur is. Adjust your speed. Repeat. You’ll learn faster than by shooting in the wild. Once you can consistently freeze a sparrow, you’ll be ready for anything.