When you look at a landscape photo that pulls you in, it’s rarely because of the sky alone or the ground alone. It’s because of how those two parts connect-and what’s happening between them. The horizon isn’t just a line where the earth meets the sky. It’s the backbone of your composition. And the foreground isn’t just what’s in front of you. It’s the doorway that pulls viewers into the scene. Get these two right, and your photos stop looking like snapshots and start feeling like stories.
Why the Horizon Line Matters More Than You Think
The horizon line is the first thing your eye notices in a landscape photo. It divides the frame into two halves: what’s above, and what’s below. That’s it. But that simple division controls everything-your sense of space, your feeling of calm or drama, even how long you look at the image. Most beginners place the horizon right in the middle. It feels safe. It’s easy. But here’s the problem: a centered horizon makes the photo feel split in two. It doesn’t invite exploration. It just stops. Your eye lands on the line, sees equal sky and land, and walks away. That’s why so many landscape photos feel flat. The fix? Move it. Don’t center it. Place it on one of the horizontal thirds-either the top third or the bottom third. This isn’t just a rule. It’s a way of giving weight to what matters most in your scene.High Horizon: Let the Ground Tell the Story
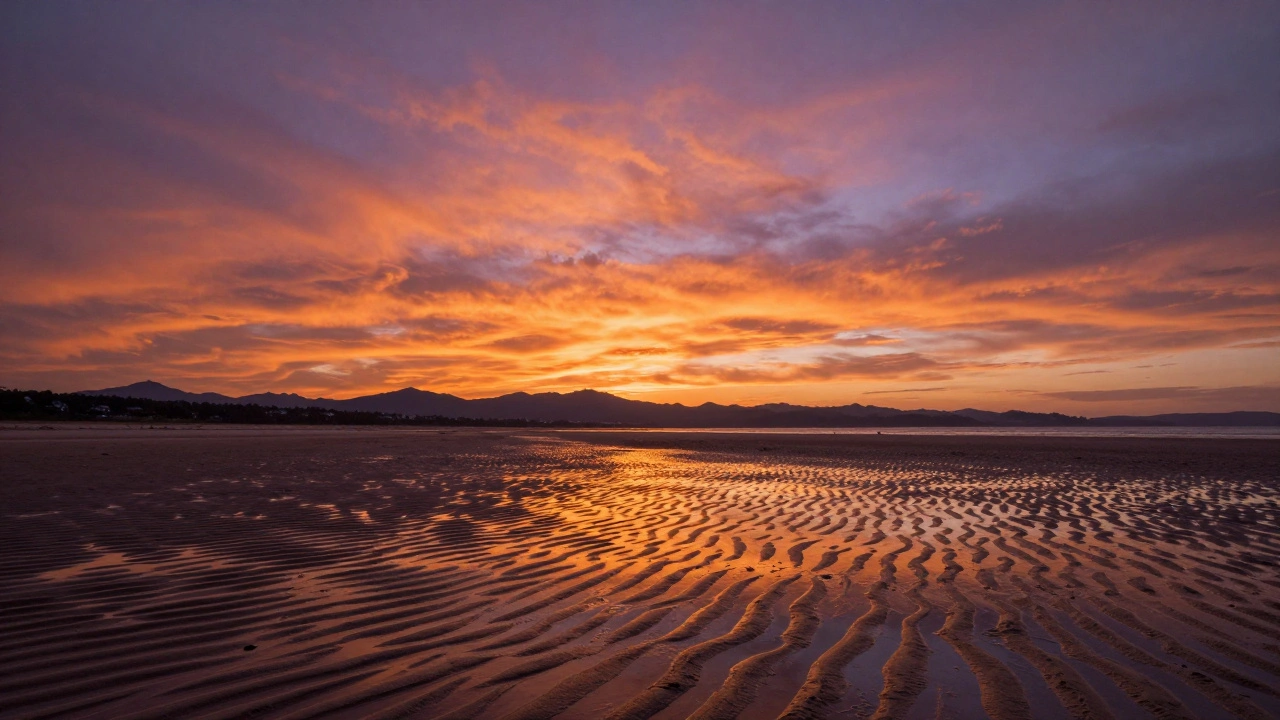
When you place the horizon in the upper third, you’re telling the camera: “The ground is where the magic is.” This works best when you’ve got texture underfoot-ripples in wet sand, cracked mud, a field of tall grass, or a winding trail cutting through dirt. Suddenly, that foreground isn’t just space. It’s a path. A rhythm. A story. Art Wolfe, one of the most respected landscape photographers alive, says this clearly: “With a horizon placed high in the frame, the foreground becomes more important and requires either a texture or an interesting detail.” That’s the key. You can’t just have empty grass. You need patterns. You need lines. You need something that leads the eye deeper. Think of a beach at low tide. The water has just pulled back, leaving behind a series of wet ridges that curve like waves frozen in time. If you place the horizon high, those ridges fill two-thirds of your frame. They draw your eye from the front, across the sand, toward the distant ocean. That’s spatial recession-the illusion of depth created by leading lines. It’s what turns a flat photo into a journey. But here’s a warning: if you tilt your camera to get that high horizon, watch out for distortion. Trees near the edges of the frame will lean inward or outward. Buildings will look like they’re falling over. You can fix this in editing, but it’s easier to keep your camera level and step back or adjust your angle instead.Low Horizon: Let the Sky Speak
Now flip it. Place the horizon in the lower third, and suddenly, the sky becomes the star. This is where you shine when the clouds are thick, the sunset is blazing, or the stars are just starting to peek through. Sunbounce Pro says it best: “Low horizon placement is great if your goal is to emphasize a sky, especially a dramatic sky.” A storm rolling in? A golden hour glow painting the clouds in pink and orange? A thin crescent moon hanging over the mountains? You need space for that. But don’t do this with a plain blue sky. Seriously. If the sky is empty, you’re wasting over half your frame. Picfair Focus calls it out: “Dedicating over half of the frame to an empty blue sky will not hold interest for long.” That’s not art. That’s a missed opportunity. The magic happens when the sky and the land talk to each other. A low horizon lets you show how the light hits the water below, how shadows stretch across rocks, how a lone tree silhouettes against a fiery cloud. It’s not about the sky alone. It’s about the relationship.
Centered Horizon: The Exception That Works
You’ve heard the rule: don’t center the horizon. But here’s the twist-it works when you’re shooting reflections. Think of a still lake at dawn. The mountains are mirrored perfectly. The clouds are doubled. The whole scene becomes a symmetrical painting. That’s when a centered horizon isn’t a mistake. It’s the point of the photo. Digital Photography School says: “A centered horizon works very well when dealing with reflections as, by default, the composition is easily balanced.” But here’s the catch: if you’re going to do this, do it right. Don’t place it 5% above center. Place it dead center. If it’s off, it looks like you messed up. And if the reflection isn’t clear? Skip it. A broken reflection is worse than no reflection at all. Also, make sure something breaks the line. A single tree, a rock, a bird in flight. Without that, the image feels too static. Too perfect. Real landscapes have imbalance. Your photo should, too.Foreground Interest: The Secret Ingredient
You can have the perfect horizon placement, but if your foreground is boring, your photo still falls flat. That’s why so many landscape photos look like postcards. They have great skies, but nothing in front of them to pull you in. Foreground interest isn’t about putting a rock or a flower in the corner. It’s about creating a visual path. A path your eye wants to follow. Look for:- Leading lines-rivers, paths, rows of rocks, the edge of a sand dune
- Texture-gravel, moss, cracked earth, wet sand
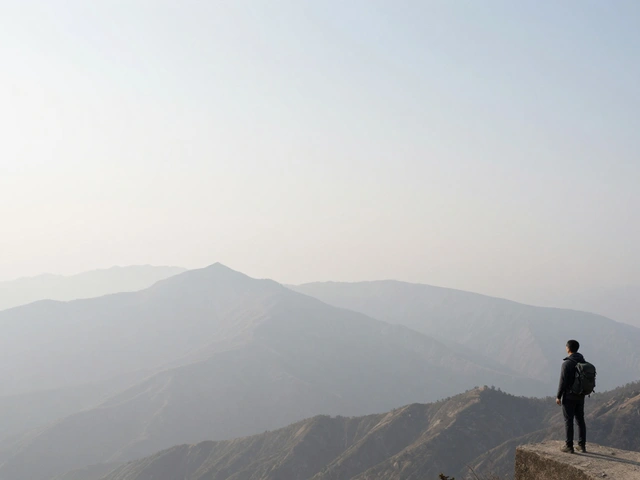
- Scale-something small, like a person or a single tree, that shows how vast the scene is
- Contrast-dark shapes against light, or bright colors against muted tones
Keep the Horizon Straight-Always
No matter where you place the horizon, it must be level. Always. Art Wolfe says it plainly: “The horizon line has the character of strength and stability; it dominates the composition and demands to be straight.” Our brains expect it to be level. Even if you’re shooting on a hill, even if the land slopes, the horizon should still be flat. A tilted horizon feels wrong. It’s not artistic. It’s sloppy. And it’s distracting. Viewers don’t think, “Oh, this is creative.” They think, “Did they forget to level the camera?” Use your camera’s grid lines. Or better yet, use a hot shoe level. If you shoot in RAW, you can correct it later-but why rely on editing? Get it right in camera. It’s one of the easiest ways to look professional.
Vertical vs. Horizontal: Frame Shape Changes Everything
Most people shoot landscapes in horizontal. It feels natural. But vertical framing opens up new possibilities. When you rotate your camera, the horizon doesn’t change. But how people see it does. In a vertical frame, your eye naturally moves up and down. That means a low horizon feels even more expansive. The sky stretches upward. A high horizon makes the foreground feel deeper, almost tunnel-like. Art Wolfe says tall trees often demand vertical shots. And he’s right. A single pine against a stormy sky-shoot it vertical. Let the tree reach the top. Let the clouds swirl above. That’s power. Don’t just shoot horizontal because it’s default. Ask yourself: does this scene feel taller than it is wide? If yes, go vertical.How to Decide: Scene First, Rules Second
The best photographers don’t follow rules. They understand them. Picfair Focus gives the clearest advice: “The best way to decide which to go with comes down to the scene.” Ask yourself:- Is the sky stunning? → Go low.
- Is the ground full of texture? → Go high.
- Is there a perfect reflection? → Go center.
- Is the sky dull? → Don’t go low. Find a better foreground.
- Is the foreground empty? → Don’t go high. Wait for better light.
Final Thought: Break the Rules-But Only After You Know Them
Rules exist to teach you how to see. Once you’ve practiced placing the horizon on the thirds, you’ll start noticing when the center works. When the tilt adds drama. When a cluttered foreground actually adds energy. But you don’t get there by ignoring the basics. You get there by mastering them. The next time you’re out shooting, don’t just press the shutter. Pause. Look. Ask: What’s the most powerful part of this scene? Then give it space. Let it breathe. Let the horizon serve it-not the other way around.Why is the horizon line so important in landscape photography?
The horizon line is the main divider in a landscape photo-it separates the sky from the land or water. Where you place it determines what part of the scene feels dominant. A centered horizon splits the image evenly and often feels dull. Off-center placement (on the top or bottom third) creates visual tension, guides the viewer’s eye, and adds depth. It’s not just about balance-it’s about directing attention.
When should I place the horizon on the top third?
Place the horizon on the top third when the foreground has strong visual elements-like textured sand, flowing water, patterns in grass, or leading lines such as trails or furrows. This gives more space to the ground, making it the focus. It’s ideal for beach scenes, deserts, fields, or any area where the land tells a richer story than the sky.
Is it okay to put the horizon in the center?
Yes-but only when you’re capturing reflections, like a still lake mirroring mountains or clouds. A centered horizon creates perfect symmetry, which can be very powerful. But avoid it otherwise. If the sky and land are equally plain, a centered horizon just makes the image feel flat. And if you do center it, make sure it’s exactly in the middle-not slightly off.
How do I make the foreground more interesting?
Look for texture, pattern, scale, and leading lines. Wet sand with ripples, a winding path, a cluster of rocks, or even a single person standing far away can anchor your foreground. Avoid empty space. The foreground should invite the viewer into the photo, not just sit there. Use a wide-angle lens to get close and exaggerate depth.
Should I always use the Rule of Thirds?
Use it as a starting point, not a rule. The Rule of Thirds helps beginners avoid boring, centered compositions. But once you understand why it works, you can break it intentionally. A centered horizon works for reflections. A tilted horizon can add drama in mountain scenes. The goal isn’t to follow rules-it’s to make strong, intentional choices.
What if my horizon is crooked in the photo?
A crooked horizon feels wrong to viewers-even if they can’t explain why. Always level your camera when shooting. Use your grid lines or a small bubble level on your hot shoe. If you miss it, you can correct it in editing, but it’s better to get it right in camera. A tilted horizon looks amateurish, not artistic.
Next time you’re out shooting, don’t just point and shoot. Pause. Look at the horizon. Ask: What’s the most powerful part of this scene? Then give it room. Let the foreground lead. Let the sky breathe. Let the line between earth and sky do its job-not just as a divider, but as a storyteller.