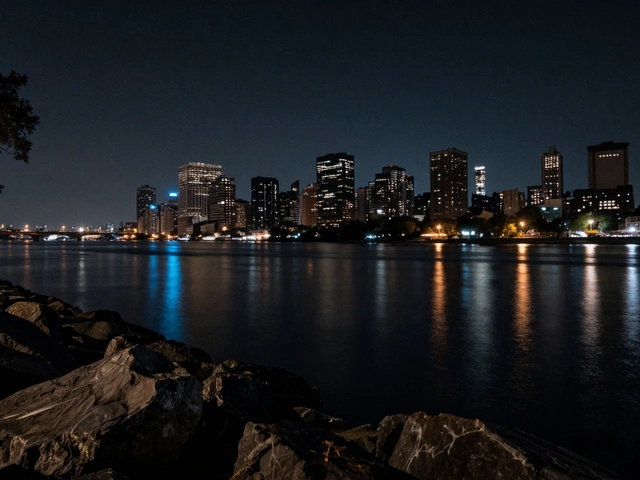
When you shoot night photos, you don’t just capture stars and city lights-you capture noise. That grainy, speckled mess in the shadows? It’s not a flaw in your lens or a bad setting. It’s physics. Low light means your camera sensor has to work harder, and when it does, it generates heat. That heat turns into color splotches and grainy texture you can’t ignore. The good news? You don’t need to delete the shot. You just need to stop treating noise like a problem to be erased and start treating it like a detail to be managed.
Why Your Night Photos Are Noisy (And Why ISO Isn’t the Culprit)
Most people think high ISO causes noise. That’s true in daylight. But at night? It’s the opposite. If you shoot at ISO 100 with a 30-second exposure, your sensor sits there heating up, picking up thermal noise like a radiator in summer. The longer the exposure, the worse it gets. That’s why shooting at ISO 1600 or 3200 with a 5-second exposure often looks cleaner than ISO 400 with a 20-second exposure. You’re trading sensor sensitivity for time-and time is what cooks the noise.
Two types of noise show up in night shots: luminance noise (grainy gray speckles) and chrominance noise (random red, green, or blue dots). Luminance noise is harder to fix without losing detail. Chrominance noise? Easy to tame. Most of the time, the color noise is what makes your image look broken. And the biggest mistake photographers make? Underexposing in-camera and then brightening everything in Lightroom. That doesn’t fix the noise. It multiplies it.
Shoot Right from the Start
Post-processing can’t fix bad capture. It can only clean up what’s already there. So before you open Lightroom, get this right:
- Shoot in Raw. JPEGs throw away data you’ll need later. Raw files keep every pixel, even the noisy ones.
- Use a fast lens. f/2.8 or wider. The more light you let in, the less your sensor has to guess.
- Start at ISO 400-640. Don’t be afraid to go higher. Modern sensors handle 3200-6400 better than you think. Your goal isn’t to keep ISO low-it’s to keep exposure time short.
- Avoid Long Exposure Noise Reduction. It doubles your wait time and adds almost nothing for exposures under 3 minutes. Skip it unless you’re doing 10-minute star trails.
One photographer in Portland shoots the Columbia River Gorge at night. He uses a Canon R5 with a 14mm f/2.8 lens. His go-to settings? ISO 3200, f/2.8, 6 seconds. He doesn’t get noise-free images. He gets images with noise he can control.
The Blacks Slider Trick (Lightroom’s Best-Kept Secret)
You’ve probably played with the Noise Reduction sliders in Lightroom. They soften detail. They blur stars. They make your foreground look like it’s covered in static. Here’s what most people don’t know: the Blacks slider is your real weapon.
Instead of pushing the Luminance slider to 50 and losing texture, try this:
- Go to the Develop module.
- Find the Tone panel.
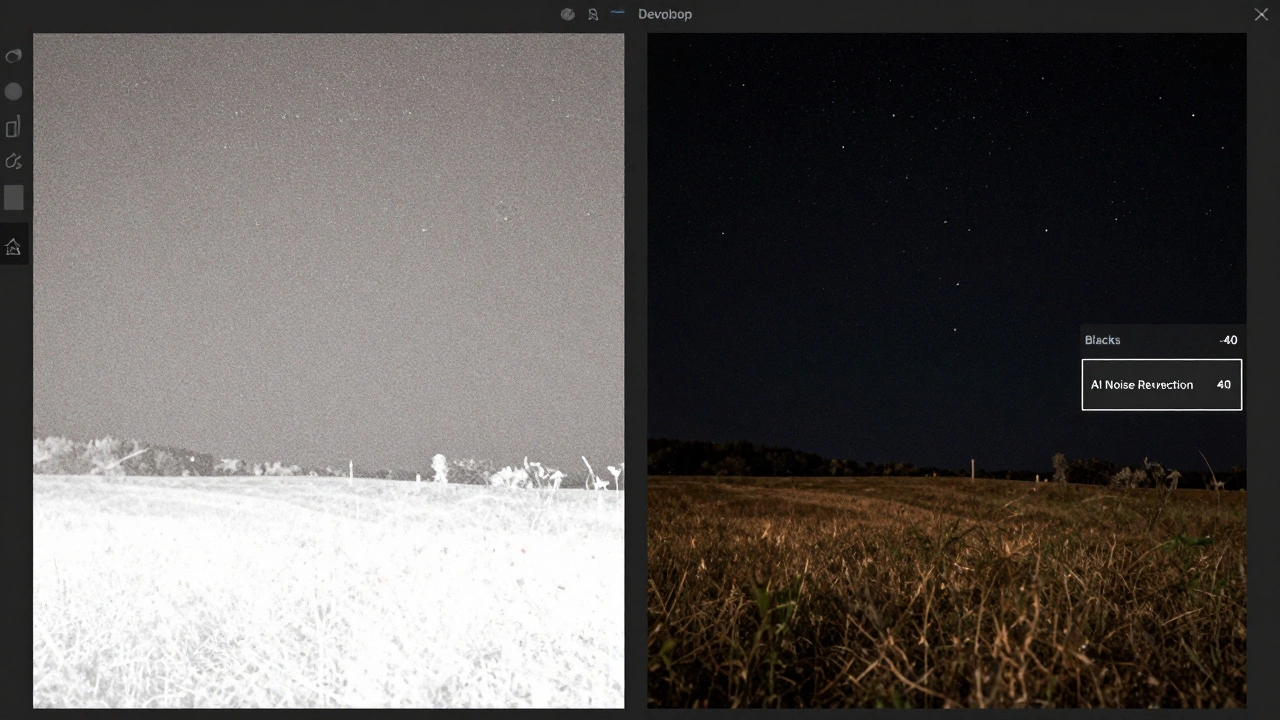
- Drag the Blacks slider down to -30 or -40.
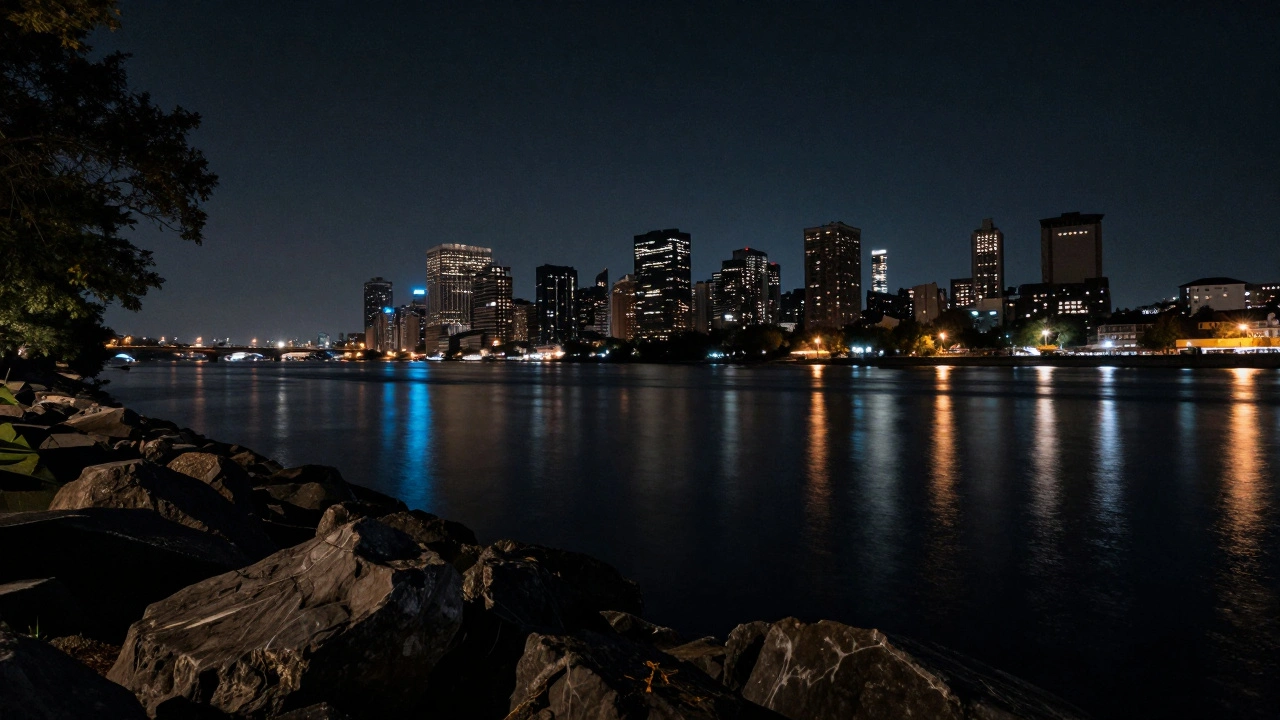
What happens? The shadows go dark-deep, true black. The noise in those shadows? It disappears. Not because you removed it. Because you made it irrelevant. Your eye doesn’t notice noise when the background is properly dark. This trick mimics how your brain sees the night sky: not as a gray canvas with stars, but as a void with pinpoints of light.
And if the foreground gets too dark? Use the Adjustment Brush. Paint the sky only. Leave the ground alone. Or use a graduated filter. The point isn’t to make everything bright. It’s to make the dark parts look like night.
Use AI Noise Reduction-But Not Everywhere
Lightroom’s AI Noise Reduction (introduced in 2023) is a game-changer. It analyzes the image and separates noise from detail better than any manual slider. But it’s not magic. Apply it globally, and you’ll lose fine texture-like the edges of trees or distant buildings.
Instead:
- Turn on AI Noise Reduction (set to 30-50).
- Then, go to the Detail panel.
- Set Luminance Detail to 70-80. This keeps texture sharp.
- Set Luminance Contrast to 0-10. Too much contrast brings back grain.
- For chrominance noise, set Color to 25-40. You rarely need more than that.
Now, use the Adjustment Brush to apply noise reduction only where it matters. Sky? Yes. Trees? Maybe. Rocks? No. Let the foreground keep its grit. It adds realism.
Color Noise Is Your Enemy-Target It
Chrominance noise is usually red, magenta, or green. It’s most visible in dark areas near light sources. Instead of wiping it out with global sliders, go to the HSL panel.
- Click on the Saturation tab.
- Find the red, magenta, or green sliders.
- Drag them down to -20 to -40.
Then, go to the Luminance tab and do the same. Reduce the brightness of those colors slightly. This kills the color speckles without touching the brightness of your stars or streetlights.
Pro tip: Use the Targeted Adjustment Tool (the circle icon in the HSL panel). Click on a noisy patch, then drag down. Lightroom automatically selects the right color channel.
When to Accept Noise-And When to Go Further
Some noise looks natural. Too much smoothing looks like plastic. You can’t turn a night sky into a studio shot. That’s not realism-that’s artifice.
Experienced photographers often leave 10-15% of noise. It gives the image texture. It feels real. If your stars look like they’re floating on a flat gray background, you’ve overdone it.
For extreme cases-like images shot at ISO 12800 or higher-consider third-party tools. Denoise AI and DxO PureRAW2 use neural networks trained on thousands of night shots. They recover detail better than Lightroom’s AI in high-ISO scenarios. But they’re not free. Use them only if you’re serious about prints or professional work.
Workflow Summary: What to Do, Step by Step
Here’s the cleanest way to handle noise in night photos:
- Shoot in Raw with a fast lens. Use ISO 400-640. Keep exposure under 10 seconds.
- Import into Lightroom. Don’t touch exposure yet.
- Drag the Blacks slider to -30 to -40. Watch the noise vanish.
- Use the Adjustment Brush to fine-tune shadows on the sky.
- Enable AI Noise Reduction (set to 40).
- Go to HSL. Reduce saturation and luminance of red, magenta, and green.
- Use the Detail panel: Luminance Detail at 75, Luminance Contrast at 5.
- Check your image at 100% zoom. If it looks soft or smeared, reduce noise reduction.
- Export. Don’t try to remove every speck. Let the noise breathe.
This isn’t about perfection. It’s about control. You’re not erasing noise. You’re making it invisible where it matters and keeping it where it adds character.
What Not to Do
- Don’t underexpose and brighten later. That’s the fastest way to ruin a night shot.
- Don’t use global noise reduction. It turns your trees into cotton candy.
- Don’t rely on in-camera noise reduction. It’s slow and ineffective for most night scenes.
- Don’t chase zero noise. That’s not photography. That’s a Photoshop fantasy.
The best night photos aren’t the cleanest. They’re the ones that feel real. That’s what you’re after-not a noise-free image, but an image that feels like you were there.
Why does my night photo look grainy even at low ISO?
Low ISO doesn’t guarantee low noise at night. The real issue is exposure time. Long exposures cause sensor heat, which creates thermal noise. Even at ISO 100, a 30-second exposure can look worse than a 5-second shot at ISO 3200. Shorter exposure = less heat = less noise.
Should I use Long Exposure Noise Reduction (LENR) for night photography?
Generally, no. LENR takes twice as long to capture each image because the camera takes a second dark-frame exposure to map noise. For exposures under 3 minutes, it adds almost no benefit. For longer shots (like 10-minute star trails), it helps-but you’ll lose time between shots. Most pros skip it and fix noise in post instead.
Is AI noise reduction better than manual sliders?
Yes-for high-ISO images. Lightroom’s AI tool analyzes patterns in noise and detail better than manual sliders. But it’s not perfect. Use it as a starting point, then fine-tune with the Detail panel and HSL adjustments. Never apply it globally without checking for softness.
What’s the best way to reduce color noise without losing star colors?
Use the HSL panel. Target the red, magenta, and green channels. Reduce their saturation and luminance by 20-40%. Stars are mostly white or blue, so they won’t be affected. This kills the noisy dots without dulling the stars themselves.
Can I fix noise in JPEGs as well as Raw files?
You can, but it’s harder. JPEGs have less data, so noise reduction tools have less to work with. You’ll lose more detail and get more artifacts. Always shoot night photos in Raw. It’s not optional-it’s essential.