Water is not just a medium; it is an obstacle. Every foot of distance you put between yourself and your subject eats away color, clarity, and contrast. That is why wide-angle underwater photography is a specialized technique that prioritizes proximity over distance to capture expansive marine environments. It sounds counterintuitive. You want a wide view, but you have to get uncomfortably close to achieve it. This discipline isn't about standing back and snapping a landscape like you would on land. It is about diving into the scene, compressing layers of foreground, subject, and background into a single, sharp frame.
If you are looking to document large pelagic fish, intricate coral reefs, or sunken shipwrecks, this is the only approach that works. The standard definition here is specific: a field of view roughly 65 degrees wider than human vision. Anything larger than a basketball generally qualifies as a subject for this style. But getting there requires mastering optical physics, choosing between two very different lens types, and learning to stack visual layers like a painter.
The Optical Reality: Why Proximity Matters
On land, air is transparent. Underwater, water is dense. As light travels through water, particles scatter it. This creates the "blue haze" that ruins distant shots. The farther you are from your subject, the more color and detail disappear. This is the fundamental rule of the trade: get closer.
This requirement creates a unique challenge. You need a lens that can capture a massive field of view, but you must position yourself inches away from your subject to maintain sharpness. This proximity allows the curved nature of the lens and the dome port to draw the viewer's eye directly to the focal point while keeping the surrounding environment in context. It transforms a flat image into a three-dimensional experience.
Visibility determines your success. A good rule of thumb? If visibility extends further than the tips of your fins, you are in business. But even in crystal-clear tropical waters, minimizing distance is non-negotiable. Shooting wide also provides a broader depth of focus, which keeps details sharp when you are working with moving subjects like sharks or dolphins.
Fisheye vs. Rectilinear: Choosing Your Lens
You cannot use just any wide lens underwater. You need specific optics designed to handle the refraction of water and glass. There are two primary configurations, each offering a distinct aesthetic:
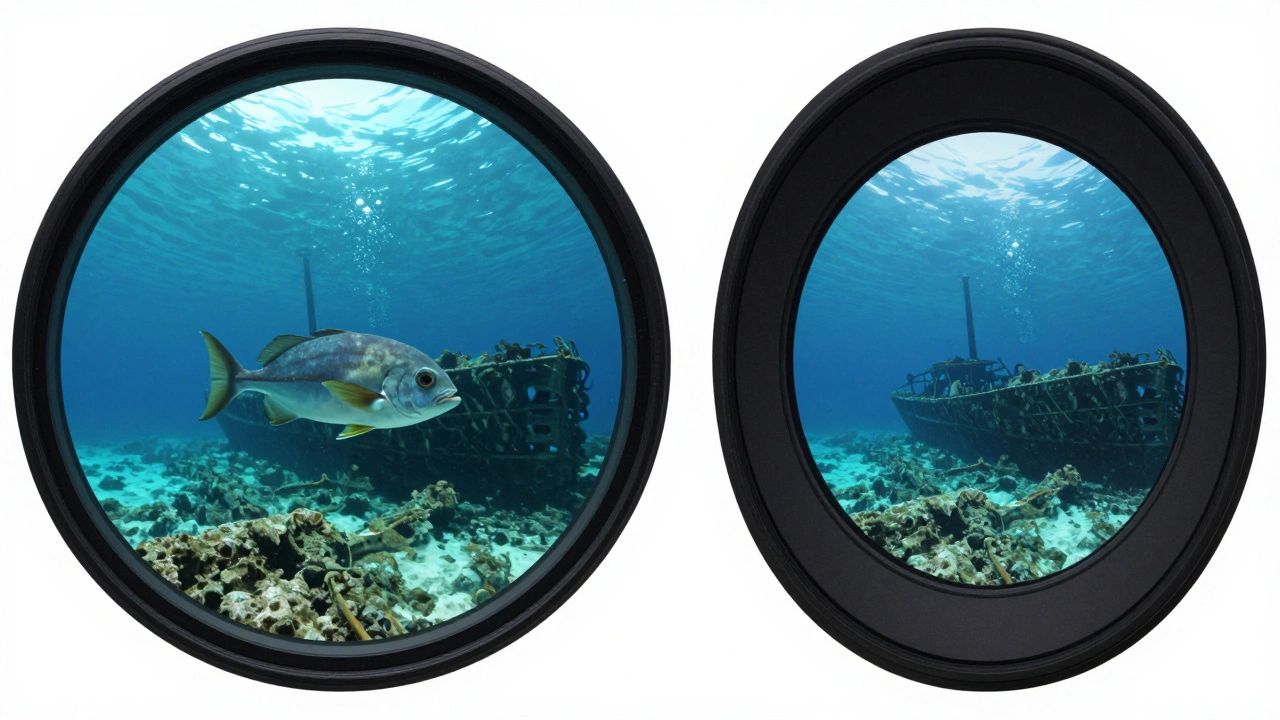
- Fisheye Lenses: These offer a true 180-degree field of view. They cram maximum content into the shot. The trade-off is significant distortion. Lines curve, and straight edges bend. This style is dramatic, immersive, and perfect for making small subjects look monumental against a vast background.
- Rectilinear Lenses: These provide a view approaching 180 degrees but stop short. Crucially, they keep lines straight. Distortion is minimal. This option offers a more natural perspective, ideal for architectural wrecks or seascapes where you want realistic proportions.
Top-tier equipment choices often include the Canon EF 8-15mm fisheye or the Canon EF-S 10-18mm rectilinear. Both work exceptionally well with bodies like the Canon EOS Rebel SL1, producing crisp images with deep depth of field even at close range. Your choice depends on whether you prefer the exaggerated drama of the fisheye or the realistic geometry of the rectilinear.
| Feature | Fisheye Lens | Rectilinear Lens |
|---|---|---|
| Field of View | 180 degrees (circular or full-frame) | Approaching 180 degrees |
| Distortion | High (curved lines) | Low (straight lines maintained) |
| Best For | Dramatic impact, close-focus macro hybrids | Seascapes, wrecks, realistic perspectives |
| Subject Feel | Exaggerated size, immersive | Natural proportions, documentary style |
Essential Gear: The Dome Port Requirement
A flat port will ruin your wide-angle shots. Light bends when it passes from water to glass to air. A flat port causes severe vignetting (black corners) and loss of sharpness at the edges. You need a dome port that corrects for light refraction, allowing the lens to see clearly without blackening the corners.
For fisheye or ultra-wide lenses, a dome port of 6 inches or larger is crucial. This size is especially important if you plan to attempt "over-under" photography, which captures both the surface landscape and the underwater seascape in one frame. Smaller domes restrict the angle of view and degrade image quality.
Lighting is equally critical. Ambient light fades quickly. While some beginners start with a single strobe positioned above the lens to fill color, professional wide-angle work typically demands two strobes. This setup ensures even illumination across the wide frame, preventing dark shadows on the sides. However, do not feel pressured to buy massive strobe arms immediately. Start simple, master positioning, and upgrade as your skills grow.
Camera Settings for Clarity and Color
Getting the exposure right underwater is a balancing act. You want the background to remain a beautiful blue (controlled by ambient light) while ensuring your foreground subject is vibrant and sharp (controlled by your strobes). Here are the baseline settings to start with:
- Shutter Speed: Set to 1/100 to 1/125 seconds. In tropical waters with brighter ambient light, increase this to 1/125 to 1/160 seconds. Never drop below 1/100 seconds, or motion blur will destroy your image.
- Aperture: Start at f/8. This is the sweet spot for most wide-angle shots. If you are shooting subjects farther away or in murkier water, open up to f/5.6 to let in more light. For pure seascapes where depth of field is paramount, try f/11 or higher, then compensate with ISO.
- ISO: Keep it low. Aim for ISO 200 to 400. Use ISO 200 in clear tropical waters to minimize noise. Higher ISOs introduce grain, which becomes very visible in the smooth gradients of underwater backgrounds.
Remember: ambient light controls the background exposure. Your strobes control the foreground. Adjust your strobe power, not your camera shutter speed, to brighten your subject. This separation keeps the background naturally blue rather than washed out.
Composition: Stacking Layers
A great wide-angle shot is not just a big picture; it is a structured narrative. Think of your frame as a canvas composed of three distinct layers:
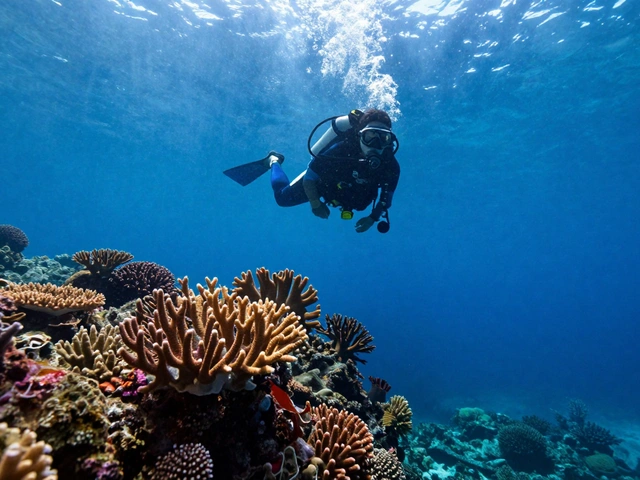
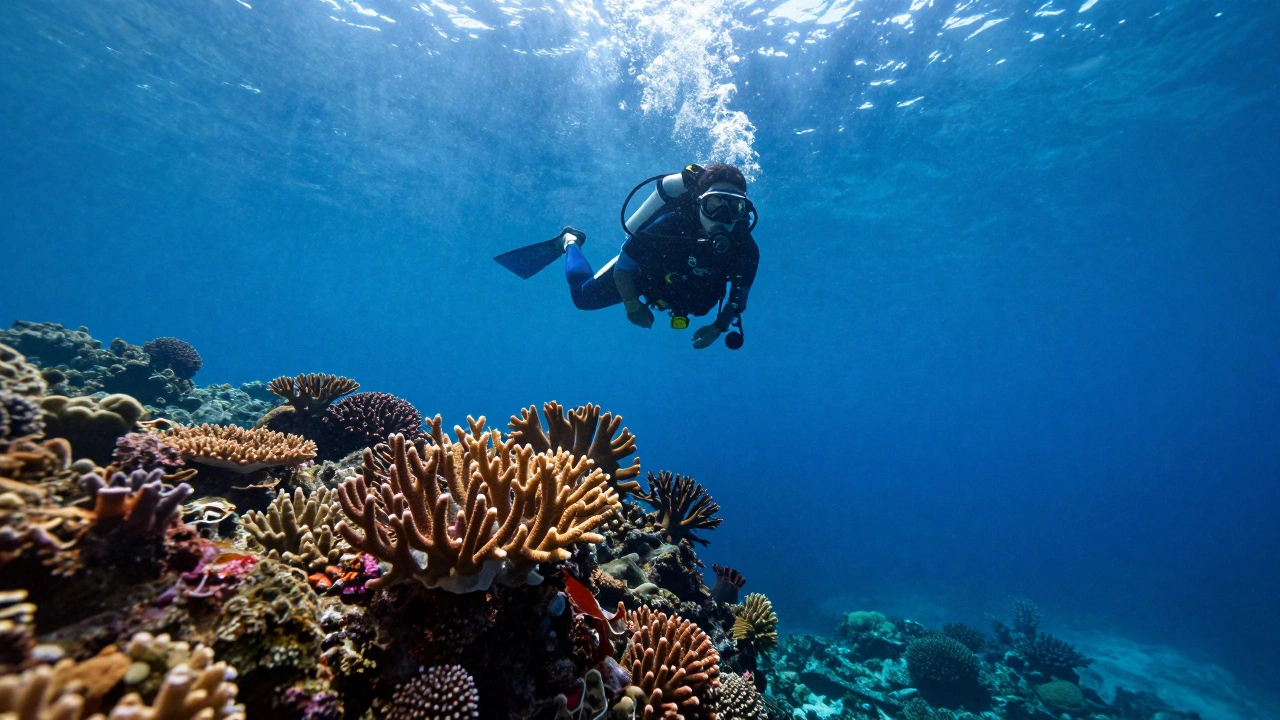
- The Foreground: This should be well-lit and contain your primary focal subject. Position this subject only a few inches from your dome port. This proximity uses the lens curvature to lead the viewer’s eye inward.
- The Midground: This connects the subject to the environment. Look for leading lines, curves, or spirals in the reef structure or sand patterns.
- The Background: This provides context and scale. Include complementary elements like the sun beam, a diver, a boat hull, or a school of fish. A strong background adds depth and prevents the image from feeling empty.
Shoot from an upward angle whenever possible. This perspective adds depth and avoids the flat, top-down look that can make underwater scenes feel two-dimensional. Arrange these layers so they flow visually from front to back.
Advanced Technique: Close-Focus Wide-Angle
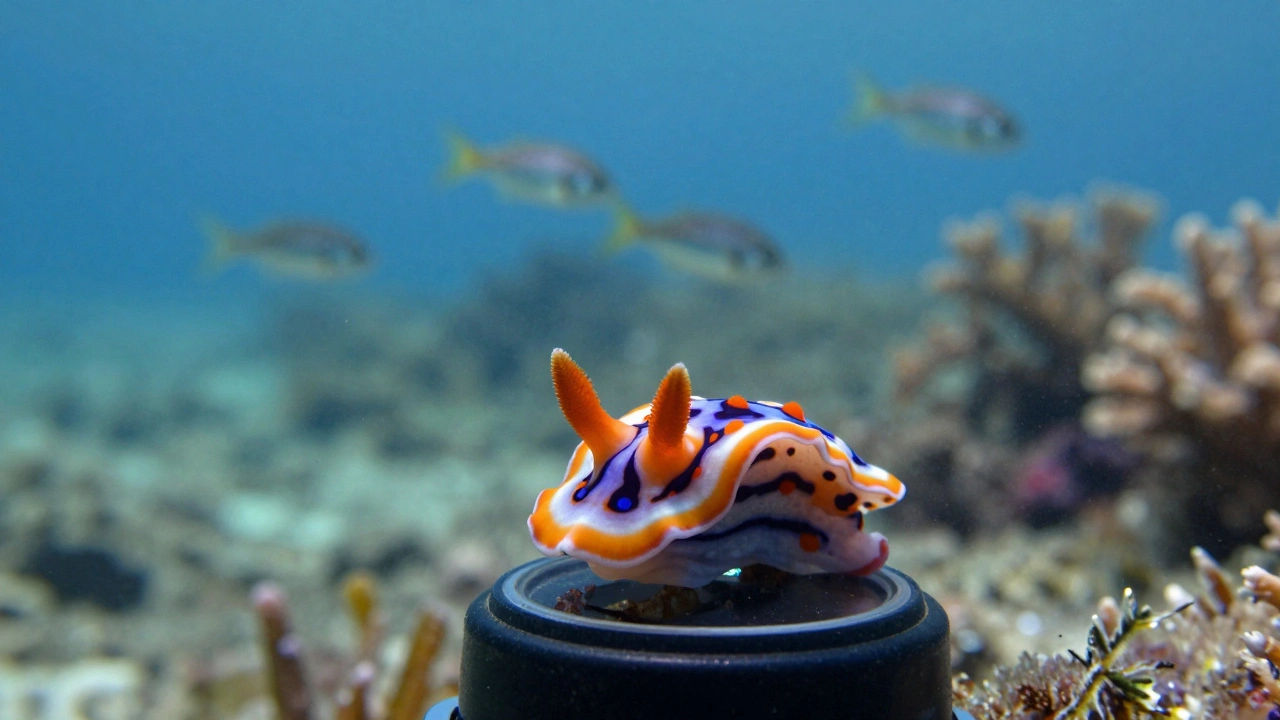
Once you master standard wide-angle shots, try close-focus wide-angle photography, which combines macro subjects with wide-angle backgrounds for a split-image effect. This technique, popularized in places like Lembeh Resort, creates a striking 50/50 balance between the subject and its habitat.
In this style, you place a tiny macro critter-like a nudibranch or pygmy seahorse-inches from the lens. The background remains a expansive, blurred seascape. The contrast between the sharp, detailed subject and the vast, soft background invites viewers to explore the habitat. It feels like a split image, merging the intimacy of macro photography with the scale of wide-angle work. This is what separates exceptional images from standard documentation.
Troubleshooting Common Issues
Even with perfect gear, mistakes happen. Here is how to fix them in the moment:
- Black Corners: Check your dome port alignment. If it is too far forward or backward relative to the lens node, you will get vignetting. Adjust your housing extension tubes.
- Washed-Out Background: Your strobes are overpowering the ambient light. Reduce strobe power or move them slightly outward. Let the sun handle the background.
- Murky Foreground: You are too close to the reef and kicking up sediment. Hover carefully. Use a buoyancy compensator to stay stable. Wait for the silt to settle before shooting.
- Flat Lighting: Single strobe placement creates harsh shadows. Add a second strobe or use a diffuser to soften the light. Position strobes symmetrically for even coverage.
What is the best aperture for underwater wide-angle photography?
The standard starting point is f/8. This setting provides a good balance of depth of field and light intake. If you are shooting in lower visibility or focusing on distant subjects, open up to f/5.6. For pure seascapes where you need everything in focus, try f/11 or higher, but remember to increase your ISO or slow your shutter speed to compensate for the reduced light.
Do I need two strobes for wide-angle underwater photography?
Two strobes are recommended for professional results because they provide even lighting across the wide frame. However, beginners can start with a single strobe positioned above the lens. This setup fills color effectively for the primary subject. Upgrade to dual strobes once you master positioning and want to eliminate side shadows.
How close should I be to my subject?
As close as possible without touching. Ideally, your main subject should be only a few inches from the dome port. This proximity minimizes the amount of water between you and the subject, preserving color and sharpness. It also utilizes the lens distortion to draw attention to the focal point.
What is the difference between fisheye and rectilinear lenses underwater?
Fisheye lenses offer a 180-degree view with significant distortion, curving straight lines. They create dramatic, immersive images. Rectilinear lenses offer a similar wide view but keep lines straight, providing a more natural, realistic perspective. Choose fisheye for creative impact and rectilinear for documentary-style accuracy.
Can I use a regular DSLR lens underwater?
Only if it is in a proper underwater housing with a dome port. Standard flat ports cause vignetting and loss of sharpness with wide-angle lenses. The dome port corrects for light refraction, allowing the lens to function correctly. Without a dome port, wide-angle lenses will produce unusable images with blackened corners.