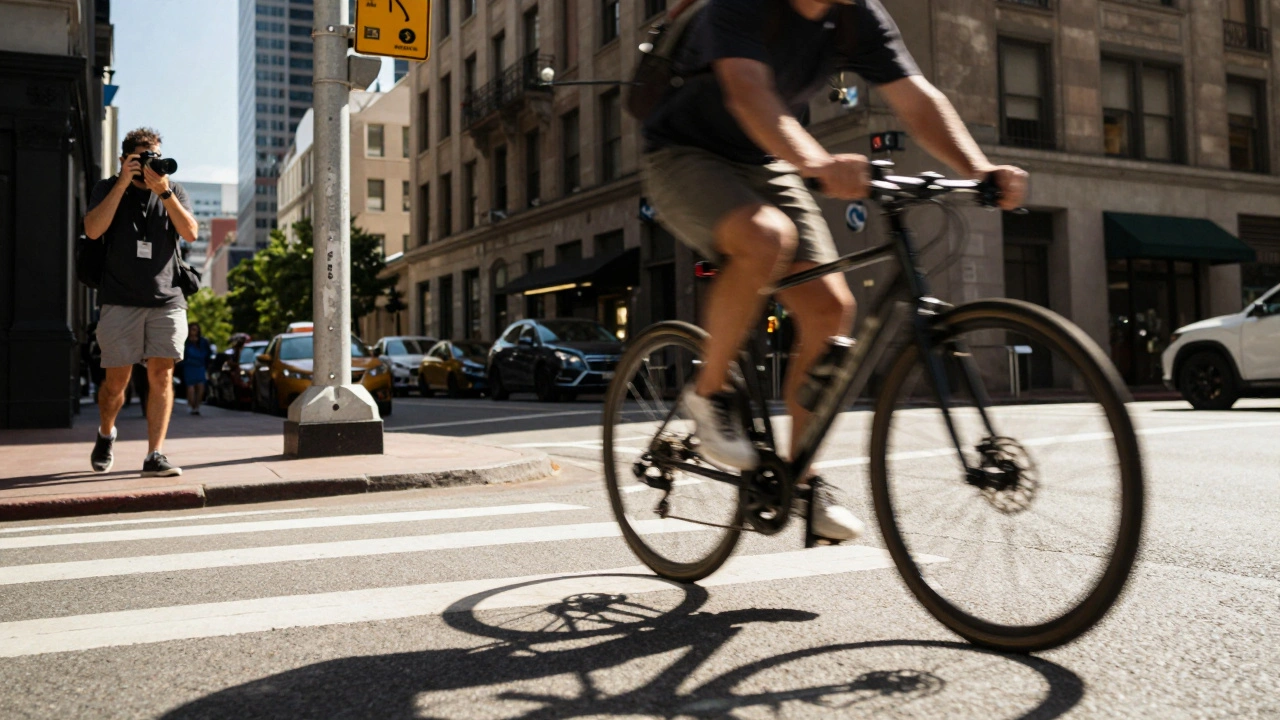
Imagine you're standing on a busy corner in downtown Portland. A cyclist zooms past, or a pedestrian steps into a beam of light for a fraction of a second. You raise your camera, the autofocus hunts for a moment, and by the time it locks on, the moment is gone. It's a frustrating experience that every street photographer knows. The secret to beating this lag isn't a faster camera-it's a technique called zone focusing is a manual focusing method where you pre-set a specific range of sharpness before the subject even enters the frame.
Instead of reacting to the scene, you're proactively defining where the image will be sharp. This means you stop fighting with your camera's electronics and start focusing entirely on the composition. If you've ever felt that your gear is slowing you down, switching to a manual workflow might be the most liberating move you make.
Quick Guide to Setting Your Zone
To get started, you don't need a fancy setup. You just need a lens with a manual focus ring and a basic understanding of how light and distance work together. The goal is to create a "buffer" of sharpness-a zone where anything entering that space is automatically in focus.
- Switch to Manual Focus: Flip the switch on your lens or change the setting in your menu. You want total control over the focus ring.
- Choose a Narrow Aperture: Set your Aperture is the opening of a lens through which light passes, controlling the depth of field to f/8 or f/11. A wider opening (like f/2.8) makes the zone too thin, while f/16 might introduce diffraction or require a shutter speed so slow that you'll get motion blur.
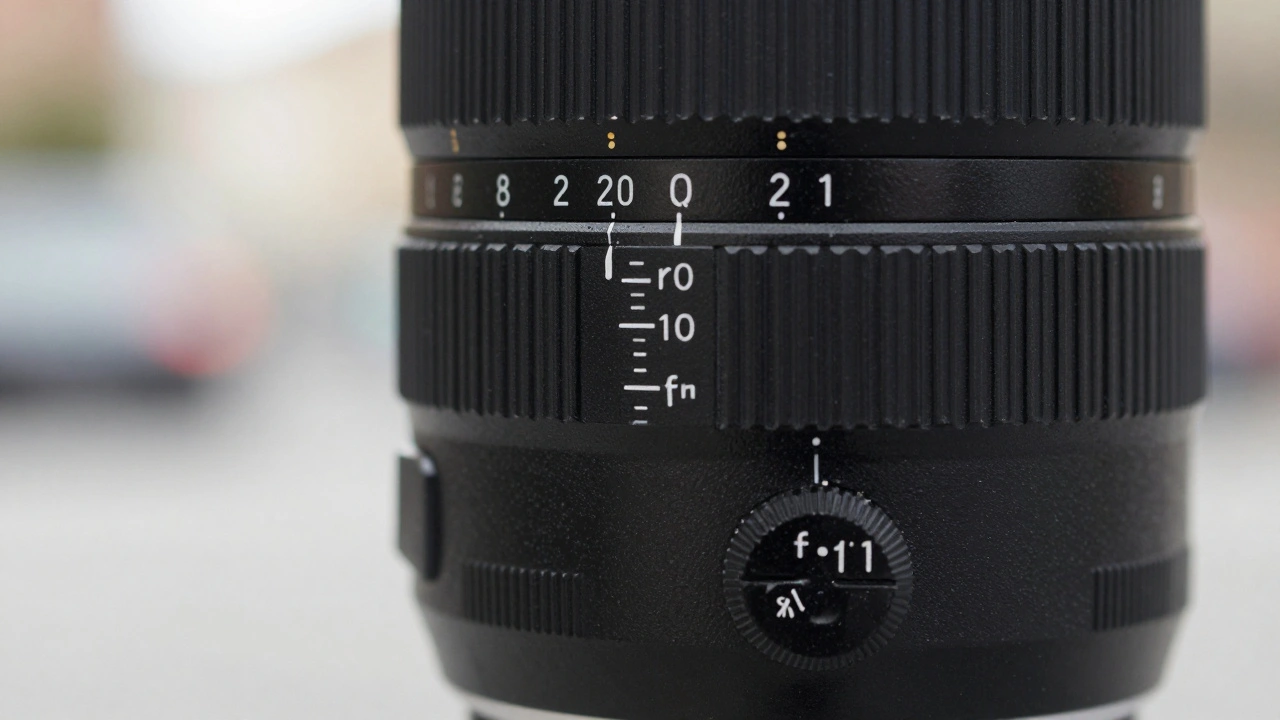
- Set Your Distance: Most street photographers find the "sweet spot" between 8 and 10 feet. Manually rotate your focus ring to this mark on the lens scale.
- Test the Range: Place an object at 6 feet and another at 15 feet. If both are sharp, you've successfully created a zone.
The Science of the Sharpness Zone
Zone focusing works because of the Depth of Field is the distance between the nearest and farthest objects in a scene that appear acceptably sharp in an image . The wider your lens, the more forgiving this zone becomes. If you use a 28mm lens at f/8 and focus at 8 feet, your sharp area might actually stretch from 5.5 feet all the way to 15 feet. That's a massive window of opportunity.
This is why you'll rarely see street photographers using 85mm or 135mm lenses for this technique. Long lenses have a shallow depth of field; even at f/8, a small movement by the subject can push them out of the focus zone. Stick to wide-angle optics like the 28mm, 35mm, or 40mm for the best results.
| Lens Focal Length | Ease of Use | Depth of Field | Typical Use Case |
|---|---|---|---|
| 28mm | Very Easy | Very Deep | Crowded markets, tight alleys |
| 35mm | Easy | Deep | General street scenes, portraits |
| 50mm | Difficult | Moderate | Selective subjects, slower pace |
| 85mm+ | Very Hard | Shallow | Not recommended for zoning |
Zone Focusing vs. Pre-Focusing: What's the Difference?
People often use these terms interchangeably, but they are different animals. Pre-focusing is the act of focusing on a specific point in space and waiting for a subject to hit that exact mark . You see this a lot in motorsports; a photographer focuses on the apex of a turn and fires the shutter the moment the car hits that spot. It's a one-shot deal.
Zone focusing is more about a "session-level" strategy. You aren't waiting for one specific person to hit one specific inch of pavement. Instead, you've created a general area of sharpness. This allows you to capture multiple people moving through the scene at different depths without having to touch your focus ring between shots. It's the difference between a sniper rifle (pre-focusing) and a shotgun (zone focusing).
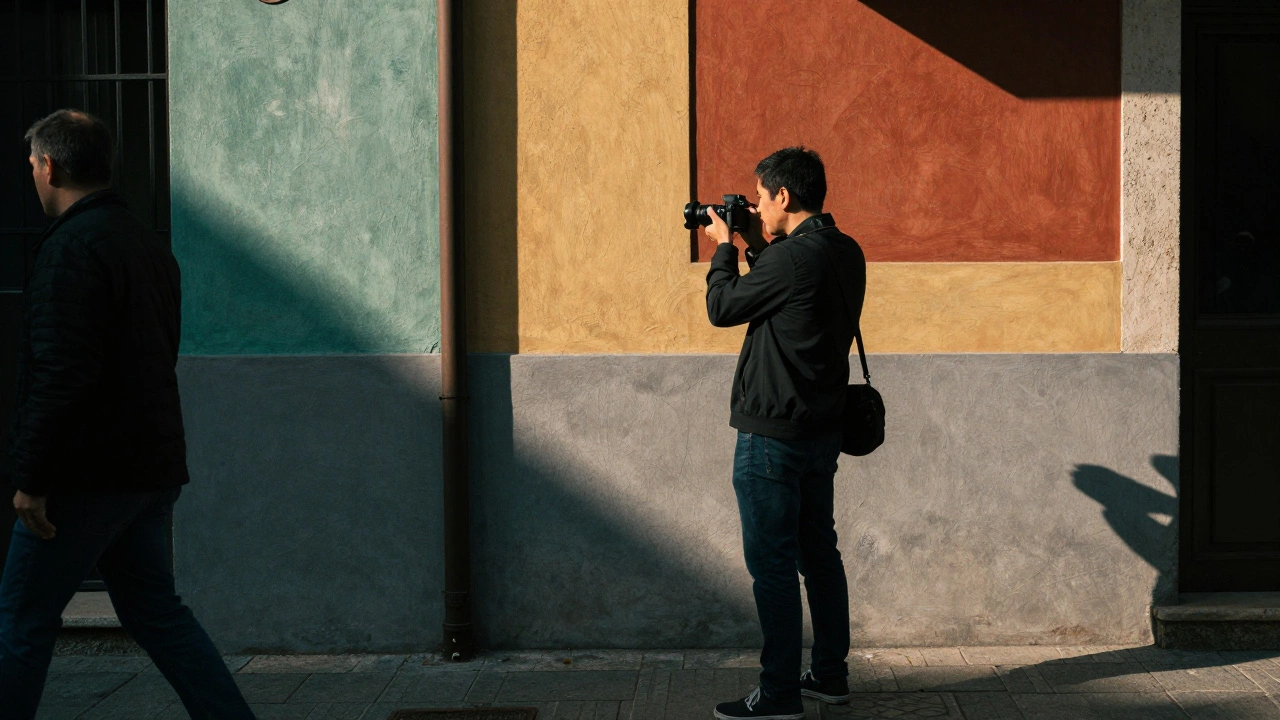
Mastering the "Fishing" Technique
One of the most effective ways to use this method is through "fishing." Instead of hunting for subjects, you find a visually interesting background-maybe a colorful wall or a dramatic shadow-and you "set your trap." You establish your focus zone based on where people will naturally walk, and then you simply wait.
Since you aren't relying on autofocus, you can keep your camera at hip level. Shooting from the hip is a game-changer for candid photography. It makes you less visible, prevents subjects from posing or feeling intimidated, and allows you to stay more connected to the environment. When you aren't staring through a viewfinder waiting for a green focus dot to light up, you can actually see the moment happening in real-time.
Common Pitfalls and How to Avoid Them
The biggest mistake beginners make is choosing an aperture that's too wide. If you're at f/2.8, your zone is tiny. One step forward by your subject, and the photo is blurry. Always double-check your aperture before you start walking. If the light allows, f/11 is the safest bet for maximum coverage.
Another hurdle is the lack of distance scales on modern lenses. Many new lenses use focus-by-wire and don't have a physical mark telling you if you're at 8 feet or 12 feet. In this case, you'll need to calibrate by eye. Find a landmark (like a specific street lamp or a door frame) that is exactly 10 feet away, focus on it, and then leave the ring alone.
Finally, don't forget about shutter speed. Because you're using smaller apertures (f/8, f/11), your camera lets in less light. To avoid motion blur, you'll need to bump up your ISO. It's better to have a slightly grainy photo that is sharp than a clean photo where the subject is a blurry smudge.
Why Bother With Manual Focus in 2026?
You might wonder why anyone would do this when modern mirrorless cameras have incredible eye-tracking autofocus. The answer is simple: speed. Even the fastest autofocus has a tiny delay-a few milliseconds of "hunting" or calculating. In street photography, those milliseconds are the difference between a candid expression and a subject noticing you and looking away.
By removing the technical layer of focus acquisition, you reduce the cognitive load on your brain. You stop thinking about "Is it in focus?" and start thinking about "Is this a great composition?" That mental shift leads to better photos because you are prioritizing the art over the gear.
Will my photos be blurry if the subject is slightly outside the zone?
It depends on the lens and aperture. If you're using a wide lens like a 28mm at f/8, the transition from "sharp" to "blurry" is gradual. A subject slightly outside the zone might still look acceptably sharp, especially in a candid street shot where the viewer's eye is more forgiving than in a studio portrait.
Can I use zone focusing with a zoom lens?
Yes, but it's trickier. Changing the focal length (zooming in or out) changes the depth of field and the focus distance. If you zoom, you'll likely need to readjust your focus ring to maintain your zone. This is why prime lenses are preferred for this technique.
What is the best focal length for beginners?
A 35mm lens is widely considered the gold standard. It's wide enough to provide a generous depth of field for zone focusing, but tight enough that your subjects fill a good portion of the frame without requiring you to be too close.
Does this work in low light?
It's challenging. Zone focusing requires narrow apertures (f/8+), which limit light. To make it work at dusk or indoors, you must use a high ISO to keep your shutter speed fast enough to freeze motion. If you have to drop to f/2.8 to get light, your zone becomes too small to be practical.
How do I know if I've set the focus correctly without a distance scale?
The best way is the "test run" method. Find a distance you commonly shoot at, mark it on the ground with a piece of tape or a coin, focus on it, and then take a few test shots of a friend or an object at different distances to see where the blur starts. Once you find the limit, memorize the position of the focus ring.
Next Steps for Improvement
If you're just starting, don't expect 100% hit rates immediately. Spend an afternoon in a high-traffic area and commit to one setting-say, 35mm at f/8 focused at 10 feet. Don't touch the dial. Take 50 shots and review them later to see exactly where your subjects were positioned relative to your zone.
Once you're comfortable, start experimenting with different distances. Try a "close-in" zone (about 5 feet) for more intimate portraits, or a "distant" zone (15-20 feet) for wider environmental shots. The more you do it, the more you'll develop a natural sense of distance, eventually allowing you to adjust your zone on the fly without even looking at the lens.