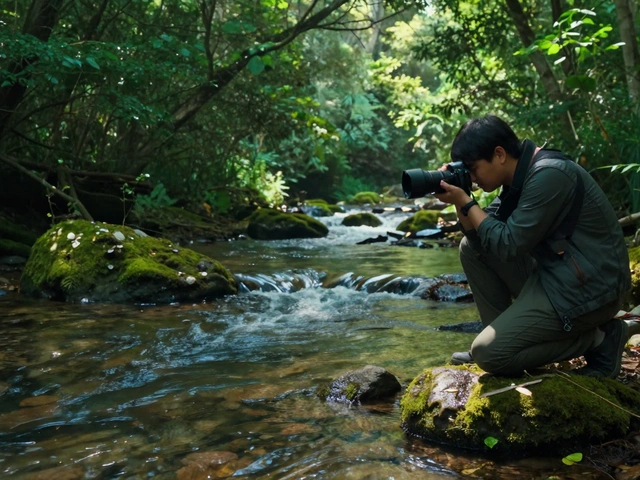
Ever looked at a stunning mountain range in person, snapped a photo, and felt the image looked "flat" compared to the real thing? You aren't alone. The biggest struggle in landscape photography is translating a three-dimensional world onto a two-dimensional sensor. The secret to fixing this isn't found in your editing software; it's found at your feet. By mastering foreground elements, you turn a simple snapshot into an immersive experience that pulls the viewer right into the scene.
Foreground Elements are compositional features positioned in the immediate area closest to the camera that enhance visual interest, establish depth, and guide the viewer's eye through an image. Think of them as the "welcome mat" of your photograph. Without a strong foreground, a landscape can feel like a wall of distant scenery. With one, it becomes a journey.
Why Your Foreground Matters
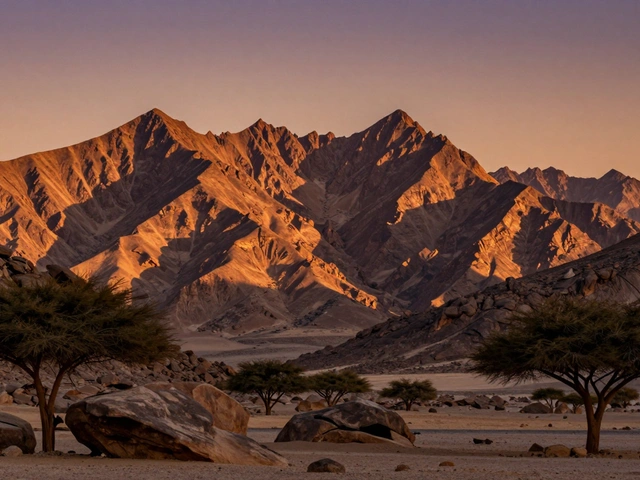
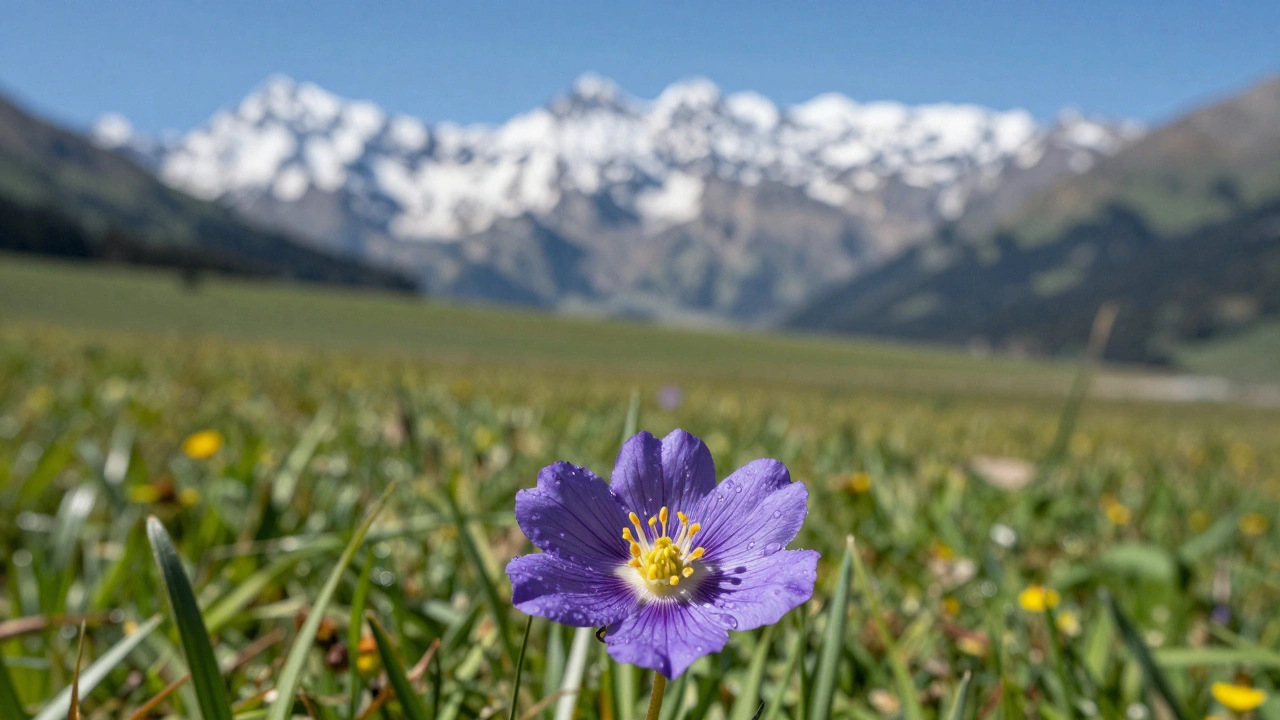
A great foreground does more than just fill space. It solves the scale problem. If you photograph a massive redwood tree from a distance, it might look like a shrub. But if you place a detailed piece of textured bark or a small wildflower in the bottom third of your frame, the viewer has a point of reference. This establishes a sense of scale and perspective that makes the background feel truly epic.
Beyond scale, the foreground provides vital context. A jagged rock suggests a rugged coastline; a soft patch of moss suggests a damp, ancient forest. These details evoke a mood and tell the viewer exactly where they are and how it feels to stand in that spot. It's the difference between seeing a picture of a place and feeling like you are actually there.
The Three-Layer Composition Strategy
To avoid a cluttered image, try thinking of your composition in three distinct layers. This structured approach ensures your photo has a logical flow and doesn't feel accidental.
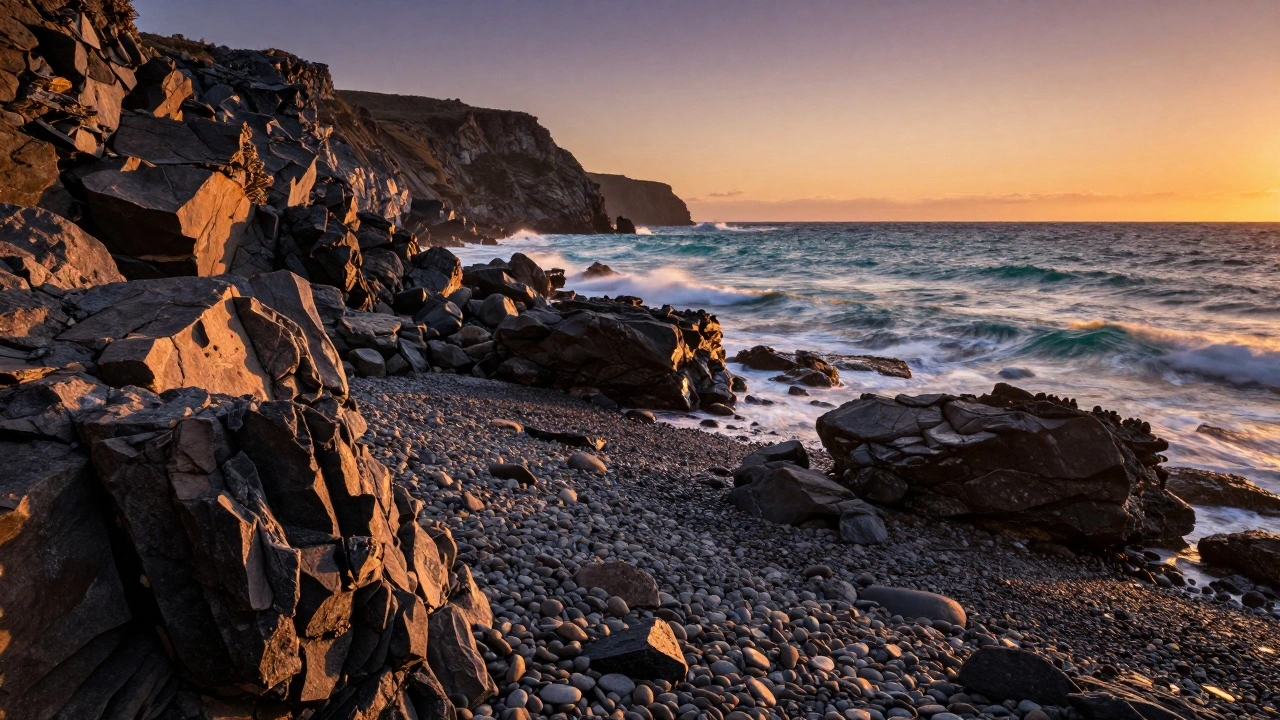
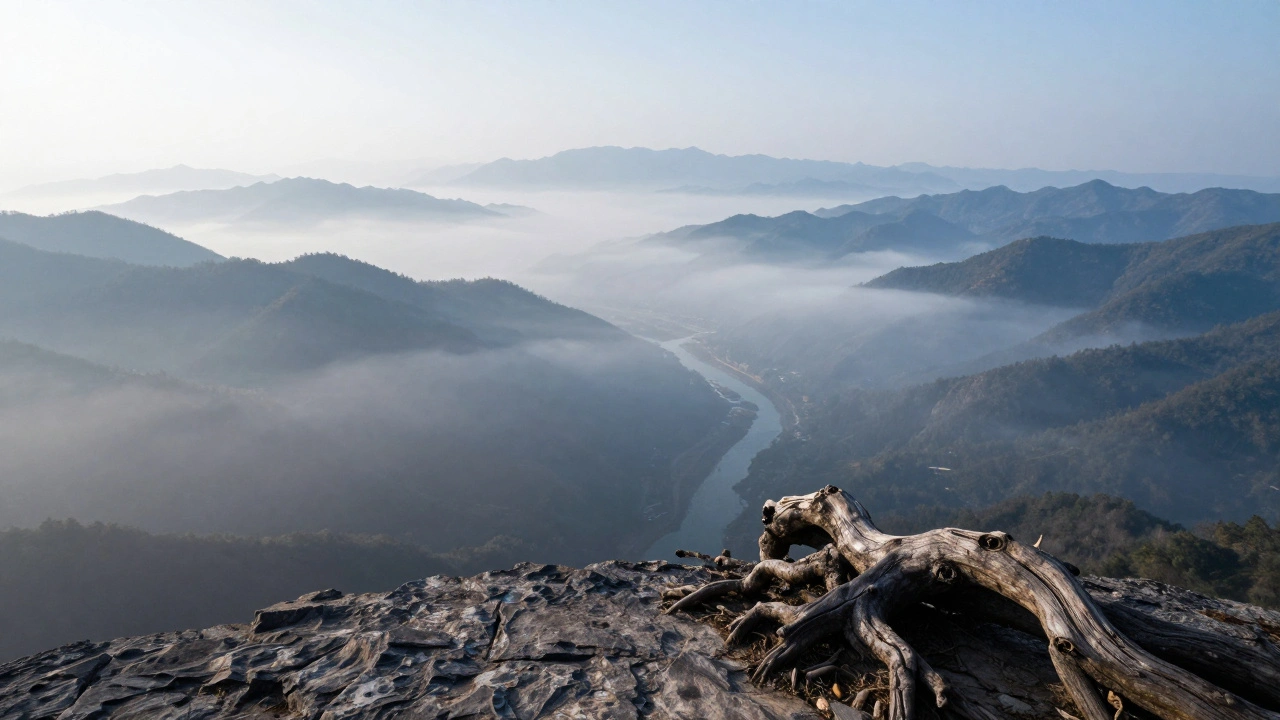
- The Foreground: This is your anchor. It could be a gnarled root, a colorful cluster of petals, or a ripple in the sand. It's the first thing the viewer sees.
- The Mid-ground: This acts as the bridge. A winding river, a forest path, or a lake often fills this space, separating the immediate foreground from the horizon.
- The Background: This is usually the primary attraction-the towering peaks, the city skyline, or the setting sun.
When these three layers work together, they create a visual corridor. The eye starts at the detailed foreground, travels through the mid-ground, and finally rests on the distant subject. If you skip the first layer, the viewer's eye often jumps straight to the background and then exits the frame, losing the sense of immersion.
Mastering Leading Lines
One of the most effective ways to use the foreground is through Leading Lines. These are strong linear elements that direct the viewer's gaze from the bottom of the frame toward the main subject. They act as a visual map, telling the viewer exactly where to look.
You don't need a paved road to find leading lines. Look for natural patterns: a meandering stream, a row of shoreline pebbles, or the curve of a fallen log. Dramatic diagonals are especially powerful; a line starting from the bottom left corner and slicing toward the upper right creates a dynamic energy that keeps the image from feeling static.
This isn't a new trick. The great masters of landscape painting, like Claude Monet and Vincent van Gogh, used this exact technique. They meticulously placed paths or rivers in their foregrounds to lead the eye deeper into their canvases, a practice that remains the gold standard for photographers today.
| Element | Primary Benefit | Best Use Case |
|---|---|---|
| Rocks/Pebbles | Texture & Weight | Riverbanks or coastlines |
| Wildflowers | Color & Softness | Spring meadows or alpine slopes |
| Winding Paths | Direction & Flow | Forests or country roads |
| Water Ripples | Pattern & Motion | Lakeshores or tide pools |
| Gnarled Trees | Form & Character | Winter landscapes or deserts |
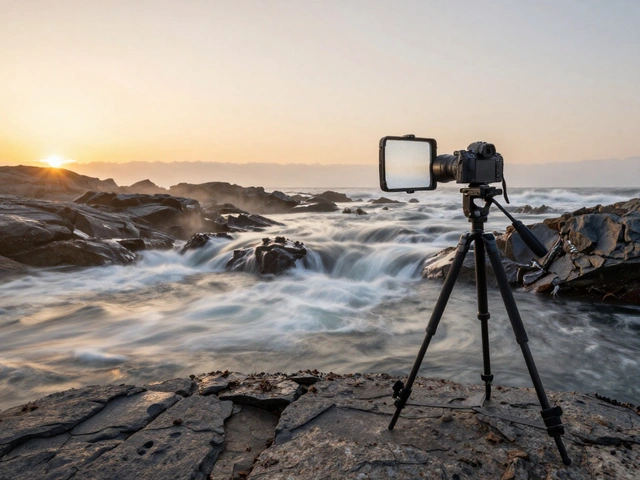
Technical Execution: Getting it Sharp
Including an element very close to the lens introduces a technical challenge: keeping both that flower and that distant mountain in focus. If you use a wide aperture, the foreground will be a blur. To solve this, you need to maximize your Depth of Field, which is the distance between the nearest and furthest objects in a scene that appear acceptably sharp.
For most landscape shooters, this means narrowing the aperture. Settings between f/11 and f/16 are usually the sweet spot. If you go too far, like f/22, you might encounter diffraction, which actually makes the image softer. A tripod is non-negotiable here; since you're using a slower shutter speed with a narrow aperture, any handheld shake will ruin the crispness of your textures.
If you're really serious about precision, look into Tilt-Shift Lenses. These specialized tools allow you to shift the plane of focus, making it possible to get an object just inches from the lens and a mountain miles away both tack-sharp without compromising image quality.
Creative Positioning and Framing
Don't just plop a rock in the center of the frame. That often creates a "bullseye" effect that can feel boring. Instead, try placing your foreground element off-center, perhaps hugging the bottom corner. This creates a more natural, asymmetrical balance that feels less staged.
Another pro move is "natural framing." Find an archway of branches, a gap in the wildflowers, or a cave entrance. By positioning these elements at the very edges of your foreground, you create a window that encapsulates the main subject. This doesn't just add depth; it focuses the viewer's attention, making the background subject feel like a discovered treasure.
Vantage point also changes the story. Dropping your tripod as low as possible-almost touching the ground-makes small elements like morning dew or tiny pebbles feel monumental. Conversely, stepping up onto a boulder gives you a "bird's eye" view of the foreground, allowing you to capture more of the patterns on the ground before the eye hits the horizon.
When to Leave the Foreground Alone
Here is the hard truth: not every photo needs a foreground element. There is a temptation to follow the "rules" so strictly that you include a random branch or a blurry rock just because you think you're supposed to. This is a mistake. An irrelevant foreground is worse than no foreground at all.
Before you click the shutter, ask yourself: Does this element actually help the story? If a piece of driftwood is just "there" but doesn't lead the eye or add meaningful texture, leave it out. The goal is cohesion, not a checklist. Sometimes, the minimalism of a clean, vast expanse is exactly what the scene requires to convey loneliness or serenity.
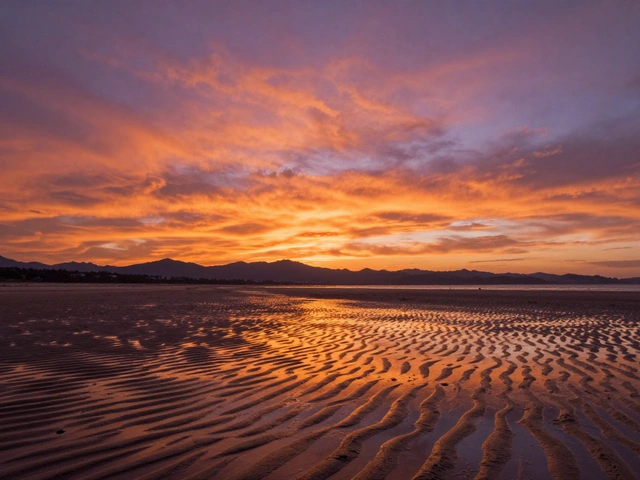
Timing and Light for Maximum Depth
The time of day can either make or break your layering. Shooting during the "golden hour"-just after sunrise or before sunset-is a game changer. Low-angle sunlight creates long shadows, which define the textures of your foreground elements. A rock that looks flat at noon suddenly gains three-dimensional form when the light hits it from the side.
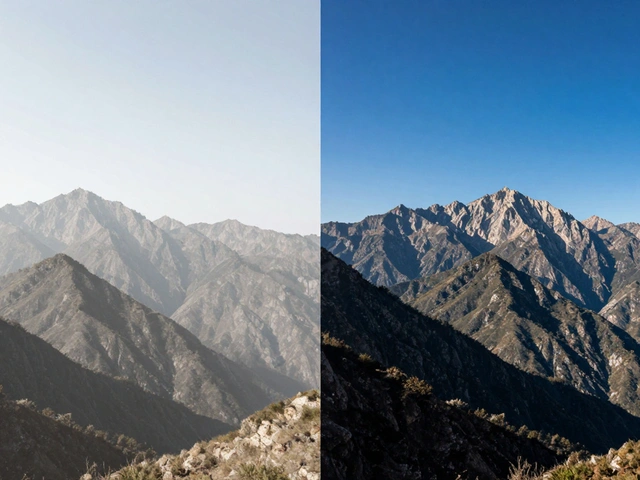
Atmospheric conditions also play a role. In the early morning, mist often settles in the valleys. This creates natural "aerial perspective," where objects in the foreground are sharp and high-contrast, while distant ridges fade into a soft blue haze. This natural contrast in clarity is the most powerful visual cue for depth, making your layered composition feel truly infinite.
What is the best aperture for foreground interest?
Generally, an aperture between f/11 and f/16 is ideal. This provides a deep depth of field, ensuring that elements close to the lens and the distant background are both sharp. Avoid f/22 if possible to prevent diffraction, which can reduce overall image sharpness.
How do I find a good foreground element if the landscape looks empty?
Look smaller. Often, the best foregrounds aren't giant boulders but tiny details: a unique pattern in the sand, a single interesting leaf, or a small puddle reflecting the sky. Get low to the ground and look for textures, lines, or colors that contrast with the background.
Should I always use a wide-angle lens for foregrounds?
Wide-angle lenses are great for exaggerating the distance between the foreground and background, which creates a dramatic sense of depth. However, a telephoto lens can also create interest by compressing the layers, making the background loom larger and more imposing over the foreground.
What happens if my foreground is too bright or too dark?
This is common when the sun is behind the mountains. You can use a graduated neutral density (GND) filter to darken the sky while keeping the foreground bright, or use HDR techniques (bracketing multiple exposures) to ensure both the shadowed foreground and bright sky have detail.
Can I use animals as foreground elements?
Absolutely. An animal, such as a deer in a meadow or a bird on a rock, adds a narrative element and a biological point of reference for scale. Just be mindful of the focus; if the animal is the primary subject, you might want a shallower depth of field than you would for a rock.