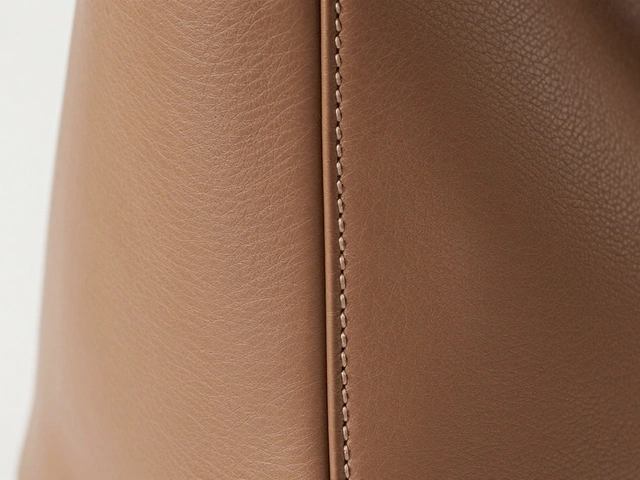
When you’re selling a product online, customers can’t touch it. They can’t feel the stitching on a leather bag or run their fingers over the embossed logo on a watch case. That’s where macro product photography comes in. It doesn’t just show what the product looks like-it shows you why it’s worth buying. The smallest details tell the biggest stories: the evenness of a stitch, the depth of an engraving, the grain in a wood finish. These aren’t just pretty pictures. They’re trust builders.
Why Details Matter More Than You Think
Think about the last time you bought something online. Did you zoom in? Most people do. On Amazon, Etsy, or a luxury brand site, shoppers click, zoom, and scrutinize. A blurry logo or washed-out texture can make a product feel cheap-even if it’s not. Macro photography turns tiny features into selling points. A well-shot logo proves authenticity. Tight, even stitching signals craftsmanship. Visible texture shows material quality. These aren’t optional extras. They’re expectations.Products with clear, detailed images get more clicks, fewer returns, and higher conversion rates. A 2024 study by a major e-commerce analytics firm found that listings with macro shots of logos and stitching had 37% higher engagement than those without. Why? Because detail = credibility.
Camera Settings That Actually Work
Macro isn’t just about getting close. It’s about control. Here’s what you need to set right:- Aperture: Start between f/8 and f/16. Too wide (like f/2.8) and only a sliver of your logo or stitch will be sharp. Too tight (f/22) and diffraction softens everything. f/11 is often the sweet spot.
- Shutter Speed: Use 1/200 to 1/250 if you’re using flash. Slower than that and camera shake ruins the detail. Faster and you risk underexposing unless you crank up your light.
- ISO: Keep it at 100 or 200. Noise hides texture. A grainy leather grain looks like a defect. Your camera’s base ISO is your friend.
Manual mode isn’t optional here. Auto settings change between shots, and when you’re doing focus stacking (more on that later), inconsistency kills the result.
Focus: The Biggest Challenge
At 1:1 magnification, your depth of field might be less than a millimeter. That means if your camera focuses on the front edge of a logo, the back edge goes blurry. That’s not a flaw-it’s physics.Autofocus? Often useless. It hunts. It misses. It locks onto the wrong plane. Instead, use manual focus with Live View zoomed in 5x or 10x. Tap the screen to move your focus point precisely. If your camera has focus peaking, turn it on. Those colored outlines show you exactly where sharpness falls.
But what if your product has depth? Like a raised logo with a recessed background? Or stitching that runs up and down a bag? That’s where focus stacking saves the day.
Focus stacking means taking 5, 10, even 30 photos of the same subject, each focused on a slightly different depth. Then, software like Photoshop or Stack Focuser blends them into one image where everything-from the front of the logo to the last stitch-is razor-sharp. It’s not magic. It’s method. And it’s standard in professional product labs.
Lighting: Shape the Detail
Lighting isn’t about brightness. It’s about contrast.Hard light? Bad. It creates hot spots on metal or plastic that blind the camera. Soft light? Essential. Use a diffuser-white fabric, a light tent, or even a sheet of tracing paper over your LED panel. It turns harsh light into a gentle wrap.
For logos and stitching, side lighting is king. Place your light at a 45-degree angle to the product. That creates shadows in the recessed areas-deep valleys between stitches, the hollow behind an engraved letter. Those shadows define shape. Without them, everything looks flat.
Try this: Take one shot with light from the front. Then take one from the side. Compare them. The side-lit version will show texture you didn’t even notice before.
Choosing the Right Lens
Not all lenses are made for detail. You need a true macro lens-one that offers 1:1 magnification. That means the subject appears life-size on your sensor. A 50mm macro works for medium-sized products. A 100mm gives you more working distance, which helps when you need room for lights or a reflector. For jewelry or tiny electronics, a 60mm is often perfect.Extension tubes? They’re cheap. They let you get closer without buying a new lens. But they reduce light and make focus harder. Use them if you’re on a budget, but know the trade-offs.
Tilt-shift lenses? Overkill for most. They’re great for controlling focus planes, but unless you’re shooting watches with curved dials or complex 3D logos, you won’t need them.
Composition: Less Is More
Macro shots are intimate. They demand simplicity.- Use clean backgrounds-white, black, or neutral gray. No distractions.
- Let the logo or stitch pattern be the hero. Center it. Align it with the rule of thirds if it helps.
- Use negative space. A little room around the detail makes it breathe.
- For stitching, follow the line. If the stitch curves, angle your shot to follow that curve. Let the pattern guide the eye.
Don’t cram in multiple elements. One detail, one product, one story. That’s the power of macro.
Post-Processing: Bring Out the Hidden
You’ve shot it. Now refine it.- Crop tight. Remove any edge clutter. If the background isn’t clean, cut it out.
- Adjust white balance. A slightly warm or cool tone can make leather look richer or metal look cooler. Match the real product.
- Use clarity, not sharpening. Sharpening adds edge noise. Clarity enhances midtone contrast, making texture pop without artifacts. Slide it up gently-5 to 15% is usually enough.
- Lab color mode + unsharp mask. For logos with color gradients, convert to Lab color. Sharpen the Lightness channel only. It keeps colors true while sharpening detail.
Never overdo it. The goal isn’t to make it look better than reality. It’s to show reality clearly.
Logos: Make Them Speak
A logo isn’t just a mark. It’s a promise.For embossed logos, light from the side to create shadow depth. For engraved ones, use soft front light to reveal the carved detail without glare. If the logo has texture-brushed metal, matte finish, color fill-get close enough to show it. A flat logo looks cheap. A textured logo looks premium.
Color accuracy matters. If your brand uses Pantone 185C, your photo must match it. Use a color checker card in your setup. Adjust in post until the logo’s color reads true. No guesswork.
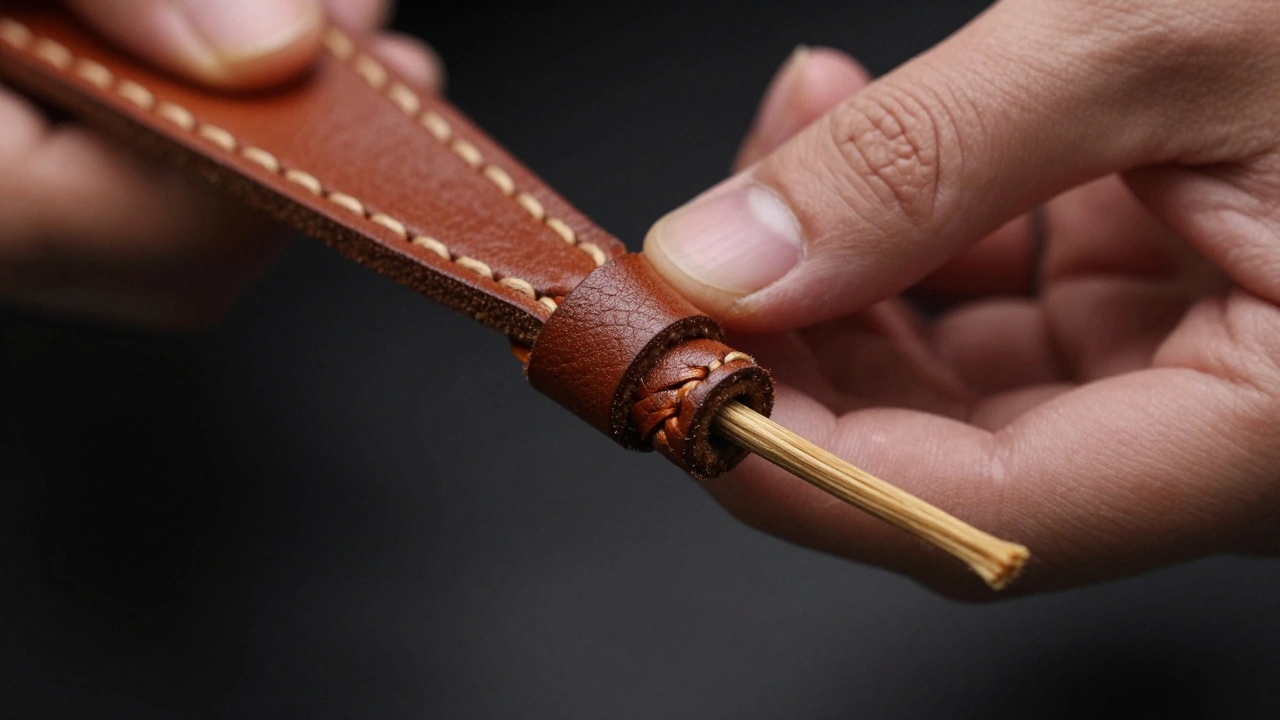
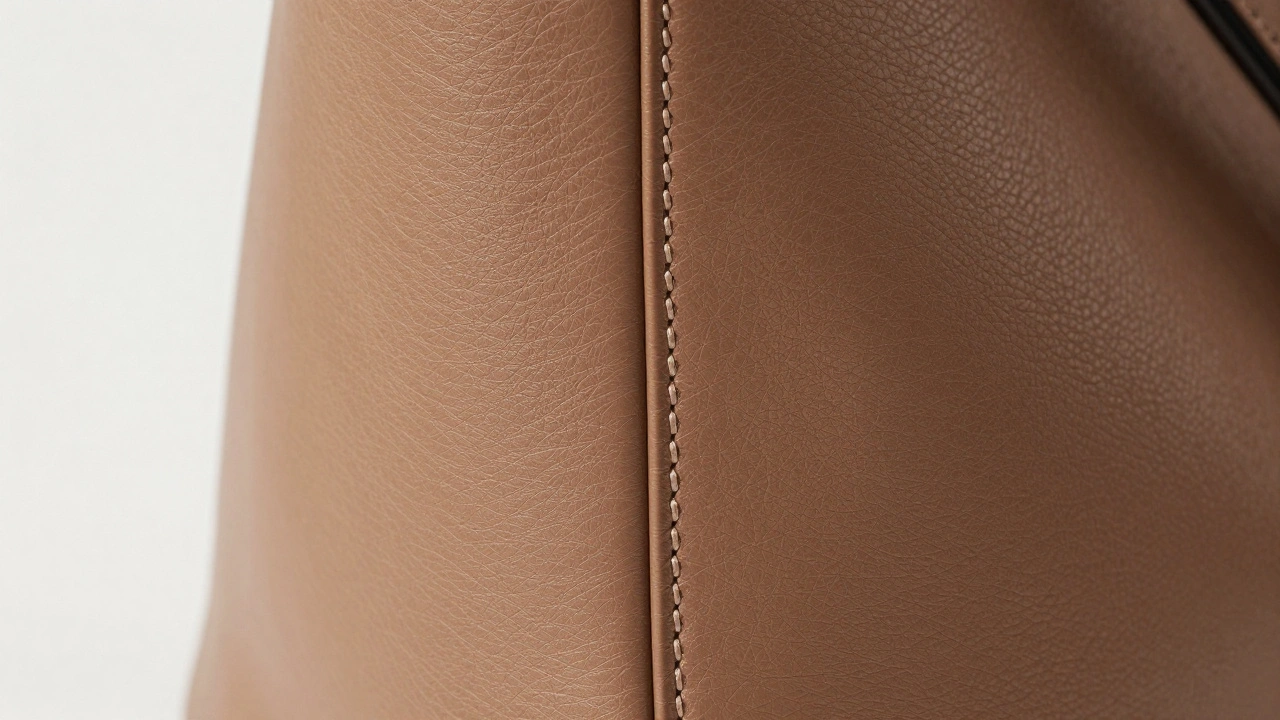
Stitching: Proof of Craft
Stitching is where quality speaks loudest.Look for:
- Even spacing between stitches
- Consistent thread thickness
- Neat knots on the back
- Thread color matching the material
Side lighting reveals the stitch depth. A slight shadow under each stitch shows it’s hand-sewn or machine-stitched with precision. If the stitches look flat, your lighting’s wrong. If they look messy, the product might be too.
Focus stacking is non-negotiable here. Stitches rise and fall. One shot won’t capture it all. Do the stack. Your customers will notice the difference-even if they can’t say why.
Texture: The Silent Salesman
Texture tells you what something is made of-and whether it’s good.Leather: Show the pores. Grain patterns. The slight variation from one area to another. Uniform texture? That’s high-quality. Patchy? That’s a red flag.
Metal: Brushed finishes should show directional lines. Polished surfaces should reflect light cleanly, not in blurry blobs.
Wood: Grain should flow naturally. No digital patterns. No repetition that looks fake.
Textiles: Weave tightness. Thread twist. Fiber density. All visible under macro. A coarse weave looks rugged. A fine weave looks luxurious.
Don’t just photograph texture. Let it tell the story. A rough canvas bag says durability. A smooth silk lining says luxury. Your photo should match that.
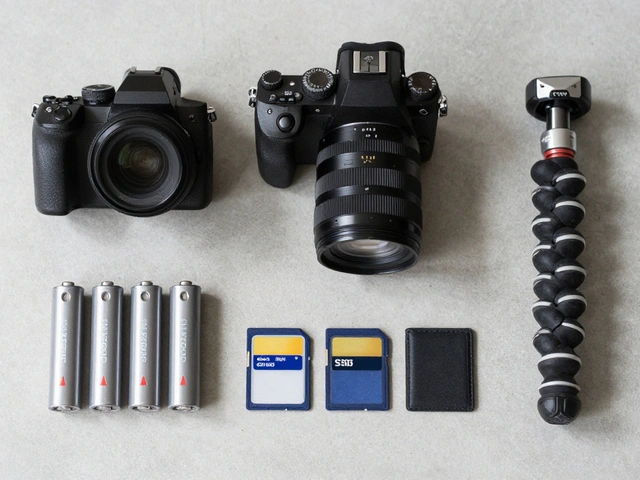
Equipment You Can’t Skip
- Sturdy tripod. Even a slight wiggle ruins macro detail. Carbon fiber is ideal, but any solid tripod works.
- Remote shutter or timer. No touching the camera when you shoot.
- Diffused lighting. LED panels with softboxes or a light tent. No direct flash.
- Focus rail (optional but helpful). For focus stacking, a motorized rail moves the camera in tiny, repeatable steps. Manual works too, but it’s slower.
You don’t need a $5,000 setup. But you do need stability, control, and patience.
Who Needs This?
Anyone selling products where quality isn’t obvious.- Jewelry sellers showing gem settings
- Leather goods brands showing stitching
- Watchmakers highlighting dial textures
- Electronics companies showing button finishes
- Craft beer labels with embossed logos
- Fashion brands with hand-sewn details
If your product’s value lies in its construction, not just its function-macro photography isn’t a luxury. It’s your competitive edge.
Do I need a macro lens to photograph product details?
You don’t absolutely need one, but you’ll struggle without it. A true macro lens gives you 1:1 magnification, meaning the product appears life-size on your sensor. Extension tubes can help you get closer, but they reduce light and make focusing harder. If you’re serious about product photography, invest in a 60mm or 100mm macro lens. They’re designed for this exact job.
Why is my logo blurry in the background even though I focused on it?
You’re likely dealing with shallow depth of field. At close distances-even with f/8-the area in focus might be less than a millimeter thick. If your logo has depth (like an embossed design), the front edge is sharp but the back edge isn’t. Use focus stacking: take multiple shots, each focused slightly deeper, then combine them. That’s how professionals do it.
Can I use natural light for macro product shots?
Yes, but it’s tricky. Natural light changes constantly. A cloudy day gives soft, even light-great for texture. Direct sunlight creates harsh shadows and hot spots. If you use natural light, shoot near a window with a white sheet as a diffuser. But for consistency across multiple products, artificial lighting with diffusers is far more reliable.
How do I avoid reflections on shiny surfaces like metal or glass?
Use polarizing filters on your lens and lights. They cut glare. Position your lights at angles where reflections won’t hit the camera. Black cards or foam boards placed around the product block unwanted reflections. And never shoot directly into a light source-angle it off to the side.
Is focus stacking hard to learn?
It’s not hard-it’s just methodical. You need a tripod, manual focus, and software like Photoshop or Stack Focuser. Take 5-15 shots, moving focus slightly deeper each time. The software does the rest. Most people get it right on their third try. Start with a simple object like a coin or a watch face. You’ll see the difference immediately.