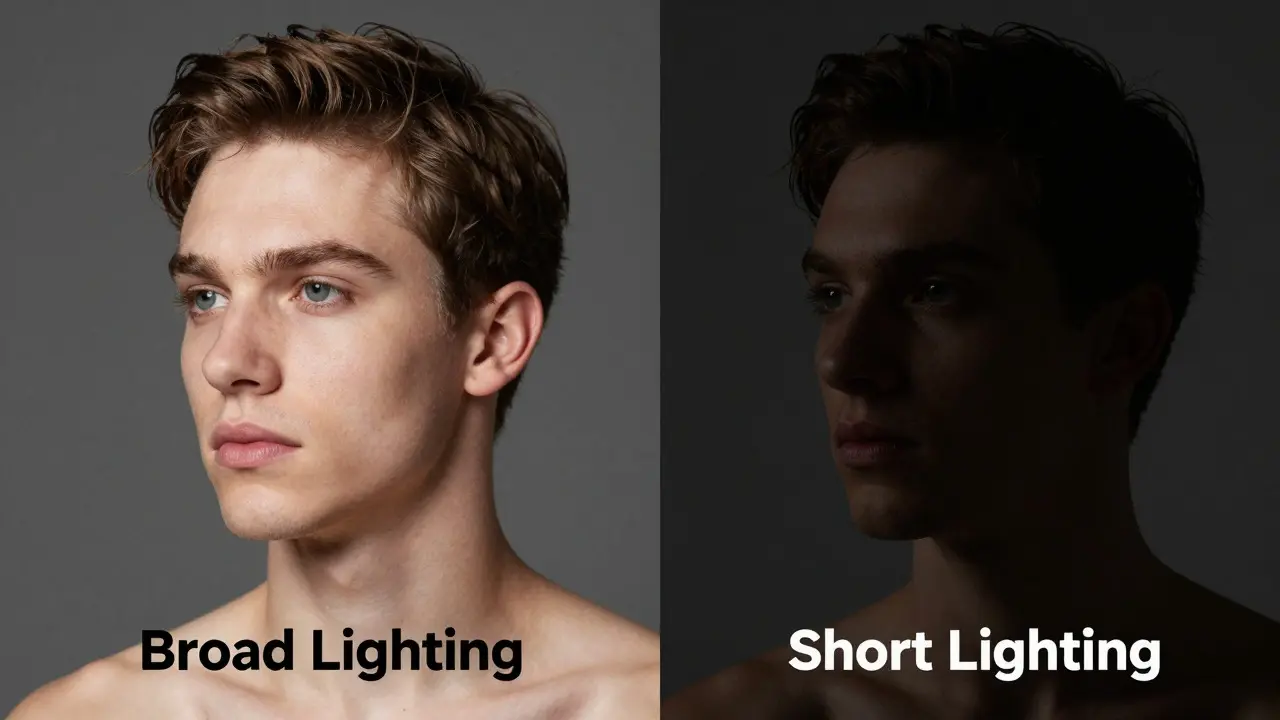
Ever look at a portrait and wonder why the subject’s jawline looks sharper in one shot but softer in another? It rarely comes down to the lens or post-processing. It’s about where you put the light. In professional Portrait Photography is a genre focused on capturing the likeness, personality, and mood of a person. While cameras capture pixels, lighting sculpts features. Two specific setups-Short Lighting and Broad Lighting-are the secret weapons for altering facial perception without touching a slider in Lightroom.
If you want to make a face look slimmer, you need to understand how shadows hide volume. This isn’t just theory; it’s geometry. By placing your key light on the shadow side of the face (short) versus the lit side (broad), you control which half of the face gets emphasized. Let’s break down exactly how these two techniques work so you can stop guessing and start sculpting with light.
The Core Difference: Shadow Side vs. Lit Side
To get this right, you first have to identify the “shadow side” of your subject’s face. Stand directly in front of them. Look at their nose. The side of the face that is turned slightly away from you-and therefore falls into shadow-is the shadow side. The side facing you, which catches the direct light, is the lit side.
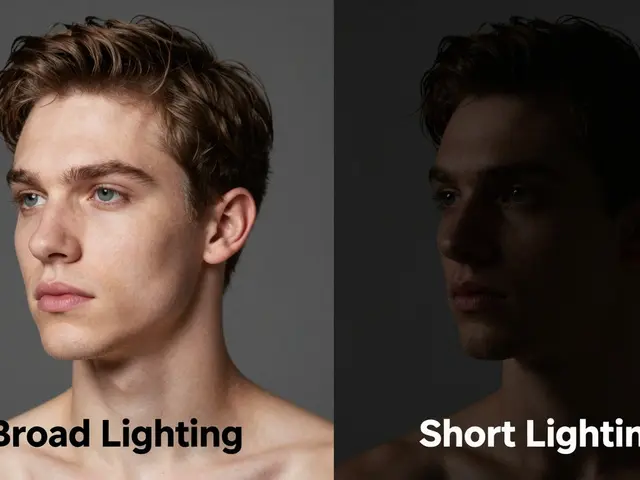
- Broad Lighting: Your main light source hits the lit side of the face. The shadow falls on the opposite side. This is the most natural setup because it mimics how we usually see people in daylight.
- Short Lighting: Your main light source hits the shadow side of the face. The shadow falls on the lit side. This creates a more dramatic, mysterious, or sculpted look.
Here is the critical rule for face-slimming: Light emphasizes, shadow conceals. If you want to minimize the appearance of cheekbones or jaw width, you want those areas to fall into shadow. If you want to highlight structure, you want them lit.
Why Short Lighting Slims the Face
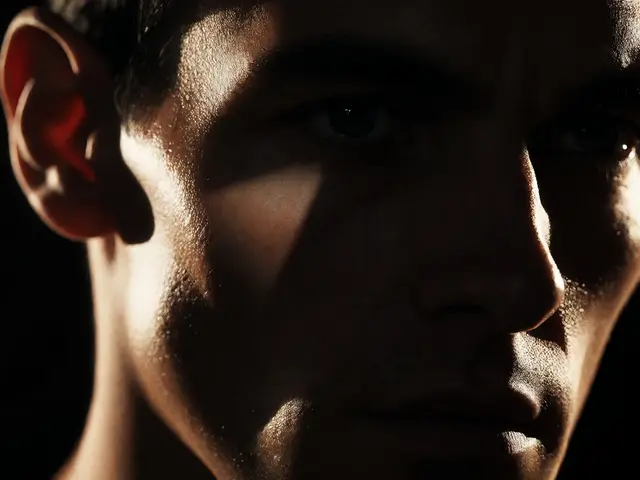
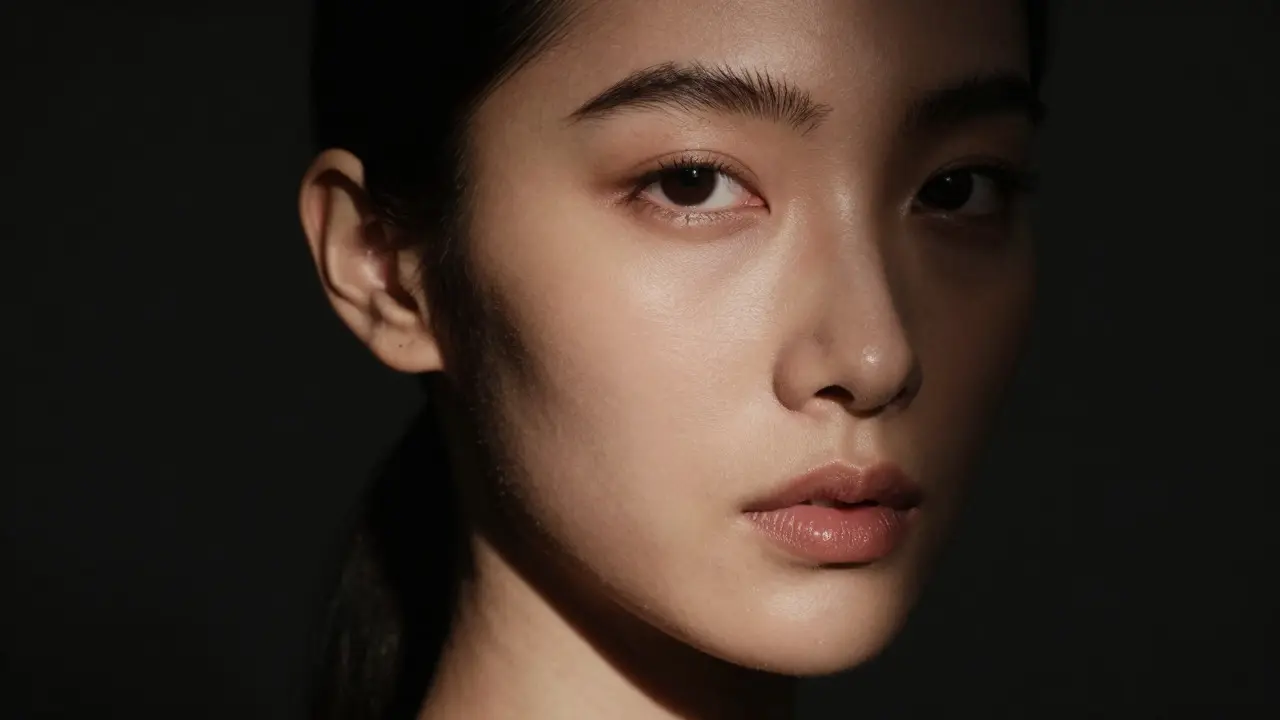
When you use Short Lighting is a portrait technique where the key light illuminates the side of the face furthest from the camera., you are effectively hiding the widest part of the subject’s head from the viewer’s eye. Since the light is coming from behind the subject’s shoulder (relative to the camera axis), the near side of the face-the side closest to the lens-drops into shadow.
Think of a human head as an egg. If you shine a flashlight on the far end of the egg, the near end goes dark. In a portrait, the “near end” is often where the cheekbones flare out the most. By keeping that area in shadow, you create a visual taper. The eye follows the light, so if the light is on the far side, the viewer’s attention moves inward toward the center of the face, making the overall silhouette appear narrower.
This technique is particularly effective for subjects with wider faces or prominent cheekbones. It adds depth and drama, turning a flat frontal view into a three-dimensional sculpture. However, be careful not to push the shadow too deep. You still need enough fill light to reveal detail in the eyes and skin texture. A ratio of 4:1 or 5:1 between key and fill light works well here to maintain contrast without losing all detail in the shadows.
When to Use Broad Lighting Instead
Does this mean Broad Lighting is a portrait technique where the key light illuminates the side of the face closest to the camera. is bad for slimming? Not necessarily. Broad lighting is the standard for commercial beauty shots, corporate headshots, and any scenario where you want the subject to look approachable and open. Because the light hits the near side of the face, it fills out the features, making the face appear fuller and more symmetrical.
If your subject has a naturally narrow face or deep-set eyes, broad lighting can actually be beneficial. It prevents the face from looking gaunt or overly angular. For example, if you’re photographing a model with high cheekbones who wants to look healthy and vibrant rather than severe, broad lighting softens the edges. It brings forward the details of the skin and hair on the near side, creating a sense of warmth and presence.
However, if the goal is strictly to reduce perceived width, broad lighting is the wrong tool. It highlights the maximum width of the face. Use it when you want to show off symmetry, clarity, and friendliness, not when you want to manipulate proportions.
Practical Setup: Positioning Your Key Light
Knowing the theory is great, but how do you physically set this up in a studio or on location? Here is a step-by-step guide to dialing in either style.
- Center Your Subject: Have your subject stand straight-on to the camera. Their nose should point directly at the lens. This ensures you have a clear reference point for left and right.
- Identify the Nose Axis: Imagine a line running through the tip of the nose. This is your central axis.
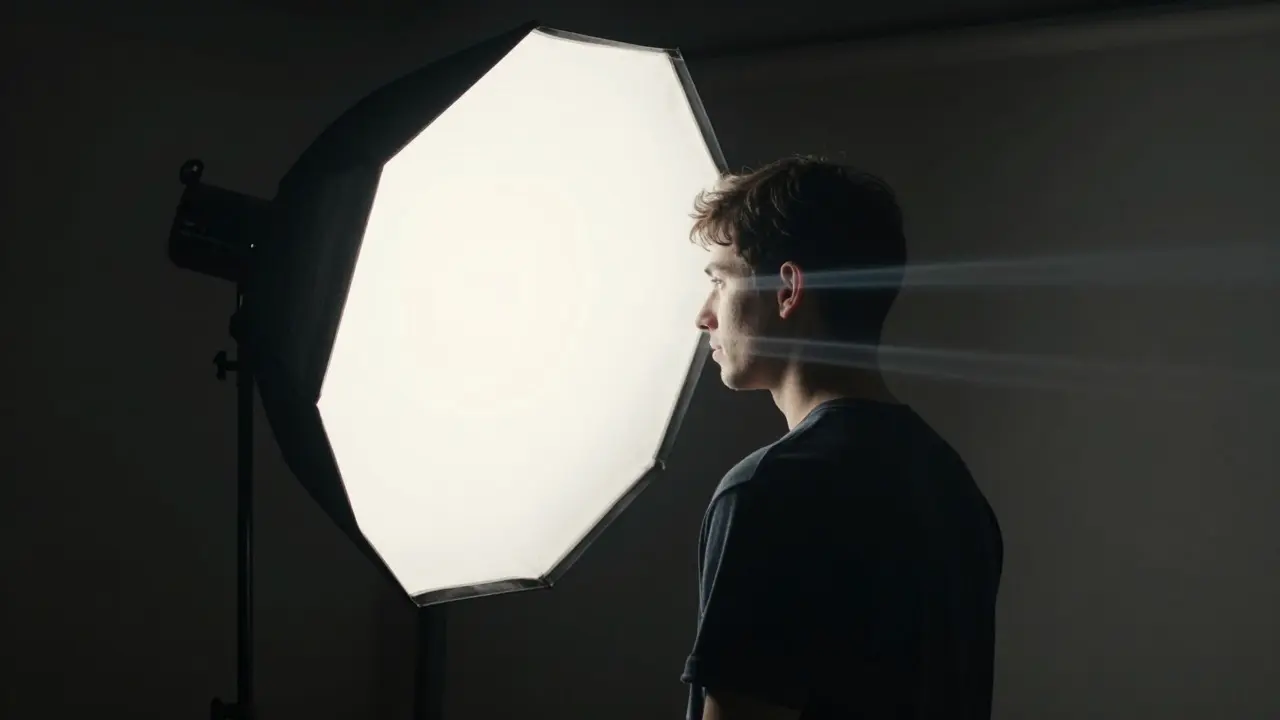
- For Short Lighting: Move your key light to the opposite side of the nose axis from the camera. If the camera is at 0 degrees, place the light at roughly 45 to 60 degrees *behind* the subject’s shoulder. The light should hit the far side of the face. Check the monitor: the side of the face closest to you should be in shadow.
- For Broad Lighting: Move your key light to the same side as the camera relative to the nose axis. Place it at 45 to 60 degrees. The light should hit the near side of the face. Check the monitor: the side of the face closest to you should be brightly lit.
A common mistake is moving the subject instead of the light. If you turn the subject’s body 45 degrees but keep the light centered, you’ve changed the pose, not the lighting pattern. To truly switch between short and broad, keep the subject facing the camera and move the light source around them.
Controlling Fill Light and Contrast
Lighting patterns don’t exist in a vacuum. The amount of fill light you use changes the final result significantly. Fill light bounces back into the shadows, reducing contrast. Too much fill, and your short lighting becomes just “flat lighting.” Too little, and you lose detail in the skin.
| Feature | Short Lighting | Broad Lighting |
|---|---|---|
| Visual Effect | Sculpted, dramatic, slimmer appearance | Open, friendly, fuller appearance |
| Best For | Wider faces, editorial, moody portraits | Narrow faces, corporate, beauty, casual |
| Shadow Placement | On the near side (camera side) | On the far side (away from camera) |
| Recommended Light Ratio | 4:1 to 8:1 (Higher contrast) | 2:1 to 4:1 (Lower contrast) |
| Emotional Tone | Mysterious, serious, artistic | Approachable, honest, warm |
For the face-slimming effect, aim for a higher contrast ratio. This makes the shadow on the near side deeper, enhancing the illusion of width reduction. Use a reflector or a second softbox on the opposite side to add subtle fill, but keep it dim. You want the shadow to remain visible but not pitch black.
Common Mistakes to Avoid
Even experienced photographers mess this up. Here are the top pitfalls that ruin the face-slimming effect.
- Ignoring Hair Volume: If the subject has voluminous hair on the near side, it will catch the light and widen the silhouette. Tuck hair behind the ears or use a gaffer tape to pin it back on the shadow side.
- Over-Rotating the Head: Turning the head too far past 45 degrees can distort the perspective. Keep the rotation subtle. The power comes from the light position, not extreme angles.
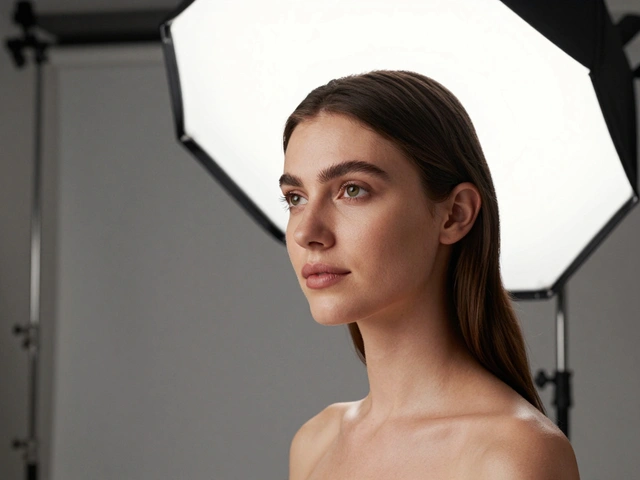
- Using Hard Light Without Diffusion: Hard light creates harsh transitions. For a flattering slimming effect, diffuse your key light. A large softbox or umbrella softens the shadow edge, making the transition from light to dark smoother and more elegant.
- Forgetting Eye Catchlights: Even in short lighting, ensure there is a catchlight in the eyes. Eyes without reflection look dead. Use a small bounce card or LED panel near the camera to add sparkle to the pupils.
Choosing the Right Technique for Your Subject
There is no single “best” lighting pattern. The right choice depends on the subject’s anatomy and the story you want to tell. Before you shoot, take a quick photo of your subject with flat, even lighting. Analyze their face shape.
If they have a round face, lean toward short lighting. It creates vertical lines and shadows that break up the horizontal width. If they have an oblong or heart-shaped face, broad lighting might balance things out by filling in the temples and cheeks. Always test both. Spend five minutes flipping the light from one side to the other. Compare the images on the back of your camera. Trust your eyes over your assumptions.
Remember, lighting is a language. Short lighting whispers, “Look at my structure.” Broad lighting shouts, “Here is who I am.” Choose the voice that fits the conversation.
What is the difference between short and broad lighting?
The difference lies in which side of the face receives the key light. In broad lighting, the light hits the side of the face closest to the camera. In short lighting, the light hits the side of the face furthest from the camera, leaving the near side in shadow.
Does short lighting always make faces look thinner?
Generally, yes, because it places the widest part of the face in shadow. However, it depends on the subject's specific features. If a subject has very high cheekbones, short lighting can accentuate them dramatically. It is best used to create a sculpted look rather than simply minimizing size.
How far should the key light be from the subject?
Distance affects the hardness of the light. For soft, flattering portraits, keep the light close to the subject (within 3-5 feet). For harder, more defined shadows, move the light further away (6+ feet). The angle (45-60 degrees) matters more than the exact distance for determining the pattern.
Can I use short lighting for corporate headshots?
It is less common but possible. Corporate headshots usually require broad lighting to appear approachable and neutral. However, if the client wants a creative or executive look that stands out, short lighting can be effective if kept moderate with sufficient fill light.
What is the ideal light ratio for short lighting?
A ratio of 4:1 to 8:1 is recommended. This provides enough contrast to define the shadow side without losing all detail in the darker areas. You can measure this with a light meter or adjust visually using the histogram on your camera.