Most beginners think post-processing is just about making photos brighter or adding a filter. But real editing is about storytelling. It’s how you take a raw capture and guide the viewer’s eye exactly where you want it to go. If you’re new to this, the sheer number of sliders in software like Adobe Lightroom or Capture One can feel overwhelming. You don’t need to master every tool on day one. You just need a clear path.
This roadmap breaks down the editing process into manageable steps. We’ll skip the fancy jargon and focus on what actually matters: building a consistent look, fixing technical flaws, and saving time. Whether you shoot portraits, landscapes, or street scenes, these principles apply across all genres.
The Foundation: Understanding Your Workflow
Before you touch a single slider, you need to understand your file types. Most modern cameras shoot in two main formats: JPEG and RAW. JPEG files are processed by the camera itself. They are smaller, ready to share immediately, but offer limited flexibility in editing. If you crush the shadows too hard or blow out the highlights, that data is often gone forever.
RAW files, on the other hand, are digital negatives. They contain all the light information captured by your sensor. When you open a RAW file in an editor, you aren’t changing the pixels directly; you’re applying non-destructive instructions. This means you can always go back and change your mind. For serious learning, start with RAW. It gives you room to make mistakes and recover details that JPEG would have lost.
- Organize first: Use software like Adobe Bridge or Lightroom Classic to import and catalog your images. Don’t edit straight from your memory card.
- Backup early: Editing is safe because it’s non-destructive, but your original files are not. Keep at least two backups of your RAW files.
- Clear your cache: Large catalogs slow down computers. Regularly clearing the preview cache keeps your editing session smooth.
Step 1: The Technical Fix (Global Adjustments)
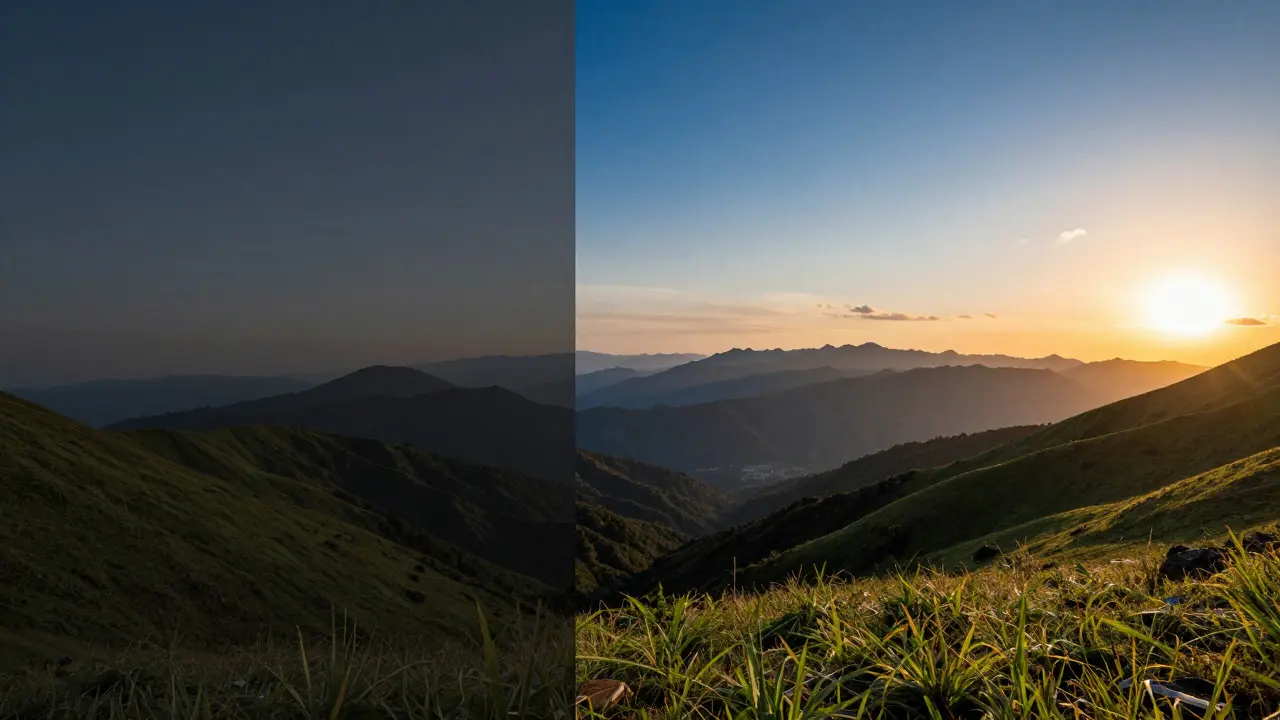
Your first job in any editing session is to fix the exposure and white balance. Think of this as cleaning the canvas before you paint. Start with the histogram. It shows you if you’ve clipped your highlights (white areas losing detail) or crushed your shadows (black areas becoming pure black).
Adjust the Exposure slider until the histogram sits comfortably within the frame. Next, tackle White Balance. If your photo looks too blue, add warmth (increase Kelvin). If it looks too orange, add coolness. Don’t rely solely on the auto settings. Look at the skin tones in portraits or the neutral grays in architecture to judge accuracy.
| Tool | Purpose | Common Mistake |
|---|---|---|
| Exposure | Overall brightness | Ignoring the histogram |
| Contrast | Difference between light and dark | Cranking it too high, causing banding |
| Highlights | Recovering bright areas | Leaving sky details blown out |
| Shadows | Lifting dark areas | Introducing noise in dark corners |
| White Balance | Color temperature and tint | Using presets without checking reality |
Once exposure and balance are set, adjust Contrast. This defines the mood. High contrast feels dramatic and punchy. Low contrast feels soft and dreamy. Finally, tweak Highlights and Shadows. Pulling down Highlights recovers detail in skies or clothing. Lifting Shadows brings out texture in dark backgrounds. Be careful not to lift shadows too much, or you’ll introduce grainy noise.
Step 2: Color Grading Basics
Now that the technical side is handled, you can start shaping the mood with color. Many beginners jump straight to HSL (Hue, Saturation, Luminance) sliders. While useful, a better starting point is understanding the Tint and Temperature sliders for global shifts, followed by selective adjustments.
Use the HSL panel to fine-tune specific colors. For example, if your landscape has dull greens, increase the Saturation of Green slightly. If the skin tones look muddy, adjust the Hue of Orange or Red to shift them toward a healthier peach tone. Luminance is particularly powerful. Lowering the Luminance of Blue makes skies deeper without oversaturating them. Raising the Luminance of Yellow makes sunsets pop.
Avoid over-saturating everything. Instead, aim for harmony. Complementary colors (like blue and orange) create visual tension and interest. Analogous colors (like green and yellow) create calm and unity. Pick a direction and stick to it. Consistency is more important than individual perfection when building a portfolio.

Step 3: Local Adjustments and Masking
Global adjustments affect the whole image. Sometimes, you need to change only a part of it. This is where local adjustments come in. In modern versions of Lightroom and similar tools, masking has become incredibly intuitive. You can use AI-powered masks to select skies, people, or objects automatically.
Common uses for local adjustments include:
- Sky Replacement/Enhancement: Select the sky and lower its exposure or saturation to prevent it from dominating the frame.
- Subject Brightening: Isolate your subject and raise the exposure slightly to make them stand out from the background.
- Vignetting: Add a subtle radial gradient to darken the edges, drawing the eye to the center.
Don’t overdo local edits. If the transition between edited and unedited areas is visible, it looks amateurish. Zoom in to 100% and check the boundaries. Feather the edges of your masks to ensure smooth blending.
Building Speed: Presets and Syncing
Editing hundreds of photos individually is exhausting. Once you find a look you like, save it as a preset. A preset captures your global adjustments, HSL changes, and sometimes even local masks. You can then apply that preset to other images in seconds.
However, presets are not magic. They are starting points. After applying a preset, you still need to check exposure and white balance for each individual shot. Lighting conditions change constantly. A preset that works for a sunny afternoon might ruin a cloudy morning shot.
Use the Sync feature to copy settings from one photo to others. Select your best-edited image, choose which settings to sync (usually Exposure, White Balance, and Tone), and apply them to the rest of the series. Then, fine-tune each image individually. This hybrid approach saves hours while maintaining quality.
Common Pitfalls to Avoid
Even experienced editors fall into traps. Here are the most common ones for beginners:
- Over-sharpening: Sharpening should be subtle. Too much creates halos around edges and makes images look gritty. Apply sharpening last, after resizing.
- Chasing Trends: Filters and trends fade quickly. Focus on developing your own style rather than copying Instagram aesthetics.
- Ignoring Noise: High ISO shots have noise. Use the Noise Reduction slider carefully. Too much smoothing turns faces into plastic.
- Forgetting Crop: Always crop before finalizing. Removing distracting elements improves composition significantly.
Next Steps for Your Learning Journey
Post-processing is a skill that improves with practice. Start small. Edit ten photos per week using this roadmap. Focus on one aspect at a time. Week one, master exposure and white balance. Week two, experiment with HSL. Week three, try local masking.
As you progress, explore advanced tools like Color Grading Wheels, Split Toning, and Dehaze. Consider learning Photoshop for pixel-level retouching, such as removing blemishes or replacing skies entirely. But don’t rush. A solid foundation in basic editing will serve you far better than a superficial knowledge of advanced tricks.
Your goal isn’t to make every photo perfect. It’s to make every photo tell the story you intended. With consistent practice and a structured workflow, you’ll develop an eye for detail and a speed that allows you to enjoy the creative process rather than dreading the technical grind.
Is post-processing necessary for all photographers?
While not strictly mandatory, post-processing is essential for professional results. Even the best cameras produce flat, underexposed images by design. Editing corrects optical flaws, enhances mood, and ensures consistency across a body of work.
What is the difference between RAW and JPEG editing?
JPEG editing is destructive; changes are permanent and limited by the compressed data. RAW editing is non-destructive; you are adjusting metadata that tells the software how to render the image. RAW offers greater dynamic range and color depth, allowing for more flexible corrections.
How long does it take to learn photo editing?
Basic proficiency takes about 2-4 weeks of regular practice. Mastering advanced techniques and developing a unique style can take months or years. Consistency is key; editing daily for 30 minutes yields faster results than sporadic weekend sessions.
Should I buy expensive editing software?
Not necessarily. Free options like Darktable or RawTherapee offer robust RAW processing capabilities. Paid software like Adobe Lightroom or Capture One provides better user interfaces, cloud integration, and AI features that save time. Choose based on your budget and workflow needs.
What is the best order for applying edits?
A standard workflow is: Crop and Straighten, Exposure and White Balance, Tone Curve and Contrast, HSL and Color Grading, Local Adjustments, Sharpening, and finally Export. Following this sequence prevents conflicts between tools and ensures a logical progression.