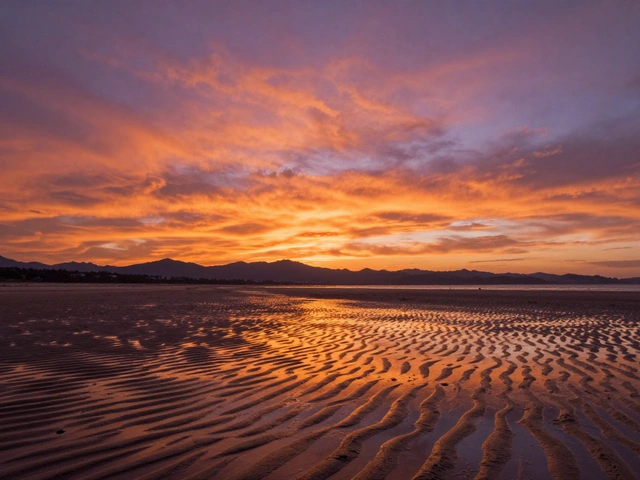
Ever taken a stunning wide-angle shot only to feel like it’s missing something? The sky is clear, the mountains are majestic, yet the image feels flat. This is usually because you ignored the most powerful tool in landscape photography: foreground interest. Without an element in the front third of your frame, viewers have no place to start looking, and the scene lacks depth.
A strong foreground element acts as an anchor. It grounds the viewer in the physical space, creates a sense of scale, and leads the eye deeper into the image. Whether it’s a jagged rock, a winding river, or a cluster of wildflowers, this element transforms a simple snapshot into a compelling story. In this guide, we’ll break down how to find, use, and master foreground elements to elevate your landscape work from good to great.
Why Your Foreground Matters More Than the Sky
We often get so focused on chasing sunsets or dramatic clouds that we forget the ground beneath our feet. But in composition design, the foreground is where the action happens. It provides context. A mountain range looks massive when placed behind a tiny hiker; it looks distant and abstract without that reference point. This is known as forced perspective, and it relies entirely on having something close to the lens.
Furthermore, the foreground establishes the mood. Wet rocks after rain suggest freshness and recent activity. Dry, cracked earth implies aridity and heat. By choosing the right foreground, you tell the viewer not just what they are seeing, but how they should feel about it. If your current images feel static, check if you’re leaving the bottom third of your frame empty or cluttered with irrelevant details. You need a deliberate choice here.
Identifying Strong Foreground Elements
Not every object works as an anchor. A strong foreground element needs contrast, texture, or shape that distinguishes it from the background. Here are the most reliable types of elements to look for:
- Rocks and Boulders: These provide hard edges and rugged texture. They work best when wet or covered in moss, adding color and detail. Avoid smooth, featureless stones unless they are uniquely shaped.
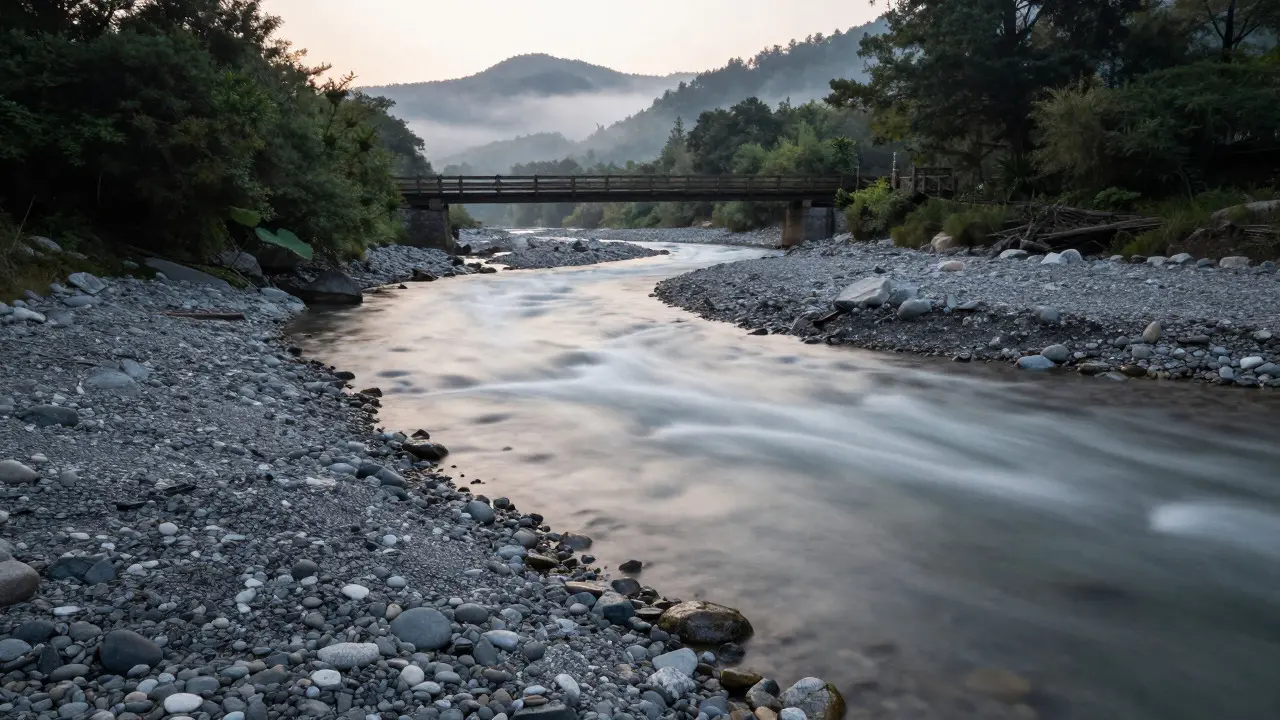
- Water Features: Rivers, streams, or even puddles create natural leading lines. Long exposures can turn moving water into silky textures that contrast beautifully with sharp, static backgrounds.
- Vegetation: Flowers, grasses, or tree branches can frame the shot. Be careful with busy foliage; select a single stem or a small cluster rather than a dense thicket.
- Man-Made Structures: Fences, bridges, or footpaths offer human scale and narrative. A weathered fence post can tell a story of time and decay that pure nature cannot.
- Sand and Gravel: Textured surfaces like rippled sand or pebbled beaches add tactile quality to the image. Look for patterns created by wind or water currents.
The key is simplicity. If the foreground competes with the main subject, it fails. The element should support the scene, not steal the spotlight.
Mastering Focus and Depth of Field
Once you’ve identified your foreground element, you face a technical challenge: keeping both the foreground and the distant background sharp. This is where hyperfocal distance comes in. Hyperfocal distance is the closest distance at which you can focus while keeping everything from half that distance to infinity acceptably sharp.
For most landscape photographers using full-frame cameras, focusing at roughly one-third of the way into the scene (often around 1.5 meters or 5 feet) with an aperture between f/8 and f/11 yields excellent results. However, if your foreground element is very close-say, within 30 centimeters-you may need to stop down to f/16 or f/22 to ensure it remains crisp. Keep in mind that diffraction can soften details at these smaller apertures, so test your specific lens to find its sweet spot.
If you’re shooting with a smartphone or a mirrorless camera with focus stacking capabilities, consider taking multiple shots at different focus points and blending them in post-processing. This ensures absolute clarity from the tip of a flower in the front to the peak of a mountain in the back.
Using Leading Lines to Guide the Eye
A static foreground element is good, but a dynamic one is better. Leading lines are paths that draw the viewer’s gaze from the edge of the frame toward the main subject. Think of a pier extending into the ocean, a road curving through a valley, or a stream flowing across a meadow. These lines create movement and tension, making the image more engaging.
To maximize this effect, position the line so it enters the frame from a corner or edge and points directly at your focal point. Avoid lines that exit the frame too quickly or lead nowhere. The stronger the line, the more immersive the experience. Even subtle lines, like the shadow cast by a tree branch, can guide attention effectively if aligned correctly.
Common Mistakes to Avoid
Even experienced photographers trip up over foreground composition. Here are the pitfalls to watch out for:
- Cluttered Frames: Too many objects in the foreground distract from the main subject. Edit ruthlessly. If an element doesn’t serve a purpose, move around it or crop it out.
- Poor Lighting Balance: If the sky is bright and the foreground is in deep shadow, you’ll lose detail. Use a graduated neutral density filter or bracket your exposures to balance the light.
- Ignoring Scale: Without a reference object, vast landscapes can feel two-dimensional. Always ask yourself: does this scene convey size? If not, find a foreground element that provides scale.
- Overlooking Texture: Flat, untextured foregrounds look boring. Seek out elements with rich detail-mossy logs, rocky shores, or patterned sand-to add visual interest.

Practical Workflow for On-Site Composition
When you arrive at a location, don’t immediately raise your camera. Spend five minutes scouting. Walk around the scene and look for potential anchors. Kneel down low to see how the ground interacts with the horizon. Check how the light hits different parts of the landscape. Often, the best foreground element is hidden until you change your angle.
Once you’ve found your element, compose the shot using the rule of thirds. Place your foreground interest in the lower third of the frame. Ensure it occupies enough space to be noticeable but not so much that it dominates. Take a test shot, zoom in on your screen, and verify that the focus is locked on the foreground element. Adjust as needed. This iterative process ensures you capture the depth and clarity you’re aiming for.
| Element Type | Best For | Technical Tip | Common Pitfall |
|---|---|---|---|
| Rocks | Dramatic, rugged scenes | Shoot when wet for added detail | Too large, blocking the view |
| Water | Leading lines, motion blur | Use slow shutter speeds (1-4 sec) | Reflecting harsh glare |
| Flowers | Soft, colorful accents | Focus manually to avoid bokeh issues | Busy, distracting colors |
| Fences | Human scale, narrative | Align with horizon for symmetry | Uneven, broken sections |
Frequently Asked Questions
What is the best aperture for keeping both foreground and background sharp?
Generally, f/8 to f/11 offers the best balance between sharpness and diffraction for most lenses. If your foreground is extremely close, you may need to go to f/16, but be aware that extreme stopping down can reduce overall image crispness due to diffraction.
How do I choose a foreground element that doesn't distract from the main subject?
Choose elements with simple shapes and contrasting textures. Avoid busy patterns or bright colors that compete with the main subject. The foreground should guide the eye, not stop it. If you’re unsure, try cropping the foreground out in post-processing; if the image still works, the foreground might be unnecessary.
Can I use artificial objects as foreground interest?
Yes, man-made objects like fences, boats, or buildings can add narrative and scale. However, ensure they fit the mood of the landscape. A modern car might clash with a serene, ancient forest, but a rustic wooden bench could enhance it.
What if there is no obvious foreground element at my location?
Look closer. Shadows, reflections, or textured ground can serve as subtle anchors. Alternatively, change your angle. Shooting from a lower perspective often reveals foreground details that are invisible from standing height. Sometimes, waiting for changing light can make existing elements more prominent.
Does foreground interest work with telephoto lenses?
It’s harder but possible. Telephoto lenses compress perspective, making it difficult to separate the foreground from the background. To use foreground interest with a long lens, you need a very distinct, high-contrast element close to the camera, such as a brightly colored flower against a dark, blurred background.