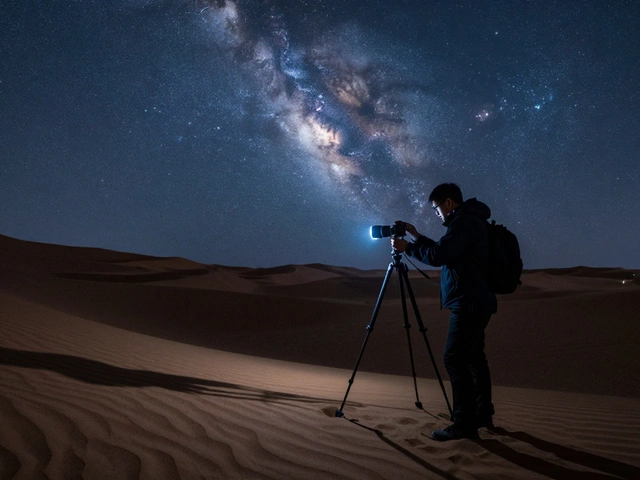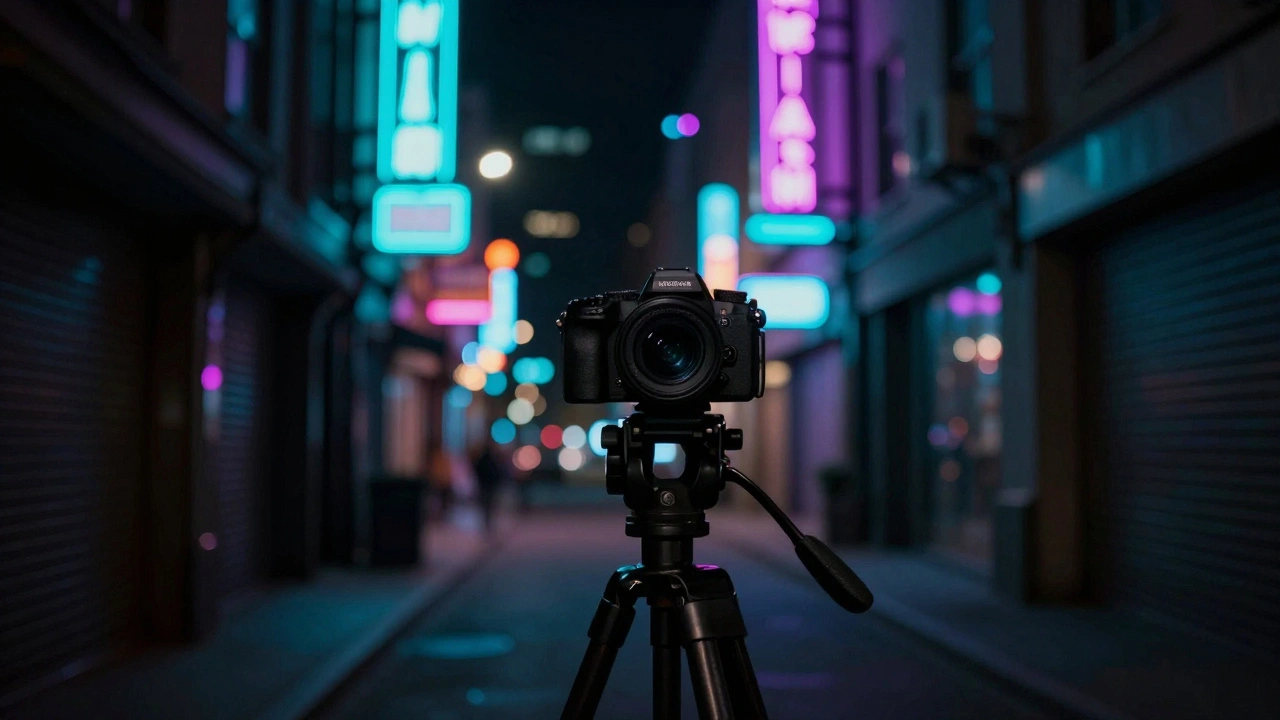
You've been there: you're standing under a canopy of stars or in the middle of a neon-lit city street, and your photos come out looking like they were sprayed with digital sand. You try to fix it in post, but suddenly your subject looks like a plastic doll. That's the classic struggle of night photography. The battle isn't just about getting enough light; it's about the tug-of-war between ISO is the sensitivity of a camera's sensor to light, which allows for brighter images in dark conditions but introduces digital noise at higher levels and the fine details that make a photo feel real.
The ISO Trade-off: Brightness vs. Grain
When you bump up your ISO, you aren't actually making the sensor more sensitive to light; you're amplifying the signal the sensor already has. Think of it like turning up the volume on a cheap radio-you hear the music louder, but you also hear the static. In digital photos, that static is noise. For those shooting urban landscapes or city streets, staying between ISO 200 and 800 usually keeps things clean. But if you're chasing the Milky Way or distant nebulae, you might push it to ISO 6,400. While modern cameras like the Nikon D750 is a full-frame DSLR known for its strong low-light performance and native ISO range up to 12,800 can handle these levels, there is a breaking point. Once you pass the native ISO limit, you're essentially amplifying a signal that's already degraded, which kills your image quality.
It's also worth noting that not all noise is the same. You have thermal noise-those annoying hot pixels that appear even at low ISO because the sensor gets warm-and white noise, which is the grain that appears as you crank up the sensitivity. The tricky part? Noise hits the dark areas of your photo first. This means your shadows lose detail much faster than your highlights, effectively shrinking the range of tones your camera can capture cleanly.
Blur is Worse Than Noise
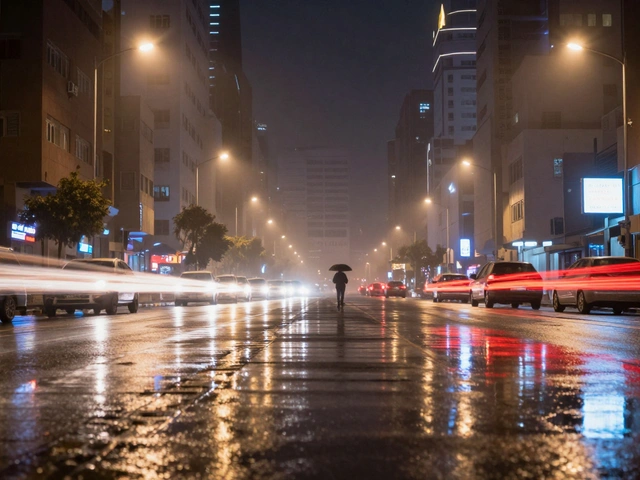
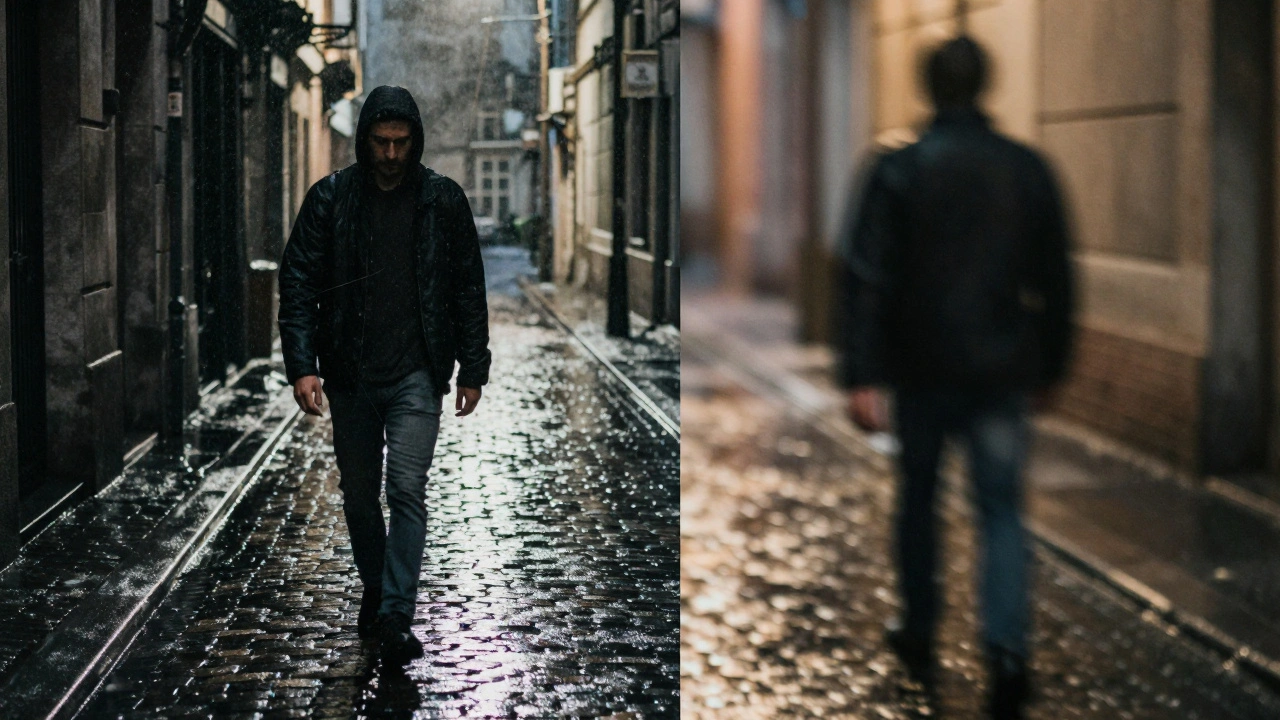
Here is a professional secret: if you have to choose between a noisy photo and a blurry one, choose the noise every single time. You can fix grain in post-processing, but you can't "un-blur" a subject that moved during a long exposure. This creates a critical decision point. Do you use a slow shutter speed and low ISO to keep the image pristine? That's great for a stationary building, but if you're shooting a person walking through a rainy alley, you'll end up with a ghost. To prevent this, professionals raise the ISO to allow for a faster shutter speed. It's a calculated risk-sacrificing a bit of cleanliness to ensure the image is actually sharp.
| Subject Type | Recommended ISO | Priority | Risk |
|---|---|---|---|
| City Architecture | 100 - 400 | Low Noise | Tripod required |
| Street Photography | 800 - 3,200 | Sharpness | Noticeable grain |
| Astrophotography | 1,600 - 6,400 | Light Capture | Sensor noise in shadows |
The Illusion of Sharpness
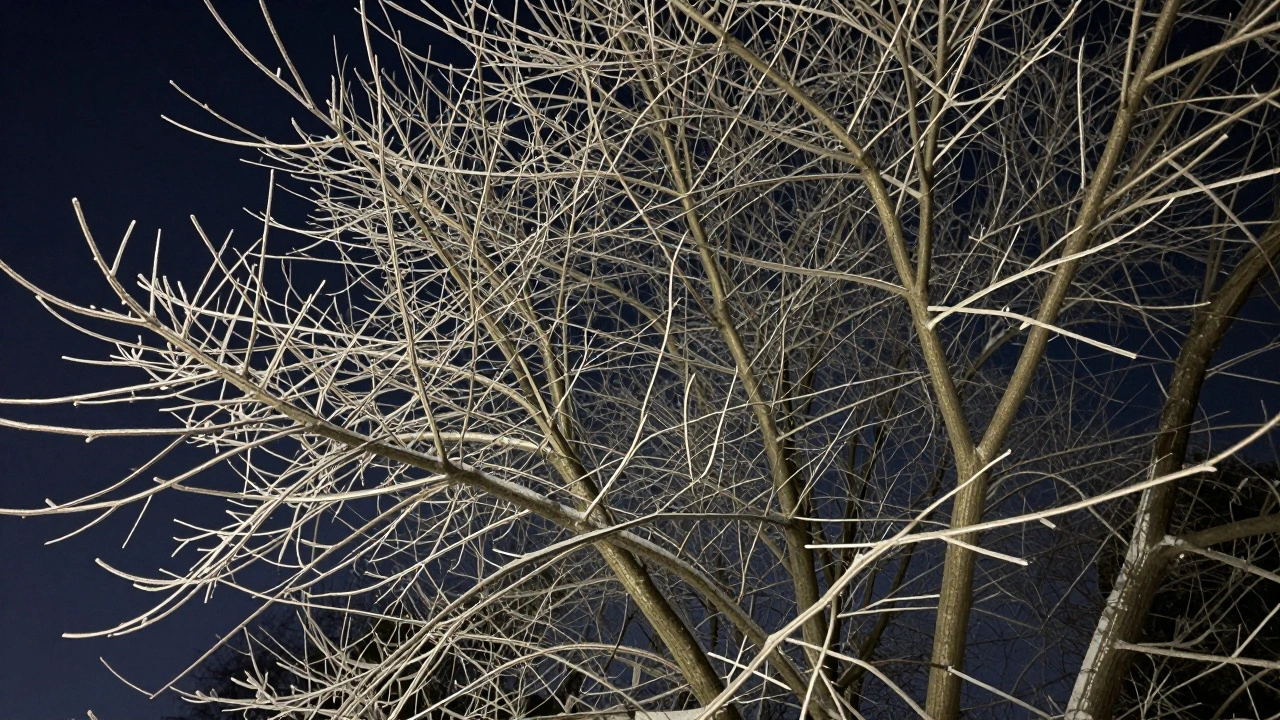
There is a common misconception that high ISO makes an image "blurry." Technically, it doesn't. However, heavy noise obscures fine details. Imagine photographing a winter tree; the tiny, delicate twigs can easily disappear into a soup of multicolored grain. When the grain becomes too thick, the human eye perceives the image as less sharp. This is where the danger of over-sharpening comes in. Many photographers try to "fight" the noise by cranking up the sharpening slider, but this often just highlights the noise itself, creating ugly white halos around your subjects. The goal isn't to make the image look surgically sharp, but to keep the details authentic.
Smart Noise Reduction in Post-Processing
The magic happens in the edit, but you have to be gentle. If you use Adobe Lightroom is a professional photo editing software that provides granular control over luminance and chrominance noise reduction and slide the Luminance correction past +75, you'll likely experience the "plastic effect." This is where skin looks like wax and textures like fur or fabric vanish completely. Instead, try a balanced approach. Set your Luminance noise reduction around +32 and bump the Micro Contrast to about +40. This preserves the grit and texture of the image, making the noise look more like organic film grain rather than digital artifacts. For Chrominance (color) noise-those random purple and green splotches-you can usually crank that slider to 100% without losing any real detail.
A pro tip for evaluating your work: zoom in to 100% on your screen. Don't judge the noise from a distance. By looking at the pixels, you can tell if you're actually removing noise or if you're accidentally erasing the very details you spent an hour capturing in the cold.
Advanced Workflows for Maximum Detail
If you're not satisfied with standard settings, you can try a hybrid strategy. Some shooters capture a burst of frames at high ISO to ensure they have a sharp image of the action, then switch to a low ISO with a longer shutter speed to capture a "clean" version of the scene. Using specialized AI-powered tools can also change the game. Running your files through DxO PureRAW is a specialized raw processing software that uses deep learning to remove noise and correct lens distortions before the image reaches the editor before moving them into Photoshop or Topaz can recover details that standard sliders simply can't touch. This allows you to push your ISO higher during the shoot, knowing that the software can surgically separate the noise from the actual image data.
Does a higher ISO always mean more noise?
Generally, yes. As you increase the ISO, you are amplifying the electronic signal from the sensor, which also amplifies the background electronic noise. However, the amount of noise depends on the sensor size; a full-frame sensor will produce significantly less noise at ISO 3,200 than a small smartphone sensor would at the same setting.
Why should I use ISO 6,400 instead of 12,800 for stars?
Operating one stop below the maximum native ISO often provides a much better balance. At ISO 12,800, you risk clipping the highlights in light-polluted horizons and introducing excessive grain that's nearly impossible to remove. ISO 6,400 usually captures enough light for nebulae while keeping the image manageable for noise reduction software.
What is the difference between luminance and chrominance noise?
Luminance noise is the grain-the bright and dark speckles that look like sand. Chrominance noise is color noise, which appears as unnatural purple, green, or red splotches in the dark areas of your photo. Color noise is usually much more distracting and is easier to remove without affecting image detail.
Can I completely remove noise from a night photo?
You can't completely "remove" it without also removing detail. The goal is noise reduction, not removal. Over-processing leads to a "smudgy" or "painterly" look. It's better to leave a little bit of grain and keep the texture than to have a perfectly smooth but lifeless image.
How does shutter speed affect the noise-detail balance?
They are inversely related. A longer shutter speed lets in more light, allowing you to keep the ISO low and the noise minimal. However, longer exposures increase the risk of motion blur. To avoid blur, you must shorten the shutter speed, which requires raising the ISO to maintain brightness, thereby introducing more noise.
Next Steps for Better Night Shots
If you're struggling with noise, start by auditing your gear. If you're using a tripod, keep your ISO at 100 and let the shutter do the work. If you're shooting handheld, experiment with the "minimum acceptable noise" threshold-find the highest ISO your camera can handle before the grain becomes a distraction. Finally, try shooting in RAW format if you aren't already; JPEG compression bakes noise into the image, making it much harder to clean up in post.