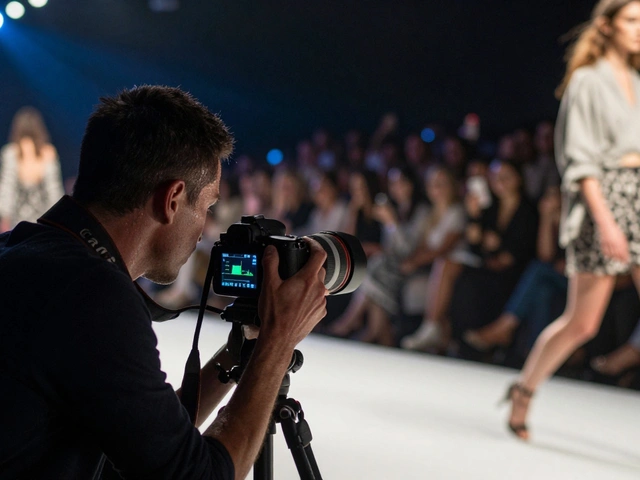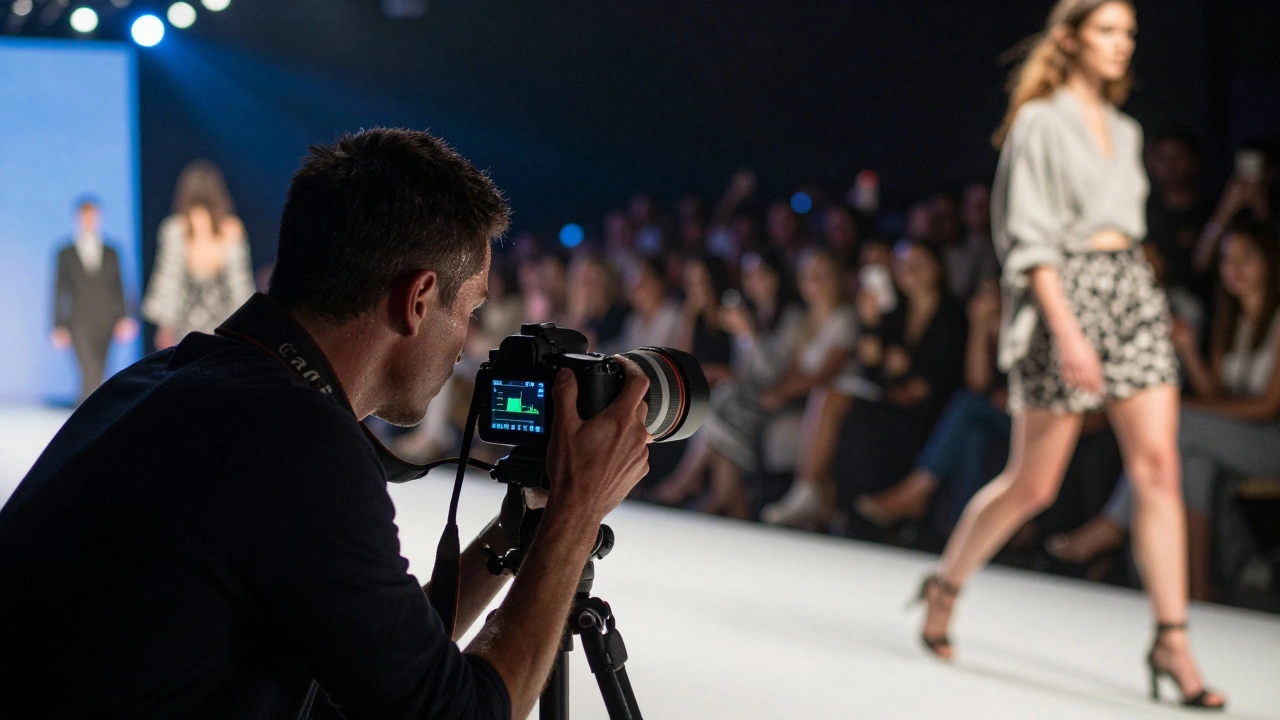
Every fashion show is a race against time, light, and movement. One moment, a model strides out in a silk gown lit by cool blue spotlights; the next, she’s in a black leather outfit under harsh tungsten lamps, and the photographer has to capture it all-without blur, without overexposure, without missing the shot. If you’ve ever tried shooting a runway show and ended up with blurry, orange-tinted, or underexposed images, you’re not alone. The truth is, runway photography isn’t about luck. It’s about knowing what to set, when to change it, and how to think fast. Most photographers assume they need expensive gear or perfect lighting. Neither is true. What you need is a clear plan, a few smart settings, and the confidence to adjust on the fly. Let’s break it down.
Start with Your Exposure Mode
Don’t just leave your camera on Auto. You’re not taking snapshots-you’re capturing motion in unpredictable light. The two best modes for runway work are Manual (M) and Aperture Priority (AV). Use Manual mode if the lighting stays steady. Once you find the right balance-say, f/4, 1/160s, ISO 800-you can lock it in and shoot without thinking. That’s ideal for shows with consistent lighting, like those lit by steady studio lights or video panels. But if the lights change every few minutes-maybe the designer uses colored gels, strobes, or dimming cues-switch to Aperture Priority with auto-ISO. Set your aperture to f/3.5 or f/4, then let the camera handle shutter speed and ISO. Just set a minimum shutter speed (like 1/125s) so the camera doesn’t go too slow and blur the model’s steps. A lot of photographers start with Aperture Priority, then switch to Manual once they’ve seen how the lights behave. It’s like learning to drive: you don’t start in fifth gear. You ease into it.Aperture: Keep It Wide, But Not Too Wide
You need a wide aperture-f/2.8 to f/4 is the sweet spot. Why? Three reasons: 1. It lets in more light, which helps keep your ISO lower. 2. It lets you use faster shutter speeds to freeze motion. 3. It blurs the background, making the model and their outfit stand out. Yes, f/1.4 lenses are tempting. But they’re risky. At f/1.4, the depth of field is razor-thin. If the model’s head is in focus but their shoe is out, you’ve lost the shot. At f/3.5 or f/4, you get enough sharpness from head to toe-even if they’re striding at an angle. One pro tip: if you’re shooting from the side, tilt your camera slightly toward the model’s torso. That way, even if the focus shifts, the most important part-the clothing-is still sharp.Shutter Speed: Freeze the Motion, Not the Light
This is where most people mess up. They think, "I need 1/500s to freeze motion." Not always. Without flash, you need at least 1/125s to 1/250s to stop the blur of walking legs. But if you’re using flash-yes, sometimes you can-you can go as slow as 1/60s. Why? Because the flash freezes the motion. The ambient light just adds mood. A common setup: f/4, 1/160s, ISO 800. That’s the baseline for most indoor runway shows. If the lights are dim, bump ISO to 1600. Don’t panic. Noise is better than blur. A grainy image of a perfect pose is worth keeping. A sharp, clean image of a blurry leg? Trash. One photographer at New York Fashion Week told me he shot at ISO 3200 for a dark, moody show with deep red lighting. The images had noise, but the color and emotion came through. He got published in three magazines.ISO: Don’t Fear the High Numbers
Modern cameras handle high ISO better than ever. ISO 1600? 3200? Go for it. The goal isn’t to avoid noise-it’s to avoid missed shots. Here’s the rule: Aperture and shutter speed matter more than ISO. If you have to choose between a noisy image and a blurry one, pick noise. You can reduce noise in editing. You can’t fix motion blur. And if you’re shooting in RAW? Even better. You can recover shadow detail and tone down highlights later. RAW files give you room to breathe.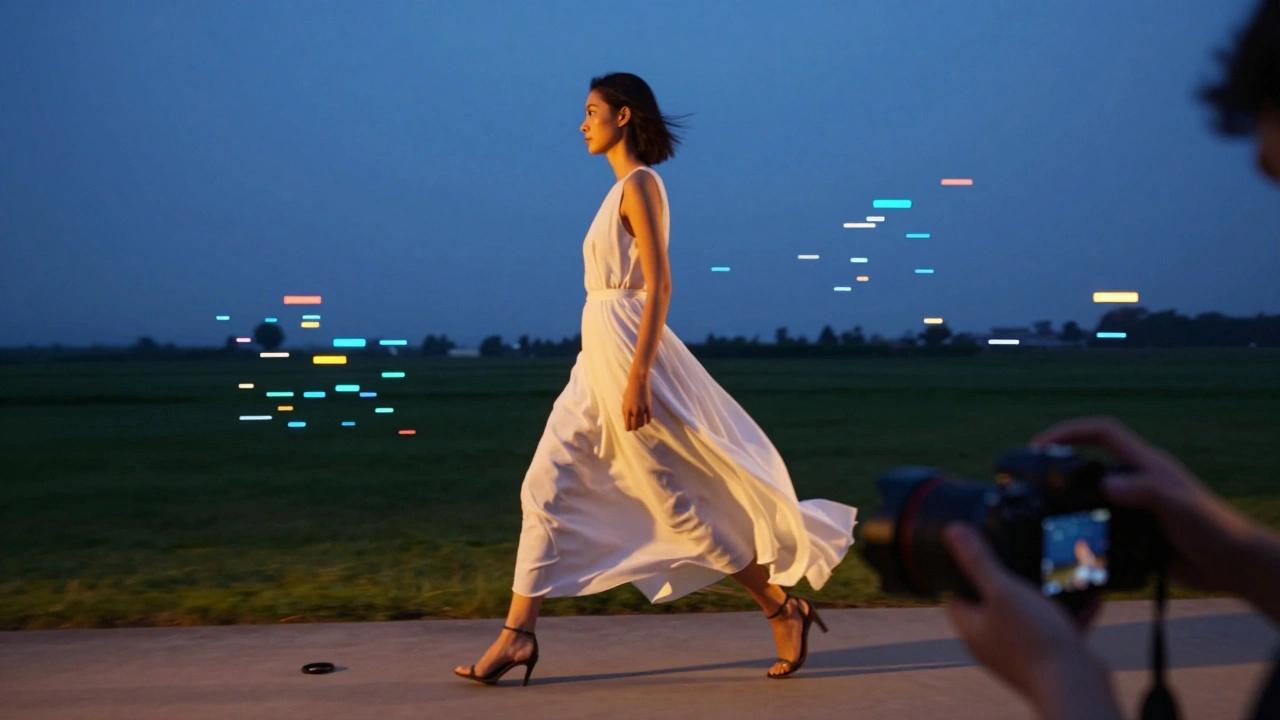
White Balance: Don’t Trust Auto
Runway lighting is rarely daylight. Most shows use tungsten (warm, orange) or LED (cool, blue). Auto white balance often overcorrects, making white dresses look yellow or blue. Set your white balance manually. Try 4800K to 5200K. That’s cooler than the default 5600K. Why? Because runway lights are usually warmer than daylight, and 5600K makes them look even more orange. At 5000K, the colors look natural. If you’re unsure, shoot in RAW. You can fix white balance in post. But if you’re shooting JPEG (and you shouldn’t be), set it before the show starts. And if you’re shooting in a venue with mixed lighting-say, blue spotlights and warm overheads-go with 5000K as a compromise. You can tweak it later.Flash: Use It Only If You Can
Many designers ban flash. Why? Because it kills the mood. The lighting is part of the art. A red spotlight on a red dress? Flash turns it into a white blob. If flash is allowed, use it smartly. Bounce it off a white card or ceiling. Don’t point it straight at the model. That creates harsh shadows and flat light. One trick: set your flash to -1.5 stops of exposure compensation. That way, it’s not overpowering-it’s just filling in shadows. You still get the drama of the room lights. And if you’re using flash? You can drop your shutter speed. 1/60s is fine. The flash freezes the motion. The slow shutter lets the ambient light linger, giving the image depth.Lens Choice: Wide, But Not Too Wide
Most runway photographers use a 16-35mm lens. Why? Because you’re often close to the catwalk, shooting from the side or front. A wide lens lets you capture the model’s full body and some of the set. But if you’re far back? You might need a 24-70mm. The key is flexibility. Bring two bodies if you can-one with a wide lens, one with a mid-range. Avoid telephoto lenses (70mm+) unless you’re shooting from a balcony. Even then, you’ll miss the details. Runway photography is about the clothes, the movement, the texture. A tight crop loses that.
Autofocus: Continuous Is Non-Negotiable
Turn off Single AF. Use Continuous AF (AI Servo on Canon, AF-C on Nikon/Sony). The model is moving toward you, away from you, and sideways. Your camera needs to track them. Set your focus points to Zone or Dynamic Area. Don’t rely on a single point. The model might turn their head, or their skirt might swing into the frame. Zone AF gives you room to breathe. And don’t forget: pre-focus if you can. If you know the model will walk past a certain spot, lock focus there, then wait. But only if the lighting is consistent. Otherwise, let the camera track.Exposure Compensation and Metering: Read the Histogram
Your camera’s light meter isn’t perfect. A white dress? It’ll try to make it gray. A black suit? It’ll try to make it gray too. Don’t trust the meter. Trust the histogram. Here’s how one pro does it: "Increase exposure until the highlights just touch the right edge, then back off 1/3 stop." That way, you keep detail in the whites without blowing them out. And if you’re shooting with flash? You’ll be adjusting exposure compensation constantly. A dark outfit? You might need +1. A light outfit? -1. It’s not magic-it’s practice.Pre-Show Prep: 30 Minutes Is Your Secret Weapon
Show up 30 minutes early. Not 15. 30. Use that time to: - Walk the venue. Find the best spots. - Test your settings under real lighting. - Check your battery. - Clean your lens. - Set your white balance. - Confirm your autofocus mode. I’ve seen photographers rush in five minutes before the show starts. They missed the first 10 models. That’s 10 outfits lost. Don’t be that person.Final Thought: It’s Not About Settings. It’s About Adaptation.
Every runway show is different. One might be bright and clean. Another is dark, smoky, with strobes every 10 seconds. You can’t memorize a set of settings and call it done. The best runway photographers don’t rely on presets. They rely on understanding how light, motion, and camera settings interact. They watch. They adjust. They shoot. So when you walk into that venue, don’t think, "What settings should I use?" Think, "What’s the light doing? Where’s the motion? What’s the story?" Then adjust. And shoot.Can I use auto-ISO for runway photography?
Yes, especially if you’re starting out or the lighting changes often. Use Aperture Priority with auto-ISO and set a minimum shutter speed of 1/125s. This lets you focus on composition while the camera handles exposure. But if the lighting is steady, switch to Manual mode for more control.
Why is f/4 better than f/2.8 for runway shots?
f/2.8 gives you a shallower depth of field, which can cause parts of the model to go out of focus-like their feet or hands-especially if they’re walking at an angle. f/4 gives you enough background blur to isolate the subject while keeping the whole outfit sharp. It’s a safer choice for consistent results.
Should I shoot in RAW or JPEG for runway shows?
Always shoot in RAW. Runway lighting is unpredictable, and you’ll need to adjust white balance, exposure, and shadows in post. RAW files preserve all the data, so you can fix mistakes without losing quality. JPEGs leave you with no room to recover blown highlights or crushed shadows.
Is it okay to use flash at fashion shows?
Only if the designer or event staff allows it. Many shows ban flash because it disrupts the lighting design. Even if allowed, use it sparingly and bounce it off a card or ceiling. Direct flash flattens the mood and can ruin the intended atmosphere of the show.
What’s the best way to handle different outfit colors?
Use spot metering or center-weighted metering and adjust exposure compensation on the fly. A white dress will trick your meter into underexposing, so dial in +1 EV. A black suit will make it overexpose, so use -1 EV. Practice reading your histogram before the show so you can adjust quickly.