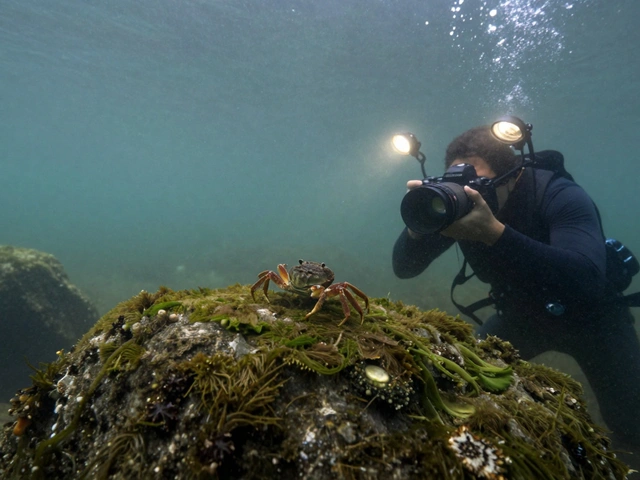
Underwater photography in clear tropical waters is often what people imagine-vibrant corals, darting fish, sunlight piercing through blue depths. But what if you’re diving in a quarry, a lake, or a river where the water looks clear from the surface but turns murky just a few feet down? That’s where most photographers hit a wall. The colors fade, the details vanish, and your images look like muddy smudges. The truth is, turbid water isn’t a barrier-it’s a challenge you can master with the right approach.
Why Turbid Water Kills Your Photos
Turbid water means suspended particles: silt, algae, plankton, or even fine sediment stirred up by your fins. These particles don’t just make the water look cloudy. They scatter light in every direction. When your strobe fires, instead of lighting your subject, it illuminates the particles between you and them. That’s backscatter-the annoying white dots that ruin otherwise perfect shots. Light doesn’t just fade underwater-it gets sliced apart. Red disappears first, then orange, then yellow. By 10 feet down in murky water, you’re left with mostly blue and green. That’s why your coral looks gray and your fish looks washed out. Even if you’re shooting in bright sunlight, the water itself is filtering out the warmth before it ever reaches your subject.Get Closer Than You Think
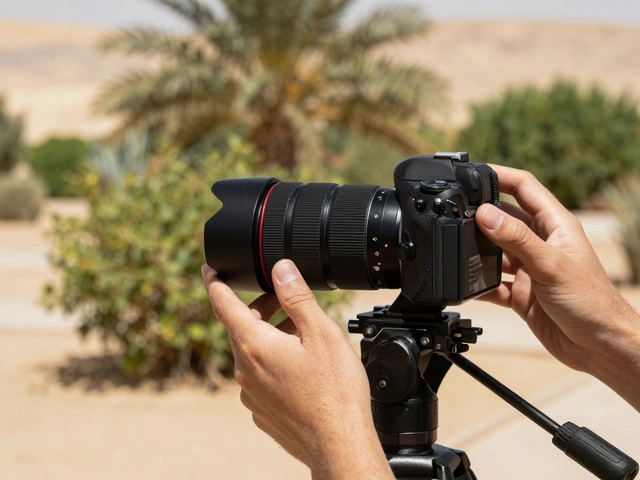
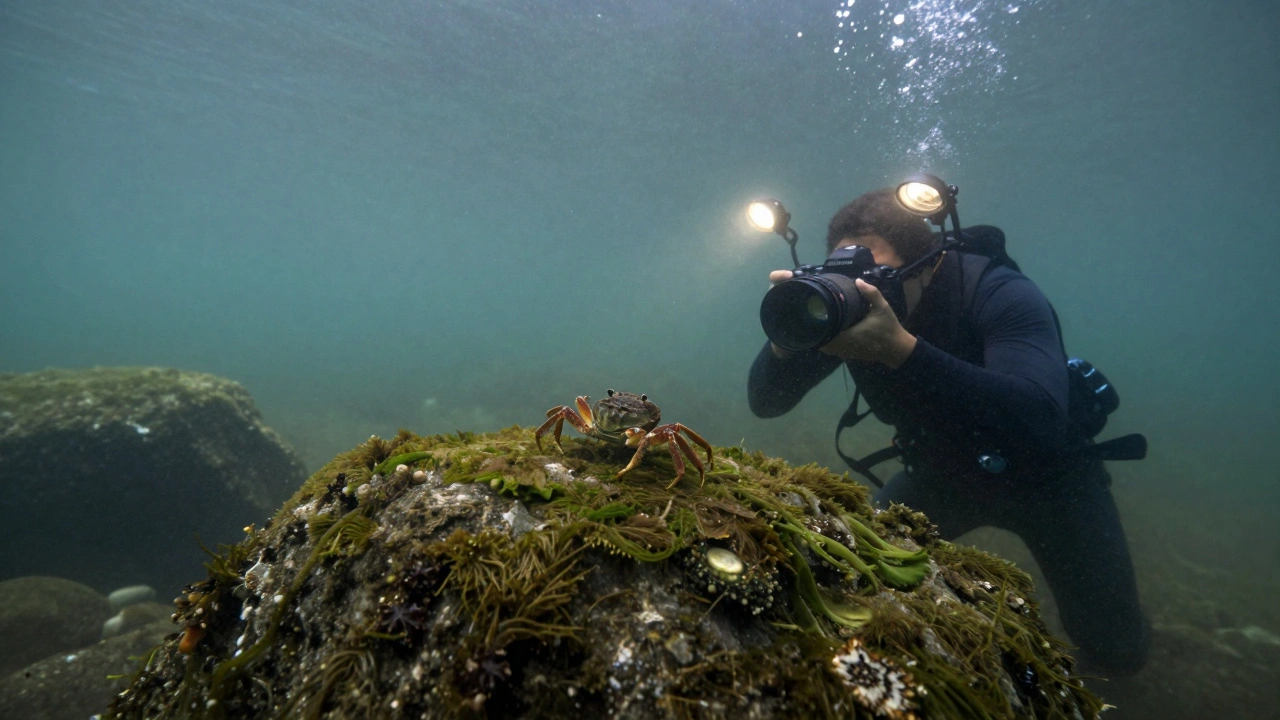
The single most effective thing you can do in turbid water is get physically closer to your subject. Not “close.” Not “kinda close.” Extremely close. Think inches, not feet. Why? Because every inch of water between your lens and your subject is a layer of particles scattering light. If you’re 3 feet away, your light has to travel through 3 feet of murk. If you’re 6 inches away, it’s only 6 inches. That difference cuts backscatter by 80% and brings back detail you didn’t even know was there. This is why wide-angle lenses aren’t optional-they’re essential. A 10mm to 28mm (35mm equivalent) lens lets you fill the frame with a subject that’s just a foot away. You don’t need to zoom in. You need to zoom out. Get the lens right up against the surface of that sponge, that crab, that sea anemone. The water between you and the subject becomes so thin it might as well not exist.Camera Settings That Actually Work
Forget presets. Turbid water demands manual control. For DSLR or mirrorless cameras:- ISO: 400-1,000 (up to 10,000 if you’re not using strobes and you’re deeper than 20 feet)
- Aperture: f/5.6 to f/8 (open it to f/4 or wider if you’re shooting in deep, dark water without flash)
- Shutter speed: 1/125s (start here; slow to 1/60s or even 1/30s if you’re shooting slow-moving subjects and need more light)
- Mode: Manual (auto modes will overexpose or underexpose depending on the murky background)
- ISO: Use manual mode if possible-set it to 1,600-10,000 if you’re not using flash
- Aperture: Use the widest available (f/2.8 or lower)
- Shutter speed: 1/60s to 1/250s (faster if you’re shooting movement, slower if you’re using natural light)
Lighting: Strobes vs. Video Lights
Strobes are powerful, but in murky water, they’re like a flashlight in a snowstorm. If you point them straight at your subject, you’ll light up every particle in between. The result? A glowing halo of backscatter. The fix? Move the strobes away from the camera. Use arms to position them 12-18 inches out to the sides and slightly behind your subject. This way, the light hits the subject first, then the particles, then the lens. You’re not lighting the water-you’re lighting the subject through the water. Video lights are quieter. They’re continuous, so you can see exactly how the light falls. They’re perfect for slow-moving subjects like tunicates or nudibranchs. You can use them to add subtle warmth without blowing out the background. Many photographers now use video lights as their primary source, especially in freshwater where color restoration is critical. Don’t rely on ambient light alone. Even at midday, sunlight fades fast. But if you’re shooting in bright sun, angle your camera upward. You’ll get a soft gradient from dark below to bright above-a moody, almost cinematic effect. It’s not the same as a reef, but it’s powerful in its own way.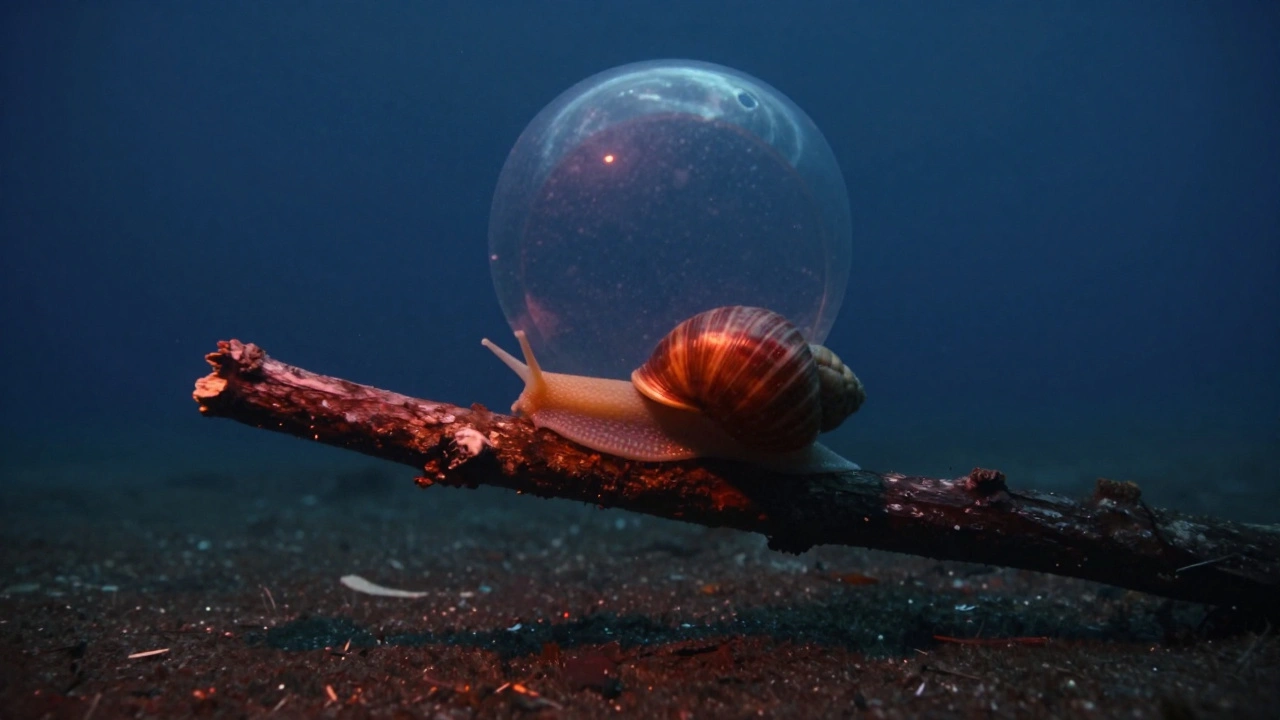
White Balance and Filters
Red filters are a myth in bright, clear water. But in murky freshwater? They’re lifesavers. A red or magenta filter placed over your lens pulls back the blue cast and restores warmth. It’s like starting your edit with a photo that’s already 75% there instead of 5%. But here’s the catch: if you’re using strobes or video lights, the filter becomes useless. Why? Because those lights bring back the full spectrum of color. The filter only helps when you’re relying on natural light. So if you’re shooting with artificial light, skip the filter. Let your camera’s white balance adjust. Shoot RAW. Then in post, nudge the tint slightly toward magenta and boost the reds in the shadows. You’ll recover tones that the water stole.Backscatter? It’s Not a Mistake-It’s a Signal
Backscatter isn’t just noise. It’s feedback. If you see a lot of it, you’re too far away, or your strobes are too close to the lens. If you see almost none, you’ve nailed the positioning. Try this: take a test shot with your strobes mounted normally. Then move them out 6 inches. Take another. Then 12 inches. Compare. The difference is startling. The goal isn’t to eliminate all backscatter-it’s to reduce it to a few faint dots that you can easily clean up in editing. A little is fine. Too much ruins the image.Choose Your Subjects Wisely
Don’t try to photograph a school of fish in murky water. They’ll dart, blur, and vanish. Instead, look for still life: a sponge clinging to a rock, a crab hiding under a log, a snail crawling slowly over algae. These subjects stay put. They let you set up your shot. They let you experiment with angles and lighting. In lakes and quarries, the best subjects are often the ones you’d overlook elsewhere: moss-covered stones, submerged branches, water plants swaying in the current. These aren’t just backgrounds-they’re compositions waiting to happen.
Pre-Dive Planning Matters
Underwater photography isn’t luck. It’s strategy. Before you even put on your mask, decide: What are you trying to capture? Where’s the light coming from? What’s your subject? Where will you position yourself? Talk to your dive buddy. Point out the spot you want to shoot. Plan your approach. In murky water, every second counts. You don’t have time to fumble with settings while a crab scuttles away.Equipment Tips That Save Shots
When you surface, water droplets cling to your dome port. They blur the top half of your image. Rub a tiny bit of anti-fog wax (specifically made for acrylic) over the dome before you dive. If you forget? Lick it. Yes, really. Saliva breaks the surface tension. It’s gross, but it works. Also, breathe slowly. Hold your breath when you take the shot. Even a slight movement from your chest can blur the image. Stability is everything.Not All Freshwater Is the Same
Cenotes in Mexico? Crystal clear. Springs in Florida? Like glass. These aren’t turbid. They’re more like tropical reefs-bright, colorful, full of light. In those places, use reef settings: low ISO, f/8, 1/250s, and strobes for color pop. But lakes, quarries, rivers with runoff? That’s the real test. That’s where the techniques above turn good photos into great ones.Final Rule: Get Close. Shoot RAW. Light Smart.
There’s no magic setting. No secret filter. No gear upgrade that fixes everything. The only thing that consistently works in turbid water is proximity. The closer you are, the less water you fight. The less water you fight, the more color and detail you recover. Use wide lenses. Adjust your ISO. Move your lights. Shoot RAW. Plan your shot. And don’t be afraid to shoot in gray, murky water. Some of the most powerful underwater images come from places where no one else bothers to look.Can I use my phone for underwater photography in murky water?
Phones are limited. Most underwater housings don’t allow manual control over ISO, aperture, or shutter speed. You can’t use external strobes or video lights effectively. While some phones have good low-light modes, they struggle with backscatter and color loss in turbid water. For serious results, use a DSLR or mirrorless with a wide-angle lens and external lighting.
Why does my underwater photo look green or blue even with a strobe?
Even with strobes, the water between you and your subject absorbs warm tones. If your strobe is too far away or you’re shooting in deep, murky water, the ambient light still dominates. Use video lights to add warmth, or adjust your white balance in post. Shooting RAW lets you correct color shifts without losing detail.
Do I need a dome port for turbid water photography?
Dome ports are best for wide-angle shots and minimizing distortion, especially when shooting near the surface. In turbid water, they’re still useful, but you’ll need to keep them clean. Water droplets on the dome cause blurry patches. Always treat the dome with anti-fog wax or saliva before diving.
What’s the best time of day to shoot in murky freshwater?
Midday, when the sun is highest. Sunlight penetrates water more directly, giving you the most natural light possible. Even in murky conditions, midday sun can create dramatic shafts of light that add texture and depth to your images. Avoid early morning or late afternoon-light levels drop too fast.
Can I fix turbid water photos in post-processing?
Yes, but only if you shoot RAW. You can boost contrast, recover shadows, and add warmth to reds and oranges. But you can’t create detail that wasn’t captured. If your subject is too far away or the backscatter is overwhelming, editing won’t save it. The best edits start with a well-exposed, well-lit, close-up shot.