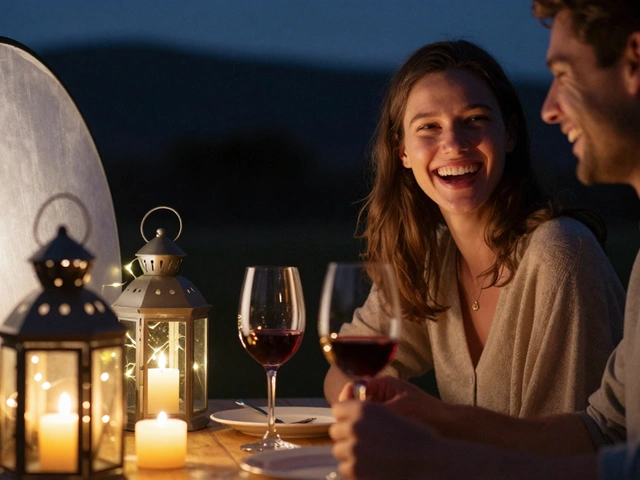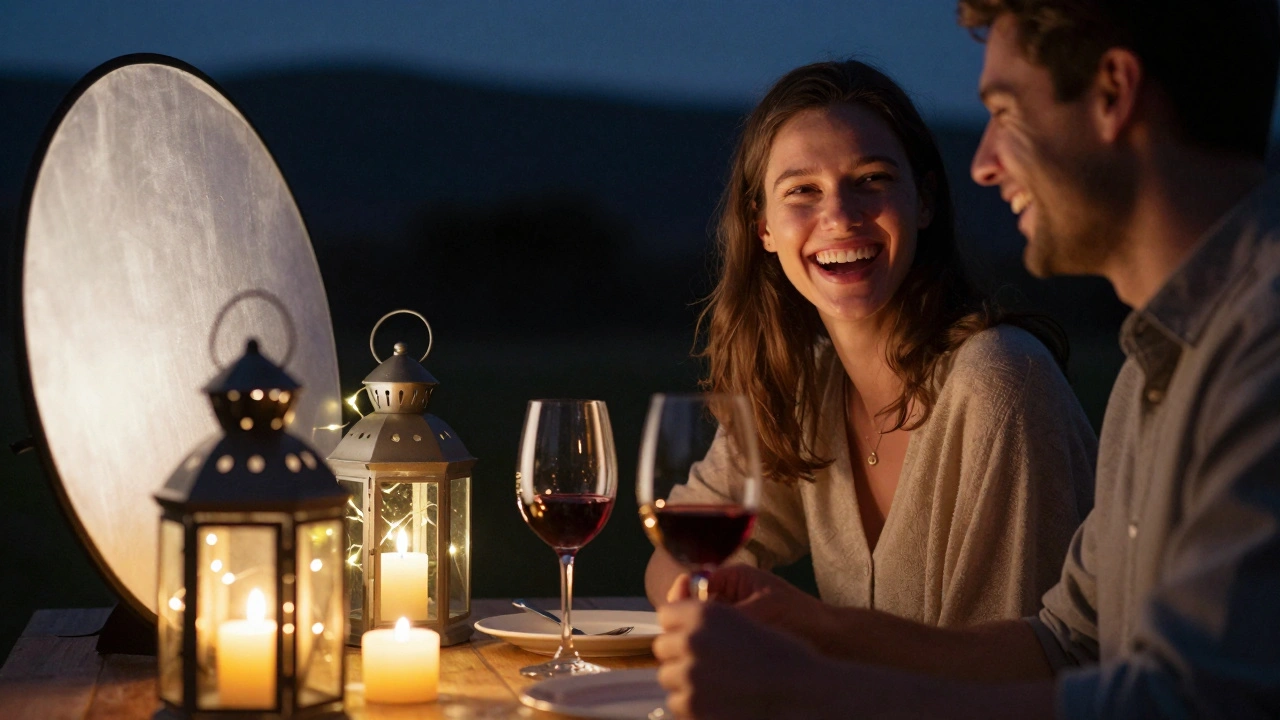
Why Your Candlelit Dinner Photos Look Grainy and Flat
You set the table with candles, dimmed the lights, lit a few fairy lights, and waited for that perfect moment-two people laughing over wine, the flicker of flame catching on glassware, the warmth of the scene. You snap the shot. But when you look at the photo later, it’s muddy, noisy, and the faces are lost in shadow. What went wrong?
The problem isn’t your camera. It’s not even your timing. It’s that you’re trying to capture something the human eye sees naturally but your sensor can’t handle alone. Candles don’t produce enough light to properly expose a modern digital photo. No matter how romantic they look in person, they’re not lighting a room-they’re decorating it.
Photographer Liam Smith tested this himself. He set up identical dinner scenes: one with only candles, another with candles plus subtle fairy lights. The candle-only shot looked like static on an old TV. The one with added light? Clean, detailed, warm. The candles gave the mood. The extra light gave the image.
The One Rule No One Tells You: Use Mixed Lighting
Forget the idea that true candlelight photography means using only candles. That’s a myth that ruins photos. The real secret? Candlelight for atmosphere, something else for exposure.
Use candles exactly where they shine: as decorative accents. Place them on the table, in holders, around the room. But don’t rely on them to light your subject. Instead, add tiny LED fairy lights shaped like candles. These give off the same warm glow, but output 10 to 20 times more light. They’re cool to the touch, battery-powered, and invisible in the final shot if placed behind glass or in lanterns.
Another option? Small halogen bulbs with diffusion. A single 50-watt bulb behind a white linen shade, placed off to the side, can lift shadows without looking like a studio flash. The key is to keep all your light sources the same color temperature-around 2200K to 2700K. Mixing cool and warm lights creates unnatural tones that kill the romantic feel.
Camera Settings That Actually Work in Low Light
Here’s what you need to set before you even pick up your camera:
- Shoot in RAW. Always. JPEGs throw away detail you’ll need later to fix exposure and noise.
- Keep ISO as low as possible. Start at 800. If the image is too dark, go to 1600. Above 3200, noise becomes unfixable-your photo will look like sandpaper.
- Use the widest aperture your lens allows. f/1.4, f/1.8, f/2.0. The wider, the more light you grab. Don’t worry about shallow depth of field. In candlelit dinners, you want the faces sharp and the background softly blurred.
- Slow down your shutter speed. Use 1/15s or slower if you’re on a tripod. Handheld? Don’t go below 1/60s unless you’re okay with motion blur.
These settings work together. You’re not trying to freeze motion-you’re trying to collect every bit of available light without introducing noise or blur.
Why Your Tripod Is Your Best Friend
Low light means slow shutter speeds. And slow shutter speeds mean camera shake. Even a tiny hand tremor turns a sharp face into a ghost.
Use a tripod. Not a fancy one. A cheap, sturdy one from a camera store works fine. Place it so the lens is at eye level with the diners. Lock it down. Use a remote shutter or the 2-second timer on your camera. No touching the camera when it’s taking the shot.
If you absolutely can’t use a tripod (say, at a crowded wedding reception), increase your shutter speed to 1/60s or faster, raise ISO to 1600-3200, and accept that some shots will be noisy. Then fix them in editing.
Reflectors: The Tool That Changes Everything
You don’t need expensive lights. A piece of white foam board from the craft store, held by an assistant or propped against a chair, can bounce light back onto a face and erase shadows.
Place it on the side opposite your main light source. White reflectors give soft, even light. Gold reflectors add warmth-great for skin tones. Silver? Use it sparingly. It’s too harsh for romantic scenes.
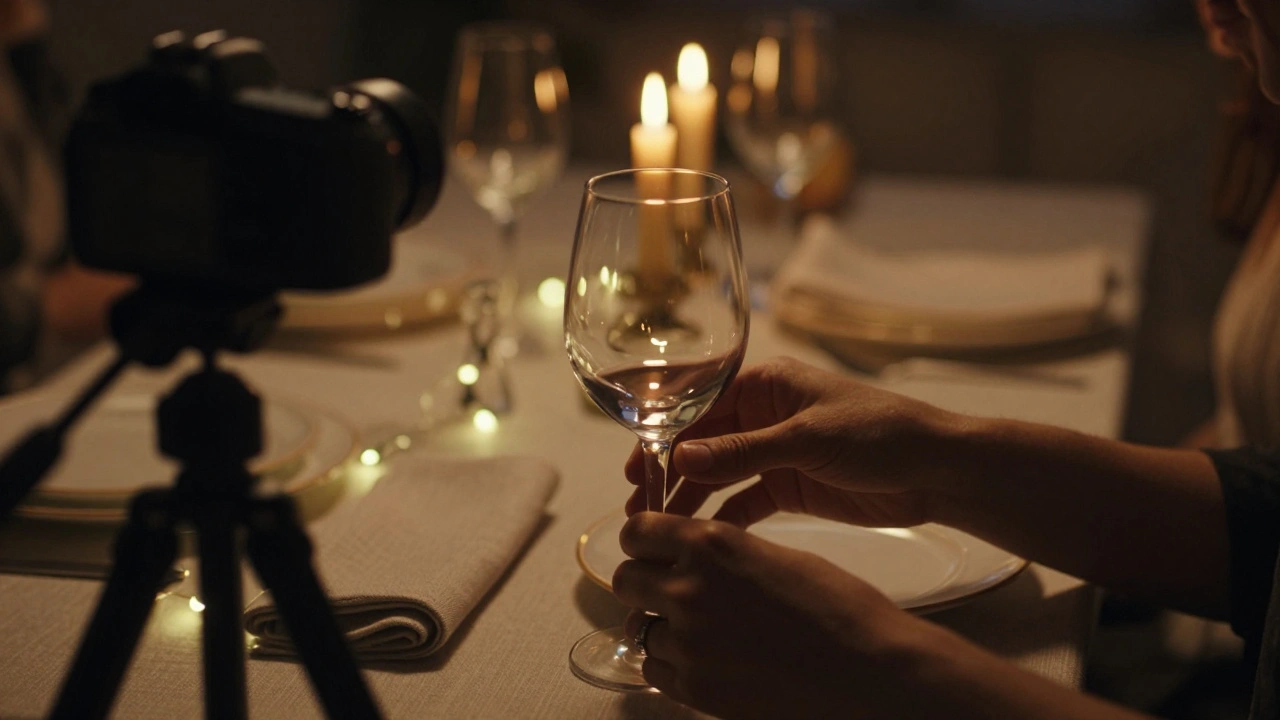
Even a small mirror can help. Point it at a candle and bounce the flame onto a glass of wine or a dessert plate. That tiny spark of light makes the whole image feel alive.
Positioning Is Everything
Light doesn’t travel far. The inverse square law means if you double the distance from a light source, you get only a quarter of the light. So don’t put your couple in the middle of the room.
Move them closer to a window with a soft curtain. Or position them near the edge of the table where fairy lights are clustered. If you’re shooting a single plate, get close. Fill the frame with the fork, the napkin, the candle, the hand reaching for the wine. Don’t try to capture the whole table. That’s where the light dies.
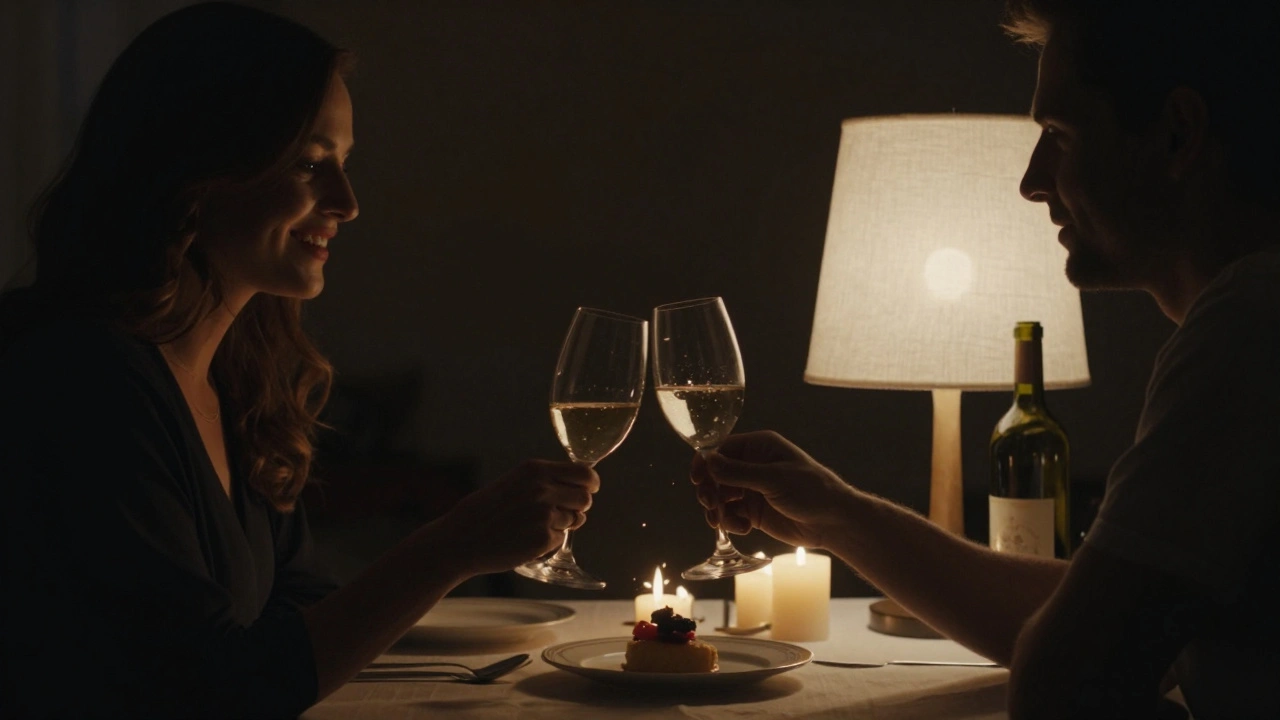
And if you’re shooting a group? Focus on pairs. Two people sharing a bite. A toast. A glance. Those moments are intimate. They’re easier to light. And they’re the ones people remember.
Let the Shadows Do Their Job
Here’s the counterintuitive part: don’t fight the dark. Embrace it.
Some shadows make the scene feel real. A dark corner behind the couple. A pool of shadow on the tablecloth. A silhouette of a wine bottle. These aren’t mistakes-they’re mood.
Think of it like a painting. Rembrandt didn’t light his subjects with floodlights. He used one source, and let the rest fall away. That’s what you’re going for. Use distance to create depth. Place one person closer to the light. Let the other fade slightly into shadow. The contrast tells a story.
Post-Processing: Fix What You Can’t Control
RAW files give you room to breathe. Open them in Lightroom or Capture One. Start with these adjustments:
- Boost exposure by +0.5 to +1.0 stops.
- Lower shadows slightly to bring out detail without crushing blacks.
- Use the noise reduction tool. Start with Luminance at 25, Color at 30. Don’t overdo it-you’ll lose texture.
- Warm up the white balance by +5 to +10. Candles are yellow. Make sure your photo doesn’t look cold.
- Use the brush tool to gently brighten faces, hands, and glassware. Don’t touch the background.
Don’t try to make it look like daylight. Make it look like candlelight-with better exposure.
What Clients Don’t Tell You (And What You Need to Know)
People hire you for candlelit dinners because they want the feeling, not the technical perfection. But they don’t realize how hard that is to capture.
Before the event, ask: "How many candles are we talking? Are they real flames or LED?" If it’s real flames, ask if you can do a quick test shot before the guests arrive. Even 10 minutes helps you see how the light falls.
If you can’t test? Bring your own fairy lights. Set them up discreetly. Explain to the client: "I’m adding a tiny bit of extra light so your photos don’t look blurry. It won’t be visible in person." Most will say yes.
And if they say no? You’ll still get great shots. You’ll just need to rely more on position, reflectors, and post-processing.
Final Tip: Don’t Shoot the Whole Room
One of the biggest mistakes? Trying to capture the entire dining table, the chandelier, the windows, the people, the candles-all at once.
That’s too much. Too dark. Too messy.
Instead, shoot tight. Focus on hands holding glasses. A fork lifting pasta. A smile caught in candlelight. A napkin tucked into a collar. These details tell the story better than a wide shot ever could.
And when you do shoot wide? Make sure there’s a clear light source near the center of the frame. Otherwise, it’s just a dark blur with a few glowing dots.