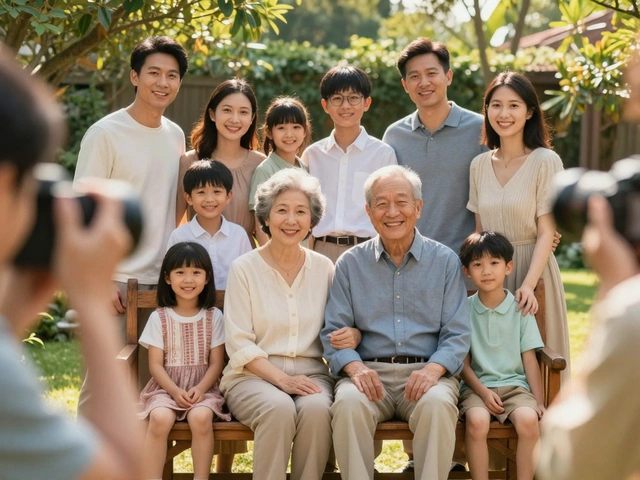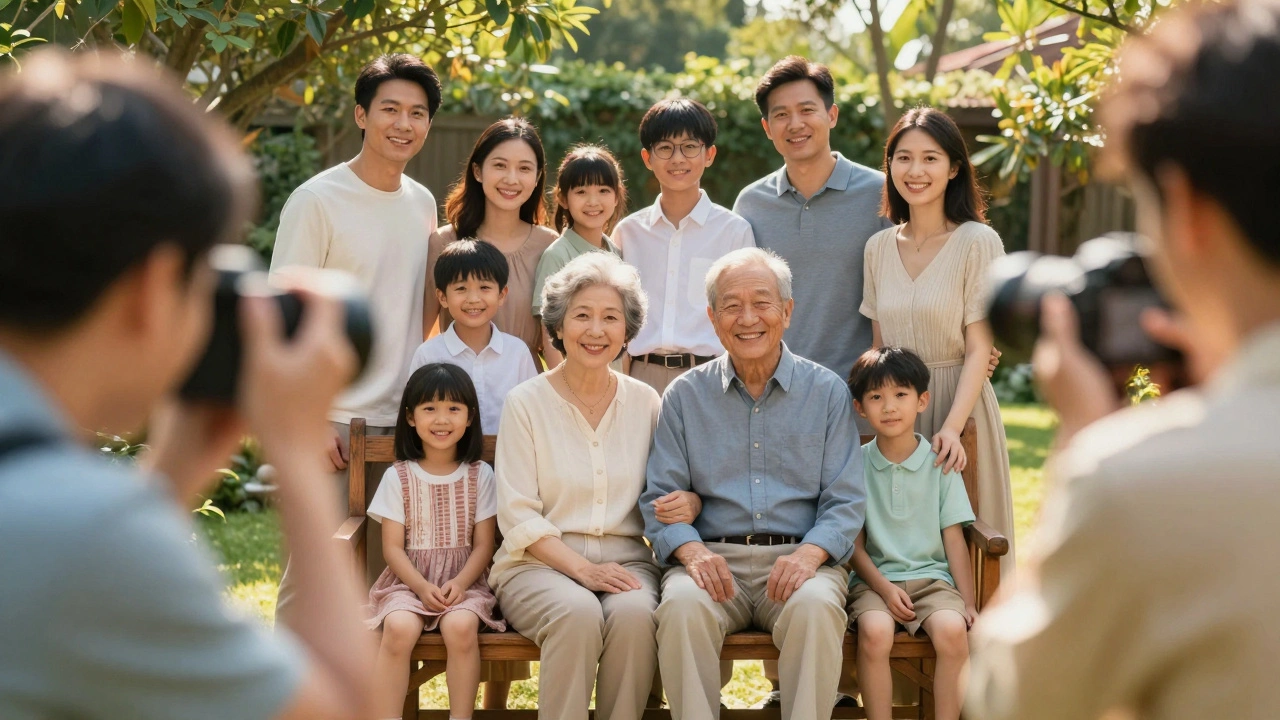
Ever tried to take a photo of ten people and realized that the moment you hit the shutter, one person blinked, another looked away, and the toddler decided to have a meltdown? It's the classic struggle of group photography. Getting a single person to look great is one thing, but managing a crowd requires a mix of technical precision and a bit of crowd control. Whether you're shooting a chaotic extended family reunion or a professional corporate team, the goal is the same: everyone in focus, everyone looking their best, and a composition that feels natural rather than forced.
| Group Setup | Recommended Aperture (f-stop) | Key Focus Goal |
|---|---|---|
| Single Row (Parallel) | f/2.2 - f/4.0 | Uniform sharpness across the line |
| Multiple Rows (Staggered) | f/3.2 - f/5.6 | Depth of field covering front to back |
| Large Crowd (15+ people) | f/5.6 - f/8.0 | Maximum clarity for all faces |
The Technical Foundation: Stopping Down for Sharpness
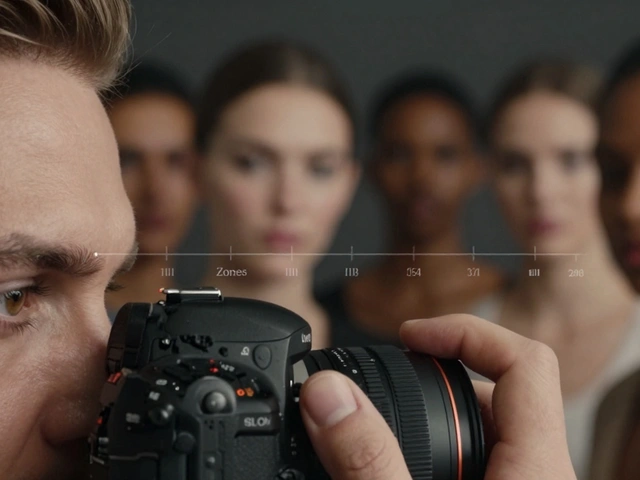
The biggest mistake people make in group shots is using a wide-open aperture. You might love that blurry background (bokeh) in individual portraits, but in a group, it's your enemy. If you shoot a group of ten people at f/1.8, the person in the center might be sharp, but the people on the edges or in the back row will be blurry. This is because your depth of field is too shallow.
To fix this, you need to stop down is the process of increasing the f-number to narrow the aperture opening, which increases the area of the image that remains in focus. For a single row of people, f/2.2 is usually safe. But the moment you add a second row, you should jump to at least f/3.2 or f/4.0. If you're using a long lens, remember that it compresses the scene, which can make the depth of field feel even tighter. A moderate focal length is often more forgiving for these setups.
Don't forget about your shutter speed. Kids move. A lot. If you're shooting at 1/60th of a second, you're going to get motion blur. Keep your shutter speed high-1/200th or faster-and bump up your ISO if you need to. A little bit of grain is a fair trade-off for a sharp image where no one is a blurry smudge.
Posing for Connection and Flow
Nobody wants to look like they're standing in a school photo from 1985. Avoid the "firing squad" look where everyone stands stiffly in a straight line. Instead, focus on creating group portrait photography compositions that feel organic. The secret is to build your group from the anchor outward.
Start with the most stable people-usually the grandparents or the heads of the family. Once they're set, layer in the older children and adults. Save the youngest kids for last because their patience is a ticking time bomb. To make the photo feel warm, encourage physical touch. A hand on a shoulder, leaning in, or holding hands transforms a collection of individuals into a cohesive family unit.
To add visual interest, vary the head heights. Use stools, stairs, or even have some people sit on the floor. This creates "triangles" in the composition, which are much more pleasing to the eye than a flat horizon of heads. Tell your subjects to shift their weight to their back foot and bend their elbows slightly. It stops them from doing the "fig leaf" pose (hands clasped in front) and makes them look relaxed.
Lighting Large Groups Without Hot Spots
Lighting a group is a completely different beast than lighting one person. If you put one light source directly in front of the group, the people in the middle will be bright, while the people on the ends will fall into shadow. You need a light spread that covers the entire width of the group.
A professional approach is cross-lighting. This involves using two large light sources, such as strobes with large octagonal softboxes, placed on opposite sides of the group. By angling the lights so the beams cross in front of the subjects, you create a wrap-around effect that fills in shadows evenly.
Pro tip: "feather" your lights. Instead of pointing the center of the light directly at the group, angle it slightly away. This uses the softer edge of the light beam, which prevents harsh highlights (hot spots) on foreheads and noses, resulting in a more flattering, creamy glow across all faces.
The Battle for Expressions: Managing the Chaos
Let's be honest: getting ten people to smile at the exact same millisecond is nearly impossible. The trick isn't to try and get the perfect shot in one go, but to gather enough data to create a perfect shot in post.
Use burst mode. Fire off five or ten frames in rapid succession. This increases the odds that you'll have at least one frame where everyone's eyes are open. If you're struggling with kids, stop giving them formal instructions. Instead of saying "smile," tell them to make a silly face or tell a joke. Once they're laughing naturally, that's when you capture the real gold.
If you're still missing that one perfect face, don't sweat it. As long as you didn't move the camera between shots, you can use "head swapping" in software like Adobe Photoshop. You simply take the perfect expression from frame B and mask it onto the perfect group composition of frame A. This is why rapid-fire shooting is a necessity, not a luxury.
Session Workflow and Psychology
The energy of a group session drains quickly. If you spend twenty minutes tweaking a tripod while a five-year-old waits, that child will be over it by the time you're ready. You have to be the director. Be firm, be kind, and move fast.
Always shoot your largest group first. The "big photo" is the most important one, and it's also the hardest to coordinate. Do it while everyone is still fresh and cooperative. After the main shot, systematically break the group down into smaller sub-sets: just the kids, just the parents, or the grandparents with grandchildren. This keeps the momentum going and gives the family a variety of images.
Regarding location, don't move the group every five minutes. Pick two or three spots that have great lighting and backgrounds, and stay there. Moving a group of twelve people across a park takes forever and kills the mood. Instead, change the posing and the crop-switch from a full-body shot to a tight waist-up shot-to create variety without the logistical nightmare of relocating.
What is the best lens for group portraits?
A standard zoom (like a 24-70mm) is usually the most practical. It allows you to adjust your distance from the group quickly. Avoid extremely long telephoto lenses if you have multiple rows, as the narrow depth of field can make it harder to keep everyone sharp unless you stop down significantly.
How do I handle a child who refuses to smile?
Stop forcing the smile. Instead, engage them with a game, a song, or a challenge (like "who can make the silliest face?"). Often, the genuine laugh that follows a silly face is much better than a forced grin. Also, keep the session moving quickly so they don't get bored.
Should I use flash for outdoor group photos?
Yes, especially in midday sun. Fill flash helps eliminate harsh shadows under eyes (raccoon eyes) and ensures that the people in the back aren't lost in the shade. Using a large modifier or bouncing the light helps keep the look natural.
How do I avoid the "flat" look in group photos?
Avoid lining people up like a wall. Use "staggering," where people are placed at slightly different depths and heights. Incorporate props like chairs or steps and encourage subjects to lean in toward each other to create a sense of intimacy and three-dimensional depth.
What aperture should I use for a family of five?
If they are all in one line, f/2.8 to f/4.0 is usually sufficient. If you have some sitting and some standing, or two rows, move to f/4.0 or f/5.6 to ensure that the people in the front and back are both tack-sharp.
Next Steps for Your Next Session
If you're heading into a group shoot soon, start by sketching out your shot list. Know exactly which combinations of people you need so you aren't guessing on the fly. Scout your location for "anchor spots"-places with natural height variations like a porch or a rocky outcrop-that will make posing easier.
For those struggling with the technical side, try a practice run with friends. Experiment with different f-stops to see exactly where your focus begins to drop off. Once you trust your settings, you can stop worrying about the camera and start focusing on the people, which is where the real magic happens.