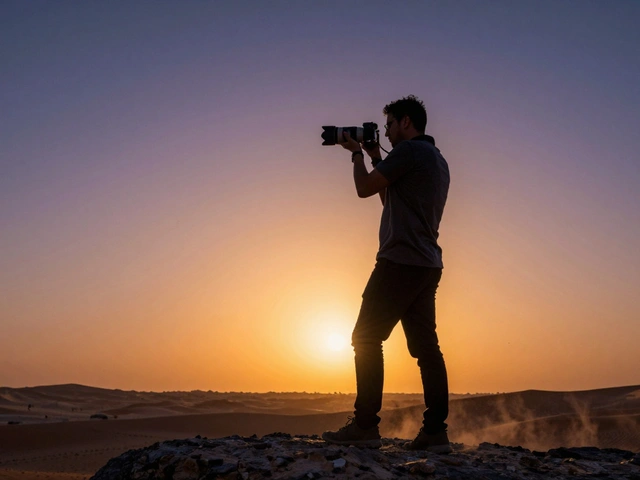
Have you ever pointed your camera at a stunning sunset, only to find the sky is a flat, white blob while the foreground is pitch black? Or maybe you wanted that dramatic, dark shape of a person against a glowing horizon, but your camera decided to brighten them up instead, ruining the mood? This happens because cameras are obsessed with balance. They try to make everything look evenly lit, which is exactly what you don’t want when shooting silhouettes.
To get that perfect silhouette, you have to trick your camera. You need to force it to ignore the subject and expose only for the bright background. It’s not about magic settings; it’s about controlling how your camera measures light. Once you understand this, you can turn any backlit scene into a striking image where the subject becomes a bold, featureless shape.
The Core Concept: Exposing for Highlights
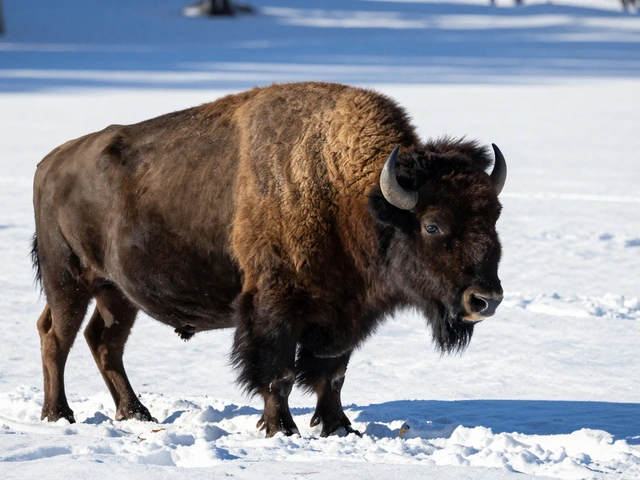
A silhouette works because of contrast. Specifically, high contrast between a bright background and a dark subject. Your camera sensor has a limit called dynamic range. It can capture details in shadows and highlights, but not both if the difference is too extreme. In silhouette photography, we embrace this limitation.
Instead of trying to save the shadows (the subject), we sacrifice them. We tell the camera, "Expose correctly for the bright sky." When the camera does this, the subject, which receives little to no direct light, falls into deep shadow. The result is a sharp, dark outline. If you try to expose for the subject, the background blows out into pure white, losing all color and texture. That’s usually not what you’re after.
The key is backlighting. The light source-usually the sun-must be behind your subject, shining toward your lens. This creates the necessary separation. Without a bright background, there is no silhouette. A cloudy day won’t work well. You need clear skies, a bright window, or city lights at night.
Choosing the Right Time and Light
Timing is everything. The best light for silhouettes isn’t midday sun, which is often too harsh and creates blown-out highlights that are hard to recover. Instead, look for the golden hour.
- Early Morning: Just after sunrise, the sky is vibrant with oranges and purples, and the light is soft enough to keep some color in the background.
- Late Evening: Just before dusk, the sky is still bright but darkening, providing a rich backdrop.
- Winter Months: The sun stays lower in the sky for longer periods, giving you more opportunities to shoot silhouettes throughout the day.
Even indoors, you can create this effect. Stand in front of a large, brightly lit window. The window acts as your background. As long as the room behind you is darker than the light coming through the glass, you’ll get a silhouette. Street photographers use this technique with neon signs or streetlights at night.
Metering Modes: How to Measure the Light
Your camera’s light meter determines exposure. By default, most cameras use matrix metering (or evaluative metering). This mode looks at the entire scene and tries to average it out. For silhouettes, this is your enemy. It will see the dark subject and try to brighten it, washing out your sky.
You need to switch to a more precise method. Here are the three best ways to do it:
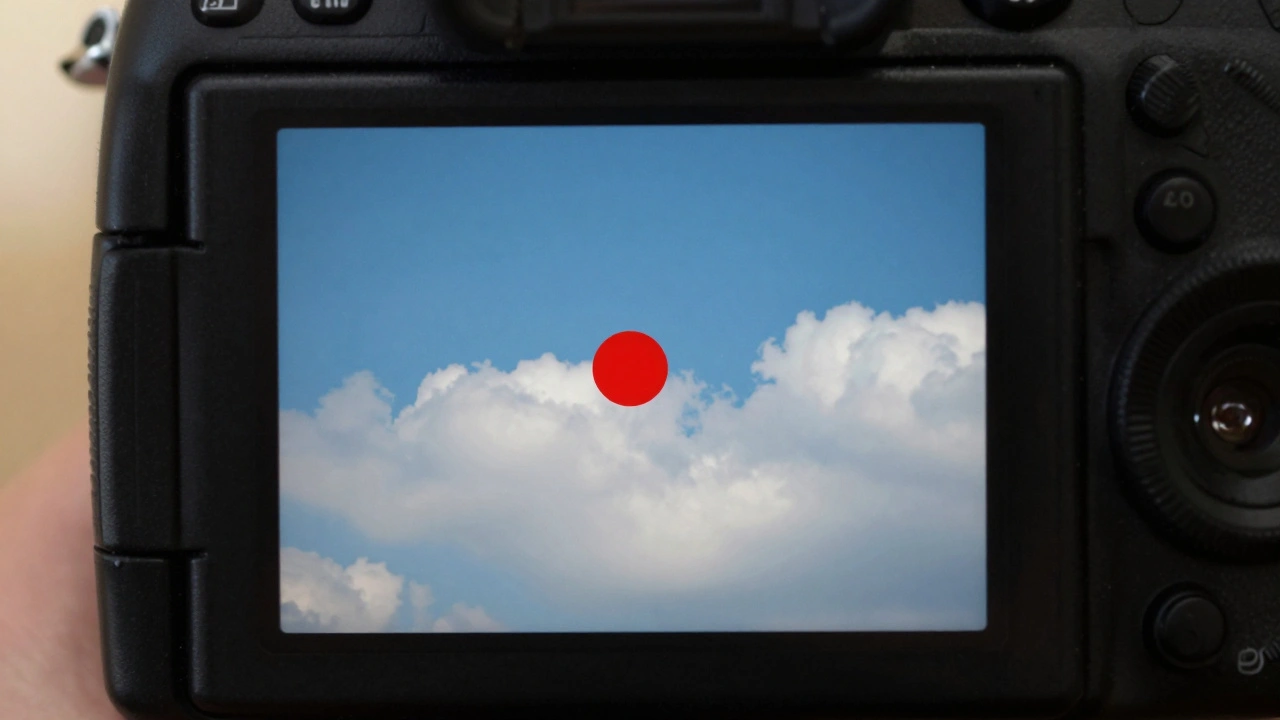
1. Spot Metering
This is the most accurate method. Spot metering measures light from a tiny area of the frame, usually just 1-5% of the viewfinder. You point this small circle at the brightest part of your background-the blue sky or the sunlit clouds-and let the camera set the exposure based on that spot alone. Because the camera thinks the whole scene is that bright, it underexposes everything else, including your subject.
2. Center-Weighted Metering
If your camera doesn’t have spot metering, center-weighted is a good backup. It prioritizes the center of the frame but still considers the edges. Place your bright background in the center, take the reading, then recompose. It’s less precise than spot metering but easier to manage quickly.
3. Manual Mode with Histogram
For total control, switch to Manual mode. Set your ISO low (100-200) and your aperture to f/8 or higher for depth of field. Then, adjust your shutter speed until the histogram shows the data hugging the right side without clipping the highlights. This ensures the background is properly exposed while the subject remains dark.
| Mode | Best For | Precision | Difficulty |
|---|---|---|---|
| Spot Metering | High contrast scenes | Very High | Medium |
| Center-Weighted | Quick shots | Medium | Low |
| Matrix/Evaluative | General photography | Low (for silhouettes) | Low |
| Manual | Consistent lighting | Highest | High |
Using Exposure Compensation
If you prefer using Aperture Priority (A/Av) or Shutter Priority (S/Tv) modes, you can use exposure compensation. This is the fastest way to get silhouettes without switching metering modes entirely.
After framing your shot, dial the exposure compensation down. Start with -1 stop. Check your screen. If the subject is still visible, go to -2 stops. Often, you need -2 to -3 stops to completely darken the subject. Keep an eye on your histogram to ensure the sky isn’t turning pure white. If it is, lower the compensation further or increase your shutter speed.
On smartphones, tap the screen on the brightest part of the background, then drag the brightness slider down until the subject turns black. This mimics the manual process perfectly.
Locking Exposure: The AE-L Trick
Here’s a pro tip for consistent results: use Auto Exposure Lock (AE-L). This feature freezes your camera’s exposure settings so they don’t change when you move the focus point.
- Switch to Spot Metering.
- Point your focus spot at the bright background.
- Half-press the shutter or press the AE-L button to lock the exposure.
- Without releasing the button, move your focus spot to your subject.
- Focus on the subject and take the photo.
This ensures that even if your subject moves slightly into a brighter patch of light, the exposure remains fixed to the background’s brightness. On many cameras, you can assign the AE-L function to a dedicated button on the back or front for faster access.

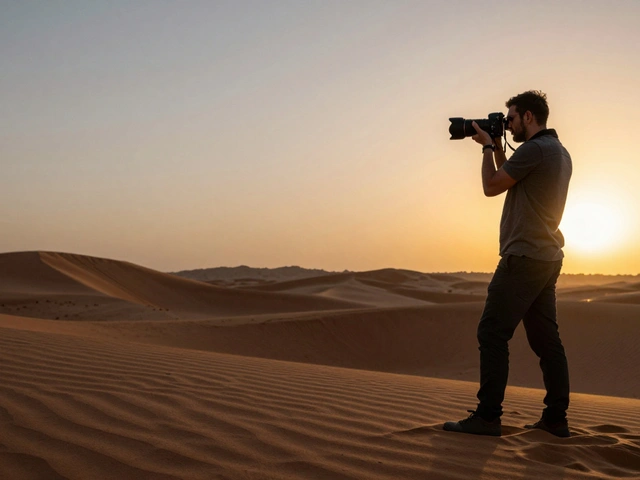
Composition: Making the Shape Matter
Since you lose all detail in the subject, the shape becomes everything. A messy, cluttered outline will look confusing. You want clean, recognizable lines.
Look for subjects with distinct profiles:
- People: Side profiles, arms raised, or walking away work well. Avoid faces directly toward the camera unless you want a mysterious void.
- Nature: Tree branches against the sky, mountain ridges, or bird wings spread open.
- Architecture: Skyscrapers, bridges, or iconic landmarks like the Eiffel Tower.
Simplify your frame. Remove distractions. If there’s a random car or trash can in the background, move it or crop it out. The viewer’s eye should follow the outline of the subject against the bright backdrop. Minimalism is your friend here.
Post-Processing: Enhancing the Effect
Even with perfect exposure, your raw file might look a bit gray. Post-processing helps punch up the contrast. In software like Adobe Lightroom or Capture One, focus on these adjustments:
- Highlights: Reduce them slightly to bring back color in the sky.
- Shadows: Drag them all the way down (-100). This crushes the blacks in the subject, making it truly black.
- Blacks: Lower them slightly (-20 to -40) to deepen the darkest tones.
- Contrast: Increase global contrast to separate the subject from the background.
Be careful not to overdo the blacks. If you crush them too much, you might lose subtle textures in the background near the subject’s edge. Aim for a crisp, clean separation.
Troubleshooting Common Issues
Problem: The sky is white.
Solution: You exposed too much. Lower your exposure compensation or increase your shutter speed. Check your histogram; if the graph is touching the right edge, you’ve clipped the highlights.
Problem: The subject is too visible.
Solution: There’s too much ambient light hitting the subject. Move the subject deeper into shadow, or lower your exposure further. Use a polarizing filter to reduce reflections on the subject.
Problem: The image is blurry.
Solution: Low light makes cameras slow down their shutter speed. Increase your ISO or use a tripod. A shutter speed of at least 1/100s is recommended for handheld shots to avoid motion blur.
Problem: The outline is fuzzy.
Solution: Ensure your subject is in focus. Even though they are dark, the edges need to be sharp. Use single-point autofocus on the edge of the subject against the bright background for best results.
What is the best time of day to shoot silhouettes?
The best times are during the golden hour: shortly after sunrise or before sunset. During these times, the sky is colorful and bright, but the light is soft enough to prevent harsh glare. Winter months also offer extended opportunities as the sun stays lower in the sky.
Do I need a specific camera to shoot silhouettes?
No, you can shoot silhouettes with any camera, including smartphones. The key is having manual control over exposure. On smartphones, tap the bright background and drag the exposure slider down. On DSLRs or mirrorless cameras, use spot metering or exposure compensation.
Why does my camera keep brightening my subject?
Your camera is likely using matrix or evaluative metering, which tries to balance the entire scene. To fix this, switch to spot metering and aim at the bright background, or use exposure compensation to manually darken the image by -2 to -3 stops.
Can I shoot silhouettes indoors?
Yes. Position your subject in front of a large, bright window. Ensure the room behind them is darker than the light coming through the glass. Focus on the window and lower the exposure until the subject becomes a dark shape.
What aperture should I use for silhouettes?
An aperture of f/8 to f/11 is ideal. This provides enough depth of field to keep both the subject and the background in sharp focus, ensuring clean edges. Wider apertures like f/2.8 may result in soft outlines.