Most people think of wildlife photography as a close-up of a lion’s face or a bird mid-flight. But the most powerful images don’t just show the animal-they show where it lives. Environmental wildlife portraits do exactly that: they place the animal right inside its world. Not as a subject on a white background, but as a living part of a forest, a desert, a wetland. These are the photos that make you pause. Not because the animal is beautiful (though it often is), but because you suddenly understand its life.
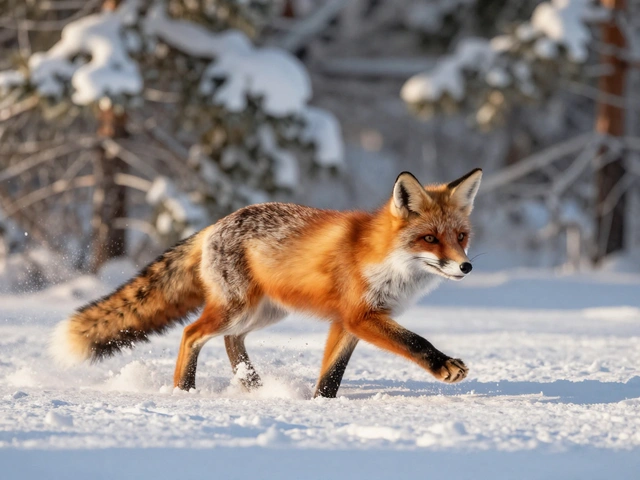
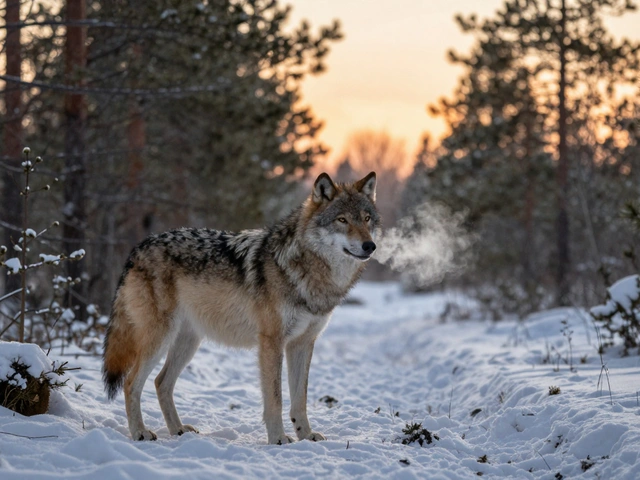
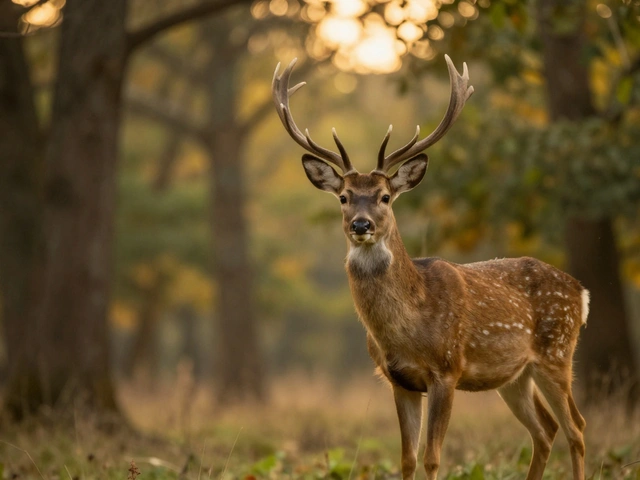
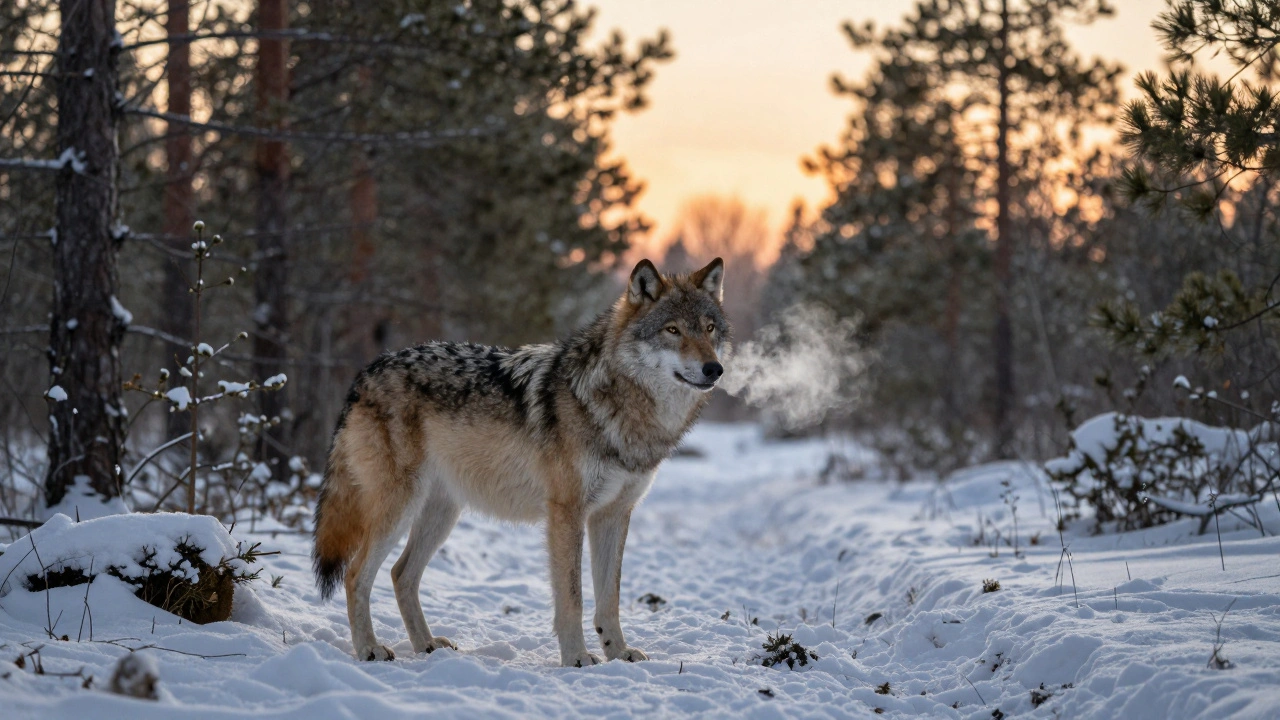
This isn’t new. The Wildlife Photographer of the Year competition has been awarding environmental portraits for decades. Winners don’t just have great gear-they know how to tell a story with space. A wolf isn’t just a wolf. It’s a creature that walks through snow-dusted pines, leaves tracks in frozen mud, and breathes air thick with pine resin. That’s the difference between a snapshot and a portrait.
Why Environment Matters More Than You Think
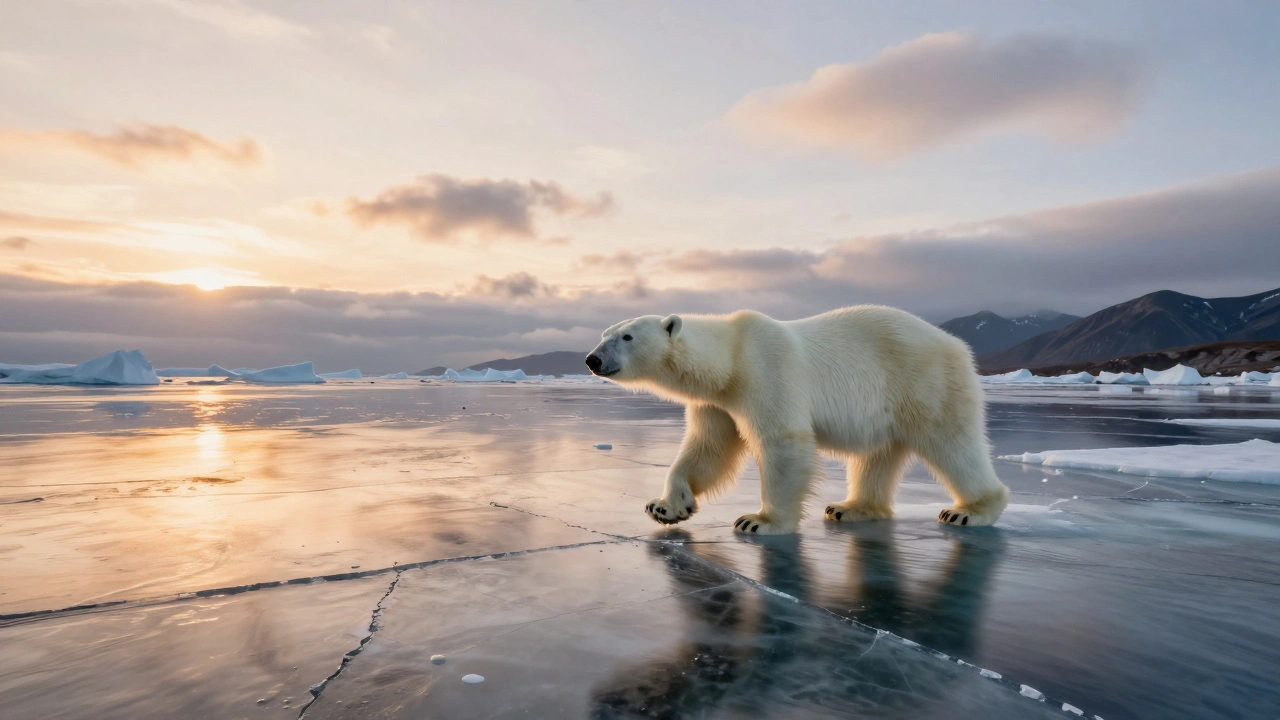
Think about the last time you saw a photo of a polar bear. Was it standing on an ice floe? Or just floating alone in white? The first tells you climate change is real. The second? Just a bear. The environment isn’t background-it’s the plot.
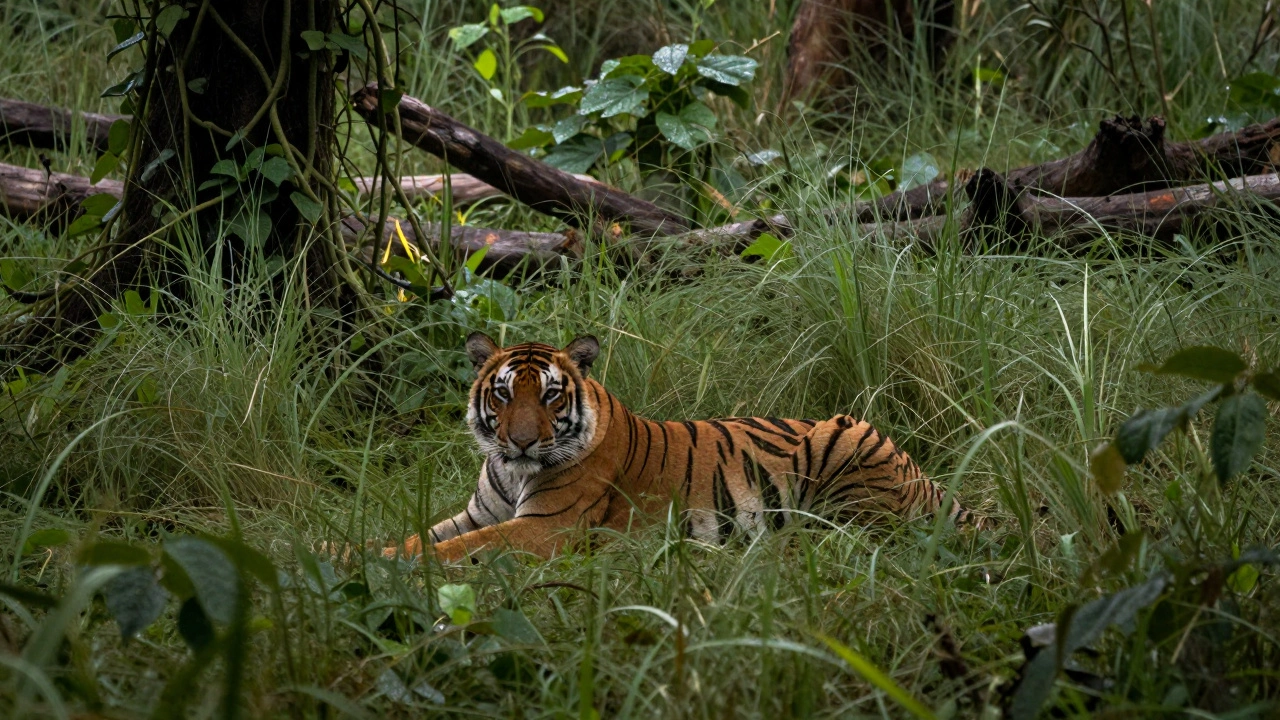
When you photograph a tiger in tall grass, you’re not just showing its stripes. You’re showing why it hunts at dawn. Why it moves silently. Why it needs 100 square kilometers of forest. A portrait without context is a fact. An environmental portrait is a warning, a plea, a story.
The Lens That Tells the Whole Story
You don’t need a 600mm telephoto to do this. In fact, many of the best environmental portraits are taken with lenses between 20mm and 200mm. Why? Because you want to include the sky, the trees, the rocks, the water. A long lens zooms in and cuts everything else out. A wide lens pulls the world in.
Try this: instead of standing 50 meters back with a telephoto, walk closer. Get within 10 meters. Then open your aperture to f/8 or f/11. Suddenly, the animal is sharp, but so is the moss under its paws, the branch behind it, the mist rising from the stream. That’s the sweet spot: intimacy without isolation.
Some photographers call this "getting closer and going wide." It’s not always easy. You have to move slowly. Wait longer. But the result? A photo that feels like you were there.
Eye Level: The Secret to Connection
Most wildlife photos are taken from above. You’re standing on a trail, looking down at a deer. That’s not a portrait. That’s a sighting.
Real environmental portraits happen at eye level. If the animal is on the ground, you lie on the ground. If it’s perched on a rock, you climb up. If it’s swimming, you get in the water (safely). Why? Because your eyes meet. The viewer feels like they’re looking at the animal-not down at it.
This isn’t just about composition. It’s about respect. Animals aren’t props. They’re living beings with their own space, their own rhythm. Getting low doesn’t just make a better photo-it shows you’re not invading. You’re observing.
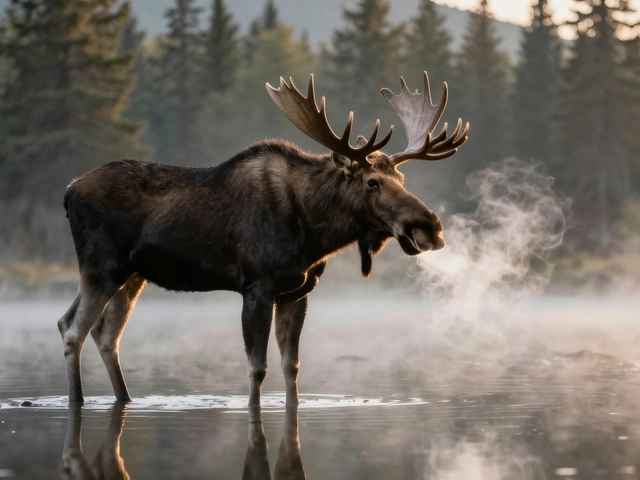
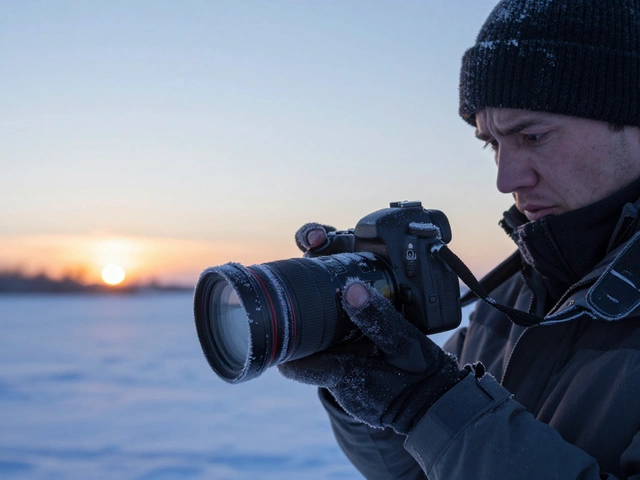
Lighting: When the Sun Does the Work
Don’t shoot at noon. Ever.
Midday sun is flat. It bleaches out texture. It turns fur into a gray blob. It flattens the forest into a backdrop. The best light? Golden hour. Sunrise. Sunset. When shadows stretch long and the air cools.
And here’s something most beginners miss: heat distortion. If you’re shooting over a road, a beach, or even a dry field in the afternoon, the air shimmers. It blurs your image. You can’t fix that in editing. The fix? Shoot early. Or wait until the sun drops low enough that the ground stops radiating heat. Water surfaces are the same. If the air temperature doesn’t match the water temperature, you’ll get a wavy, unreadable background.
Look for rim light-when the sun hits the edge of the animal’s body. It glows. It separates them from the background. That’s the magic. You don’t need a flash. You just need patience.
Depth of Field: Keep the Whole World Sharp
In traditional wildlife photography, you blur the background. f/2.8. f/4. You want the animal to pop. But in environmental portraiture, you want the world to pop too.
Use f/8 to f/16. Yes, that means slower shutter speeds. Yes, that means you need a tripod-or serious stability. But the payoff? You see the moss on the tree behind the fox. The ripples in the pond where the otter just dived. The clouds drifting over the mountain where the eagle nests.
This isn’t about technical perfection. It’s about storytelling. If the background is blurry, you lose the story. If it’s sharp, you invite the viewer into the animal’s world.
Motion: When the Animal Moves
Not all wildlife portraits are still. Some of the most powerful ones capture motion-but not in the way you think.
Panning works great for fast-moving animals running sideways. Set your shutter to 1/15 or 1/30. Follow the animal with your camera. The background blurs. The animal stays sharp. It feels like motion. Like speed. Like life.
Or try dragging the shutter. Set your camera on a tripod. Use a slow shutter-1/2 second or longer. Let the animal move through the frame. The background freezes. The animal blurs into streaks. It looks like the wind is chasing it.
And don’t forget weather. Rain falling. Snow drifting. Wind bending grass. A slow shutter can capture all of it. A single frame can show not just the animal, but the whole weather system it lives in.
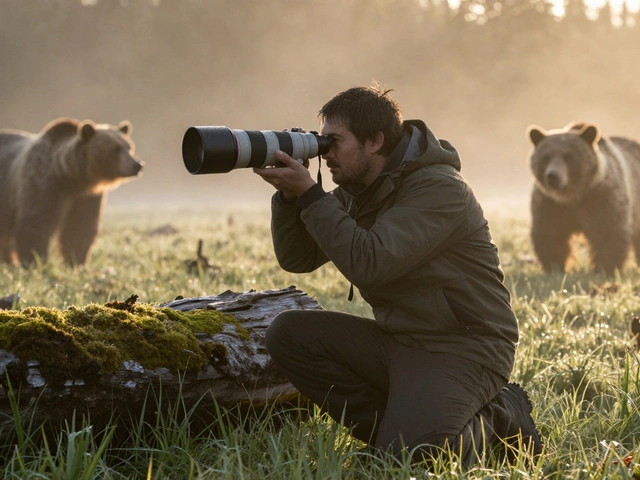
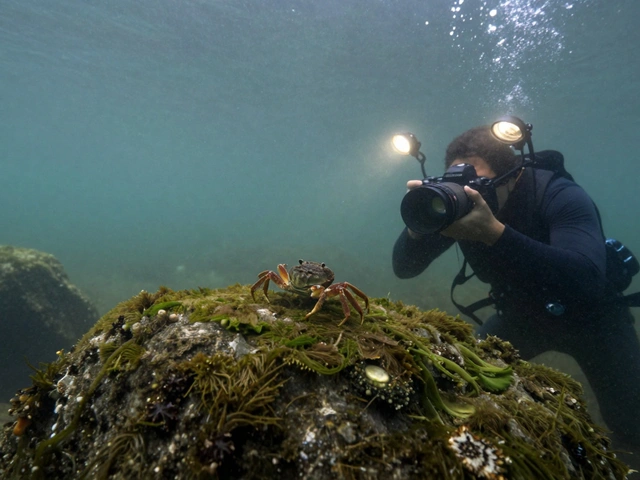
Stealth: How to Get Close Without Scaring Them
You can’t take an environmental portrait if the animal runs away. That’s why concealment matters more than gear.
Simple blinds work. A piece of burlap tied between trees. A camo net. Even a hat and jacket in natural tones. Some photographers sit in one spot for hours. Days. Waiting. Not because they’re lazy. Because animals have routines. They return. They trust.
And smell? It matters. Wash your clothes in scent-free detergent. Avoid perfume, coffee, or strong food. Animals smell fear. They smell intrusion. You’re not a hunter. You’re a guest. Act like one.
When to Use Both Styles
Don’t force one style. Sometimes, the animal is alone on a rock under perfect light. Take the close-up. The portrait. The face. The eyes.
Then, five minutes later, step back. Zoom out. Capture the same animal with the whole valley behind it. Two shots. Two stories.
Many pros shoot both. Then they pick. Sometimes the environmental version wins. Sometimes the portrait does. But you can’t choose if you don’t take both.
Why This Matters Now
Wildlife photography isn’t just art. It’s evidence. As habitats shrink, as climate shifts, as species vanish, these images become archives. A photo of a snow leopard in the Himalayas isn’t just beautiful. It’s proof that this place still exists. That this animal still belongs here.
Environmental portraits remind us: animals don’t live in zoos. They live in ecosystems. And those ecosystems are breaking. Your camera can show that. Not with words. With light. With shadow. With a single frame that holds a whole world.
Do I need expensive gear to take environmental wildlife portraits?
No. A good camera with manual controls and a lens between 24mm and 200mm is enough. What matters more is patience, knowledge of animal behavior, and the ability to wait for the right light. Many award-winning photos were taken with mid-range gear. It’s not about the camera-it’s about how you use it.
Can I use a smartphone for environmental wildlife portraits?
It’s possible, but limited. Smartphones struggle with low-light performance and shallow depth of field control. You won’t get the same detail or background sharpness as a DSLR or mirrorless camera. However, if you’re in a protected area with predictable animal movement (like a bird feeder or a wetland path), you can still capture compelling moments. Use apps that let you lock focus and exposure, and shoot in the golden hour.
What’s the biggest mistake beginners make?
Zooming in too early. Many beginners think they need to fill the frame with the animal. But environmental portraiture is about context. The first mistake is not stepping back enough. The second is shooting from standing height. The third? Ignoring the background. A cluttered background ruins the story. Always check behind, above, and below the subject before pressing the shutter.
How do I know if my photo is truly an environmental portrait?
Ask yourself: If I removed the animal, would the background still tell a story? If yes, you’ve got it. The habitat should feel alive-even without the animal. The light, the texture, the weather, the terrain-they all matter as much as the subject. A true environmental portrait doesn’t just show where the animal lives. It shows why it lives there.
Should I edit these photos heavily?
Keep it real. Environmental portraits gain power from authenticity. Avoid over-saturating colors, removing natural shadows, or adding artificial contrast. A slight boost in clarity or shadow recovery is fine. But don’t turn a misty forest into a fantasy scene. The truth of the habitat is what makes the image meaningful.