Ever taken a photo that looked fine on your camera’s screen, only to find it full of grainy shadows when you edited it on your computer? You’re not alone. Many photographers struggle with noisy, flat-looking shadows - especially in low-light scenes. The answer isn’t always to crank up the ISO. There’s a technique called Expose to the Right (ETTR) that’s been quietly changing how serious photographers handle exposure. But it’s not magic. It’s a trade-off. And if you use it wrong, you can ruin your shot.
What Expose to the Right Actually Means
ETTR isn’t about making your photo look bright. It’s about making your RAW file as data-rich as possible. The idea is simple: shift your exposure so the histogram peaks as far to the right as possible - without blowing out the highlights. Why? Because digital sensors store way more detail in the bright parts of the image than in the dark ones.
Think of your sensor’s data like a building. Shadows are the basement - small, cramped, few rooms. Midtones are the middle floors - decent space. Highlights? That’s the top floors - tall, wide, packed with data. When you underexpose, you’re forcing your image to live in the basement. When you expose to the right, you’re giving it the penthouse suite. And when you bring it back down in editing, you get cleaner shadows, smoother gradients, and less noise.
This only works with RAW files. If you shoot JPEG, your camera already processed the image, crushed the highlights, and flattened the tones. ETTR gives you nothing. You need to be shooting RAW to even benefit.
How ETTR Works: The Science Behind the Technique
Digital camera sensors capture light in 12-bit or 14-bit files. That means they can record thousands of tonal values - from pure black to pure white. But here’s the catch: those values aren’t spread evenly. More than 70% of the data lives in the top half of the histogram. The bottom half? It’s fighting for crumbs.
Let’s say you’re shooting a forest scene with dark shadows under the trees and bright sunlight on the leaves. If you expose for the shadows, you’ll get a clean foreground - but the leaves will be blown out. If you expose for the leaves, the shadows will be noisy. ETTR says: expose for the leaves. Then, in Lightroom or Capture One, drag the shadows back up. You’ll get detail in both.
Why does this work? Because digital noise is worst in the shadows. Every time you lift shadows in post, you’re also lifting noise. But if you started with more data in those shadows - because you exposed to the right - you’re lifting less noise. It’s like using a better quality canvas. The paint (light) is richer. The brushstrokes (tonal transitions) are smoother.
How to Implement ETTR: Step by Step
Here’s how to actually do it in the field:
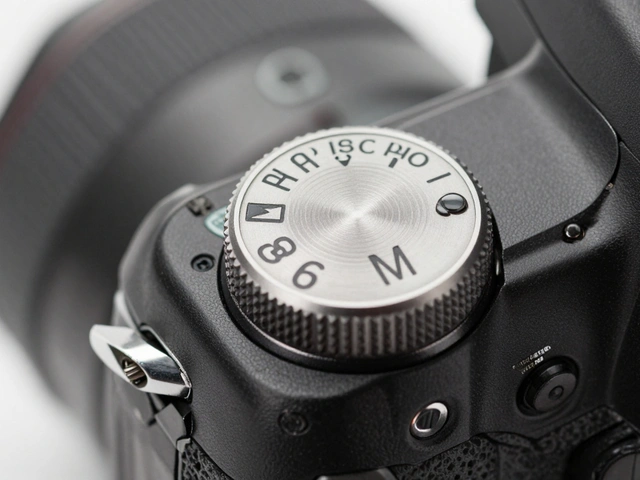
- Set your camera to manual mode. Auto modes won’t give you the control you need.
- Switch to spot metering. This lets you pick one point to base your exposure on.
- Find the brightest part of the scene that still has detail - like sunlit grass, a white wall, or cloud edges.
- Point the spot meter at that area. Adjust exposure until the meter reads 0 EV. That’s your baseline.
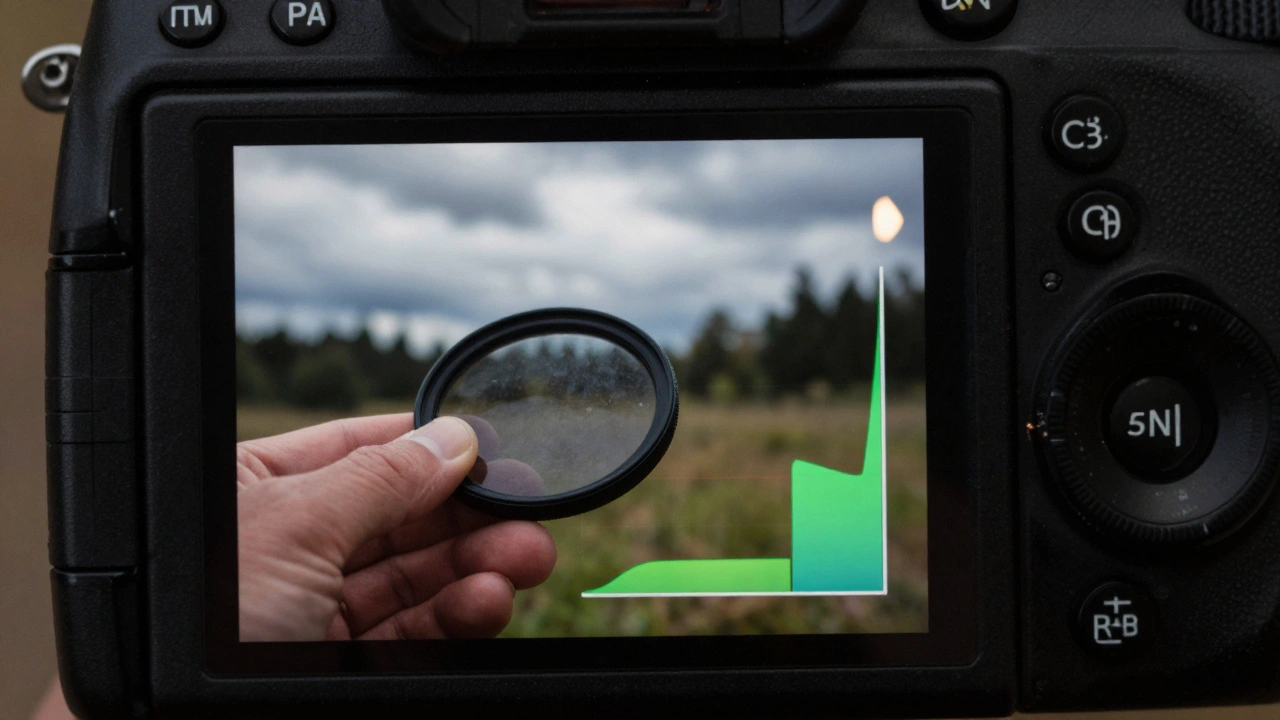
- Now, take a series of shots: +1/3 EV, +2/3 EV, +1 EV, +1.5 EV, +2 EV. Keep going until the histogram starts to clip.
- Load them into your computer. Look at the histogram. Which shot has the rightmost peak without any pixels hitting the far right edge? That’s your sweet spot.
- For a Nikon D800E, that might be +2.7 EV. For a Canon R6 Mark II, maybe +2.3 EV. It varies.
- From now on, use that value as your default exposure compensation.
Pro tip: Turn off all in-camera processing. Set your picture profile to Neutral or Flat. Lower contrast, saturation, and sharpening to zero. Disable lens corrections. This keeps your RAW file untouched. The preview on your screen? It’ll look terrible. That’s okay. It’s not meant to be judged.
The Big Risk: Highlight Clipping
ETTR sounds great - until you blow out the sky.
Once a pixel hits pure white (255,255,255 in RGB), it’s gone forever. No software in the world can bring back detail from a clipped highlight. That’s why ETTR is dangerous. It’s like walking a tightrope. One wrong move, and you lose data you can’t get back.
This is why ETTR works best in controlled environments:
- Landscape photography: You have time. You can use ND or graduated filters to tame bright skies.
- Studio work: You control the lights. You can dial in exact exposures.
- Architectural shots: You can meter carefully and bracket if needed.
It’s a terrible idea for:
- Wildlife: A bird flies into the sun? Your highlight is gone.
- Weddings or events: You can’t pause the ceremony to tweak exposure.
- Street photography: Light changes in seconds. You don’t have time to test.
That’s why many pros only use ETTR selectively - not as a default, but as a tool for specific scenes.
The Psychological Trap: Trusting Your Eyes
Here’s the real challenge: your camera’s LCD screen looks way too bright. It’s not calibrated. It’s designed to show you something that looks “right” - not something that’s technically optimal.
When you shoot ETTR, your preview looks like an overexposed mess. Your brain screams: “Turn it down!” And if you listen, you ruin the whole point.
You have to train yourself to ignore the screen. Use it only for focus and composition. Judge exposure only by the histogram. And even then, zoom in and check for clipping. Don’t rely on the big picture.
This is why ETTR separates amateurs from advanced shooters. It’s not about gear. It’s about discipline.
When ETTR Fails: The Alternatives
Not everyone uses ETTR. Some photographers swear by the opposite: Expose to the Left (ETTL). That means underexposing on purpose to protect highlights, then lifting shadows in post. It’s safer, but you get more noise. It’s a trade-off: detail vs. noise.
Another option? Bracketing. Shoot three exposures: one at your normal meter, one underexposed, one overexposed. Merge them in HDR software. It’s slower, but foolproof. No guessing. No risk.
And for many, that’s enough. ETTR isn’t necessary. It’s an optimization. A way to squeeze out the last bit of quality - if you have the time, the skill, and the patience.
Who Should Use ETTR?
ETTR is for photographers who:
- Shoot RAW exclusively
- Use post-processing software regularly
- Have time to test and tweak exposure
- Work in static, controllable lighting
- Want the cleanest possible shadows for large prints
If you’re shooting JPEGs, you’re wasting your time. If you’re shooting action, you’re risking your shot. If you hate editing, you’ll hate ETTR.
But if you’re a landscape shooter in Oregon, waiting for golden hour, and you’ve got a tripod, a neutral density filter, and a quiet mind - ETTR might be the best tool you’ve never tried.
Final Tip: Always Bracket
Even if you’ve calibrated your camera and know your ETTR value, shoot a bracket. Take one shot at your standard ETTR exposure. Take one at +2/3 EV more. Take one at -2/3 EV less. That gives you:
- A clean ETTR shot
- A backup if you clipped a highlight
- A darker version if you need to recover a blown sky
It’s not extra work. It’s insurance. And in digital photography, insurance is cheap.
Is ETTR better than normal exposure?
ETTR isn’t better - it’s different. It gives you cleaner shadows and more data in RAW files, but only if you expose correctly and edit properly. For most casual shooters, normal exposure works fine. ETTR is for those who want maximum quality and are willing to put in the work.
Can I use ETTR with JPEG?
No. JPEGs are processed in-camera. The camera applies contrast, sharpening, and tone curves before saving. ETTR’s benefits - more shadow data, less noise - only apply to RAW files. If you shoot JPEG, ETTR gives you no advantage.
Do I need a high-end camera for ETTR?
Not necessarily. Even entry-level DSLRs and mirrorless cameras have enough dynamic range for ETTR. What matters more is your ability to read the histogram, avoid clipping, and edit in software. A $500 camera with good RAW files can benefit just as much as a $4,000 one.
What if I accidentally clip a highlight?
If a highlight is clipped, the detail is gone forever. No software can recover it. That’s why ETTR requires caution. Always check your histogram after each shot. Use the highlight alert feature on your camera (blinking whites) to spot clipped areas. If you see blinking, reduce exposure.
How do I know if my camera handles ETTR well?
Test it. Set up a static scene with both shadows and bright areas. Take a series of shots from -2 EV to +3 EV. Import them into editing software. Compare the shadow noise and highlight detail. The exposure with the least noise and no clipping is your camera’s sweet spot. Every model is different.