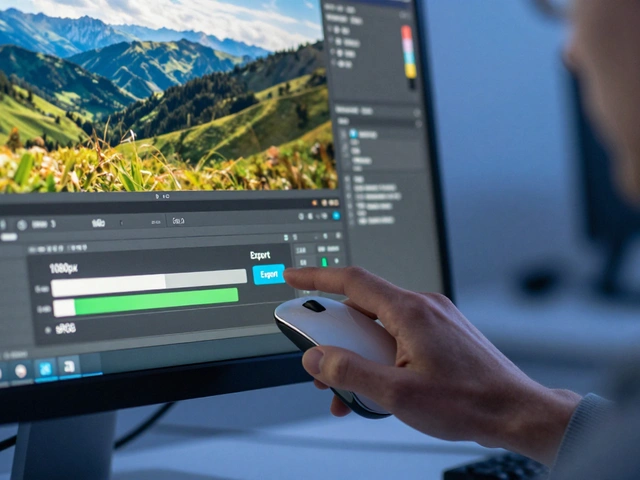
You spend hours editing a photo. You tweak the exposure, balance the colors, and perfect the contrast. Then you hit 'export,' upload it to Instagram or Facebook, and watch your hard work get crushed by invisible algorithms. The image looks soft. The colors look dull. It’s frustrating, but it’s not your fault-it’s just how these platforms work. They compress every single image you upload to save server space. If you don’t prepare your file correctly before uploading, that compression will destroy the quality you worked so hard to achieve.
Getting this right isn't about guessing. It’s about understanding three specific technical pillars: Resolution, Sharpening, and Compression. When you control these variables during the export process, you can actually fight back against platform compression. This guide breaks down exactly what settings to use in Lightroom or Photoshop so your photos look crisp on any device, whether it's an iPhone, an Android, or a desktop monitor.
The Resolution Trap: Why Bigger Is Better
Most photographers make a mistake here. They think smaller files are faster and therefore better. In the world of social media, that logic is backwards. Platforms like Instagram and Facebook have their own internal resizing engines. If you upload a tiny image, say 500 pixels wide, the platform doesn't just display it. It often re-processes it, and because there is no data left to work with, the result is blurry and pixelated.
To avoid this, you need to feed the platform high-resolution data. Think of it like giving a chef high-quality ingredients. If you give them pre-chopped, low-grade veggies, they can’t make a gourmet meal. If you give them fresh, whole produce, they have room to work. Your job is to provide the "whole produce"-the highest quality file the platform accepts.
For Instagram posts, the sweet spot is a width of 1080 pixels. While you can go up to 2048 pixels in width, 1080 is the standard that balances quality with processing speed. For Facebook, the number jumps significantly. Testing shows that 2048 pixels on the long edge is the clear winner. Anything lower than that tends to look worse after Facebook applies its compression. Avoid using the platform’s built-in cropping tools. Those tools are designed for convenience, not quality, and they consistently produce inferior results compared to cropping your image yourself before export.
Aspect ratio matters too. On Instagram, a 4:5 aspect ratio is fantastic because it maximizes vertical screen real estate. Recently, a 3:4 ratio has also become a popular choice for drawing attention to the subject. For Stories, you must use 1080x1920 pixels at a 9:16 aspect ratio to fill the screen without black bars.
Color Profiles: The sRGB Standard
If there is one rule you cannot break, it is this: always export in sRGB. Professional cameras shoot in Adobe RGB or ProPhoto RGB, which have much wider color gamuts. These profiles are great for printing, where ink can reproduce subtle shades of blue or red. But social media platforms do not support these wide gamuts.
When you upload a non-sRGB image to Instagram or Facebook, the platform forces a conversion. This forced conversion is often done poorly, leading to washed-out colors or strange color shifts. By converting your image to sRGB manually in your software, you ensure that the colors you see on your calibrated monitor are the exact colors that appear on a viewer's phone. It is the universal language of the web. Without it, your vibrant sunset might look gray and muddy to half your audience.
Sharpening: Pre-emptive Strike Against Blur
This is the most debated topic among photographers. Should you sharpen? How much? The answer is yes, but not for artistic effect-you sharpen to compensate for the damage the platform will do. When a platform compresses an image, it uses mathematical shortcuts that smooth out details. This smoothing makes the image look softer. To counteract this, you apply "output sharpening" before you upload.
In Lightroom Classic, the export dialog has a specific setting for this. Select Screen as the target medium and Standard as the amount. Some experts recommend High, but Standard usually provides a safer balance. This tells Lightroom to enhance edges specifically for digital display. Do not rely on the general sharpening slider in the Develop module for this; that is for creative adjustment. Output sharpening is a technical necessity.
If you prefer working in Photoshop, the approach is more manual. Many pros advise skipping Lightroom’s export sharpening entirely if they are going to Photoshop. Instead, use the Unsharp Mask filter. A common technique involves reducing noise first-setting Preserve Details around 10 and Color Noise Reduction to 30-and then applying a mild Unsharp Mask. This creates a "smooth sharp" look that survives compression better than aggressive edge enhancement, which can create ugly halos around objects.
Compression and File Formats
You cannot escape compression. Even if you upload a raw file, the platform will convert it. So, you should do the converting yourself. The standard format is JPEG. It offers the best balance of file size and quality for complex images with gradients, like skies or skin tones.
When exporting JPEGs from Lightroom, set the quality slider between 80 and 90. Going above 90 yields diminishing returns-the file gets bigger, but the visual difference is negligible. Going below 80 introduces visible artifacts, such as blocky squares in smooth areas. Since the platform will compress it again anyway, starting at 85% is a smart heuristic. It keeps your initial file clean while acknowledging that further compression is inevitable.
For video content, the rules shift slightly. Bitrate becomes the critical factor. For Instagram Reels or Stories, aim for a bitrate between 8 and 12 Mbps. This range offers a good balance between quality and file size. If your video has fast motion or lots of detail, lean toward the higher end. Also, consider adding a bit of contrast and vibrancy in your edit. Video compression tends to dull dynamic range, so pushing those values slightly helps the footage pop on mobile screens.
Workflow: Lightroom vs. Photoshop
Your workflow depends on your tools and your time. Both paths lead to acceptable results, but they serve different needs.
The Lightroom workflow is faster. You select your photos, open the Export dialog, and choose a preset. A typical preset includes: 1080px width, sRGB, JPEG, and Screen/Standard sharpening. You can save this preset and apply it to hundreds of photos with one click. This is ideal for batch processing event photos or daily social media updates where speed matters.
The Photoshop workflow offers granular control. You export from Lightroom at full resolution, then open the file in Photoshop. Here, you can perform targeted noise reduction, dodge and burn specific areas, and apply precise Unsharp Masking. This takes longer per image but allows you to fix issues that automated presets miss. Use this method for hero images, portfolio pieces, or when the lighting conditions were particularly challenging.
| Platform | Optimal Width (Pixels) | Aspect Ratio | Color Profile | Sharpening Target |
|---|---|---|---|---|
| Instagram Feed | 1080 | 4:5 or 3:4 | sRGB | Screen / Standard |
| Instagram Stories | 1080 | 9:16 | sRGB | Screen / Standard |
| Facebook Posts | 2048 | Variable | sRGB | Screen / Standard |
Common Pitfalls to Avoid
Avoid uploading full-size RAW or TIFF files directly. The platform will crush them into a small JPEG anyway, and you lose all control over the process. Never use the platform’s crop tool. It resizes and recompresses your image in unpredictable ways. Finally, don’t ignore color management. Posting an Adobe RGB image to the web is like speaking French in a room where everyone only speaks English-they might guess what you mean, but the message will be lost.
What is the best resolution for Instagram in 2026?
The best resolution for Instagram feed posts is 1080 pixels wide. For optimal screen coverage, use a 4:5 aspect ratio (1080x1350 pixels). You can also use a 3:4 ratio. For Stories, use 1080x1920 pixels (9:16 ratio).
Why does my photo look blurry after uploading to Facebook?
Facebook applies aggressive compression to uploaded images. If you upload a low-resolution image or fail to apply output sharpening, the compression artifacts become visible as blur. Always export at least 2048 pixels on the long edge and use Screen/Standard sharpening in your editor.
Should I use Adobe RGB or sRGB for social media?
Always use sRGB. Social media platforms do not support Adobe RGB. Uploading an Adobe RGB file will result in incorrect color conversion by the platform, leading to dull or shifted colors. Convert to sRGB manually before exporting.
How much sharpening should I add before exporting?
In Lightroom, use the 'Screen' target with 'Standard' amount in the export dialog. In Photoshop, use Unsharp Mask with conservative settings. The goal is to compensate for platform compression, not to make the image look artificially sharp. Over-sharpening can create halos and noise.
Is JPEG or PNG better for social media photos?
JPEG is generally better for photographs because it handles gradients and complex details efficiently with smaller file sizes. PNG is lossless but creates larger files, which may trigger heavier compression by the platform. Use JPEG with a quality setting of 80-90.
Can I use Lightroom presets for social media export?
Yes. You can create custom export presets in Lightroom Classic that automatically apply the correct dimensions, color profile, and sharpening settings. This saves time and ensures consistency across your posts.
What bitrate should I use for Instagram Reels?
Aim for a bitrate between 8 and 12 Mbps. This provides a good balance between video quality and file size. Higher bitrates may be compressed aggressively by Instagram, while lower bitrates can result in blocky artifacts.