You just finished a wedding or a landscape shoot. You have 2,000 images on your card. Do you feel excited, or do you feel dread? If the latter, you are not alone. The gap between taking photos and actually finishing them is where most photographers get stuck. That is exactly why Adobe Lightroom is a comprehensive photo management and editing software developed by Adobe that integrates cataloging, organization, editing, and export functionality into a single interface. It was built to bridge that gap.
Many people think Lightroom is just another photo editor like Photoshop. It is not. While Photoshop handles pixel-level manipulation, Lightroom handles workflow. It manages your files from the moment they hit your hard drive until they go live on Instagram or print. This guide breaks down the three pillars of that workflow: keeping your library sane, making fast edits in the Develop module, and using batch processing to save hours of time.
The Library Module: Your Digital Darkroom Filing Cabinet
Before you touch a slider, you need to find your photos. The Library module serves as the core organizational hub where cataloging, indexing, and basic editing tasks are performed. Think of this as your filing cabinet. If your files are messy here, your entire workflow slows down.
When you import photos, Lightroom gives you control over destination folders. You can organize by date or existing folder names. But organization does not stop at import. Lightroom offers two main ways to group images: Folders and Collections.
- Folders: These reflect the actual physical structure of your hard drive. If you move a file in Windows Explorer or macOS Finder, it moves in Lightroom too. Use these for backup structures.
- Collections: These are virtual groups. A photo can belong to five different collections but still sit in only one folder. This is how you create project-specific groups without duplicating files.
For advanced organization, use Smart Collections. These act like saved searches. You set rules-for example, "All photos with 5 stars AND taken in June." As you rate new photos, they automatically appear in this collection. You never have to manually drag files into it again. This feature alone saves countless hours for event photographers who need to quickly pull "best shots" from large batches.
To keep your grid view clean, use stacking. If you took 10 bracketed exposures of the same scene, stack them together. They collapse into one thumbnail. Click to expand when you need to see them. This reduces visual clutter significantly.
Ratings and Flags: The Quick Cull System
Speed matters when culling. Lightroom provides a dual-rating system designed for rapid decision-making. Do not start with detailed edits. Start with selection.
- Flagging (Temporary): Press
Pto pick an image (white flag). PressXto reject it (red flag). PressUto unflag. Use this for the first pass. You want to separate the keepers from the trash instantly. - Star Ratings (Permanent): Use keys 1 through 5. Five stars mean "print quality / portfolio worthy." One star might mean "good enough for social media." Unrated means "ignore."
Combine these with color labels. Assign red to "needs retouching," green to "ready to export," and yellow to "client proof." Then, filter your Library by these labels. Suddenly, you can hide 90% of your images and work only on the 10% that matter. This filtering capability allows photographers to perform targeted tasks on specific subsets of images without losing track of the larger collection.

The Develop Module: Non-Destructive Editing
Once your images are organized, press D to jump to the Develop module. Adobe chose the term "Develop" intentionally, referencing traditional darkroom practices of analog film photography. Unlike Photoshop, every edit you make here is non-destructive. The original file remains untouched. You are creating instructions on top of the data.
The interface includes a toolbar accessible via the View menu. Here you will find tools for cropping, straightening, and removing spots. But the power lies in the panels on the right:
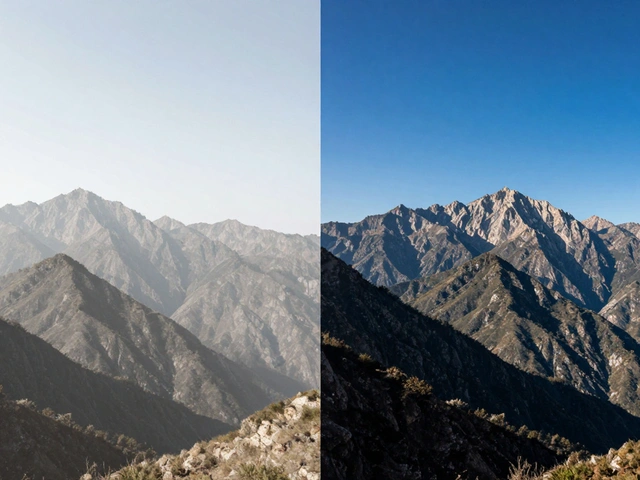
- Basic Panel: White Balance, Exposure, Contrast, Highlights, Shadows, Whites, Blacks. Adjust these first. Get the tonal range correct before touching color.
- Tone Curve: For precise control over contrast and midtones. Use this if the Basic panel feels too limited.
- HSL / Color: Control Hue, Saturation, and Luminance for individual colors. Want greener grass or less orange skin tones? This is where you fix it.
- Detail: Sharpening and Noise Reduction. Modern AI noise reduction in Lightroom Classic is incredibly effective for high-ISO images.
While professional sources note that Photoshop remains superior for complex composites or heavy retouching, Lightroom’s editing tools are sufficiently advanced for 80-90% of photographic needs. Most landscape, portrait, and street photographers finish their entire workflow here. Only switch to Photoshop if you need to remove objects or blend multiple exposures manually.
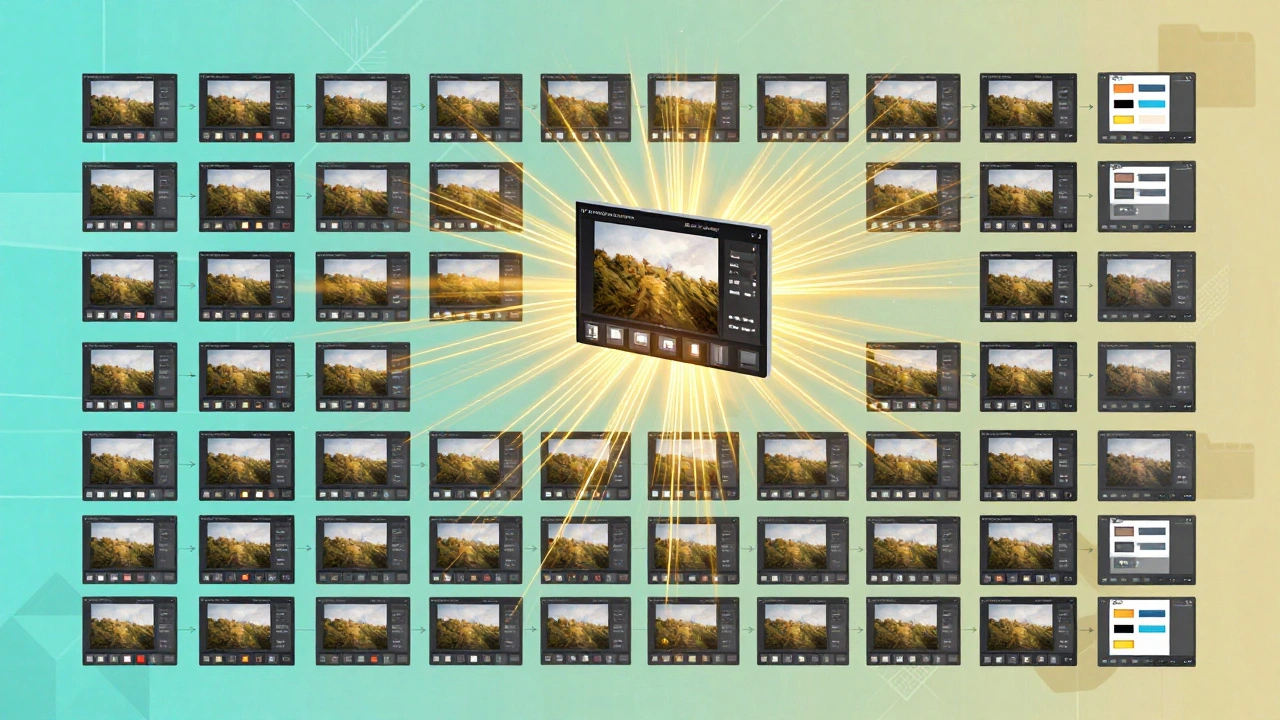
Batch Processing: Work Smarter, Not Harder
This is where Lightroom shines. Imagine applying the same white balance and exposure correction to 500 images from a cloudy day. Doing it one by one would take hours. Batch processing lets you do it in minutes.
There are three primary methods for batch operations:
| Method | Best Use Case | Speed | Control Level |
|---|---|---|---|
| Sync Settings | Similar lighting conditions (e.g., indoor events) | Fast | High (choose which sliders to sync) |
| Presets | Consistent style across varied lighting | Instant | Medium (applies pre-defined look) |
| Quick Collections | Gathering images for quick export or renaming | Fast | Low (organizational tool) |
Sync Settings: Edit one master image perfectly. Select all other similar images. Click "Sync Settings." Choose what to sync-usually Exposure, White Balance, and Tone Curve. Avoid syncing Crop or Lens Corrections unless the camera angle was identical.
Presets: Create a preset from your favorite edit. Apply it to thousands of images with one click. This is essential for maintaining brand consistency for commercial photographers. During import, you can even apply presets automatically, so your images come in with a baseline look.
Quick Collections: Press Y to add selected photos to the Quick Collection. This temporary album sits at the bottom of your left panel. It is perfect for gathering images for a quick client preview or batch export. Once you are done, clear it. It resets automatically.
Metadata and Keywords: Finding Photos Later
Organization is useless if you cannot find your photos six months later. Metadata is the hidden layer of information attached to each file. Lightroom captures camera settings automatically (Exposure, Aperture, ISO). You must add the rest.
Use the Keywording panel. Add terms like "Wedding," "Outdoor," "Candid," or "Client Name." You can also add Copyright information during import. This ensures your images are protected and searchable. Smart Albums can be built on keywords. Create a rule: "Keyword contains 'Portfolio' AND Rating is 5 Stars." Now you have a dynamic portfolio gallery that updates itself.
Also, consider People Tags. Lightroom’s AI recognizes faces. Tag a person once, and it finds them in other photos. This is invaluable for family photographers or event shooters managing hundreds of guests.
Workflow Flexibility: Organize First or Edit First?
There is no rigid rule. Some photographers prefer to organize everything before editing. Others dive straight into editing and organize later. Lightroom supports both. The key is consistency. Pick a method and stick to it.
If you choose to edit first, use Flagging heavily. Mark rejects early so you do not waste time developing bad shots. If you choose to organize first, use Smart Collections to isolate projects. Either way, the goal is the same: reduce friction between seeing the image and finishing it.
Remember, Lightroom Classic and Lightroom CC serve different needs. Classic is desktop-centric, ideal for local storage and heavy batch processing. CC is cloud-based, better for mobile integration and cross-device access. Choose based on where your files live and how you work.
What is the difference between Lightroom Classic and Lightroom CC?
Lightroom Classic is the desktop-first version with full local catalog control, ideal for professionals managing large libraries on hard drives. Lightroom CC is cloud-based, syncing across devices, and simpler for mobile workflows. Classic has more advanced batch processing and metadata tools; CC is better for accessibility on iOS/Android.
How do I batch rename files in Lightroom?
Select your images in the Library module. Right-click and choose "Rename Photos." In the dialog box, select a template (e.g., Date + Sequence Number). Preview the changes, then click Rename. This applies consistently across all selected files.
Can I undo batch edits in Lightroom?
Yes. Since Lightroom is non-destructive, you can always revert changes. To undo a batch sync, select the images, go to the History panel, and reset to the state before syncing. Or use "Sync Settings" again with no options checked to clear synced adjustments.
What is the best keyboard shortcut for rating photos?
Use P for Pick, X for Reject, and numbers 1-5 for Star Ratings. Combine these with arrow keys to navigate quickly. This allows you to cull hundreds of images in minutes without touching the mouse.
Do I need Photoshop if I use Lightroom?
Not necessarily. Lightroom handles 80-90% of typical photo editing needs including exposure, color, cropping, and noise reduction. Photoshop is needed only for complex composites, object removal, or heavy retouching. Many photographers complete their entire workflow in Lightroom alone.