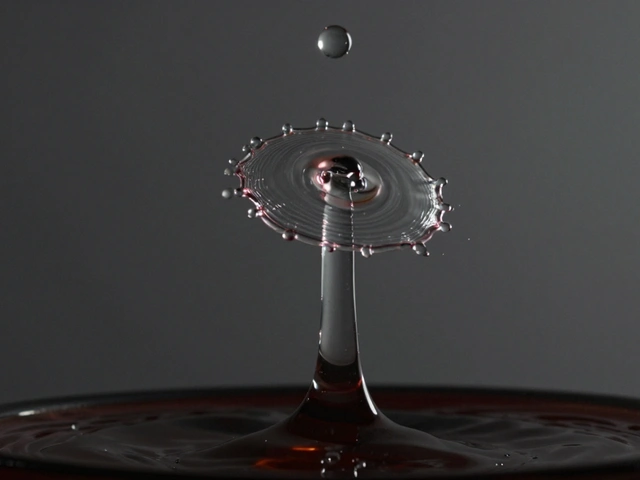
Imagine capturing a moment that lasts less than a blink of an eye - two water droplets crashing into each other mid-air, exploding into a crown of liquid that hangs frozen in time. This isn’t science fiction. It’s droplet collision photography, and it’s one of the most rewarding - and demanding - forms of macro photography you can try. You don’t need a million-dollar lab. You need patience, a few basic tools, and an understanding of how light, timing, and physics work together in milliseconds.
Why This Technique Is So Hard
Most photographers think fast shutter speeds freeze motion. But for droplet collisions, shutter speed barely matters. The splash happens in about 15 milliseconds. Even a shutter speed of 1/1000th of a second is too slow. That’s why you don’t rely on the camera’s shutter to freeze the action. You use a flash.A flash isn’t just a bright light. When set to low power, it can fire in as little as 1/20,000th of a second - fast enough to freeze water moving faster than a bullet. But here’s the catch: you have to trigger that flash at the exact moment the droplets collide. Miss by 2 milliseconds, and you get nothing but blurry streaks or empty air.
Setting Up the Droplet System
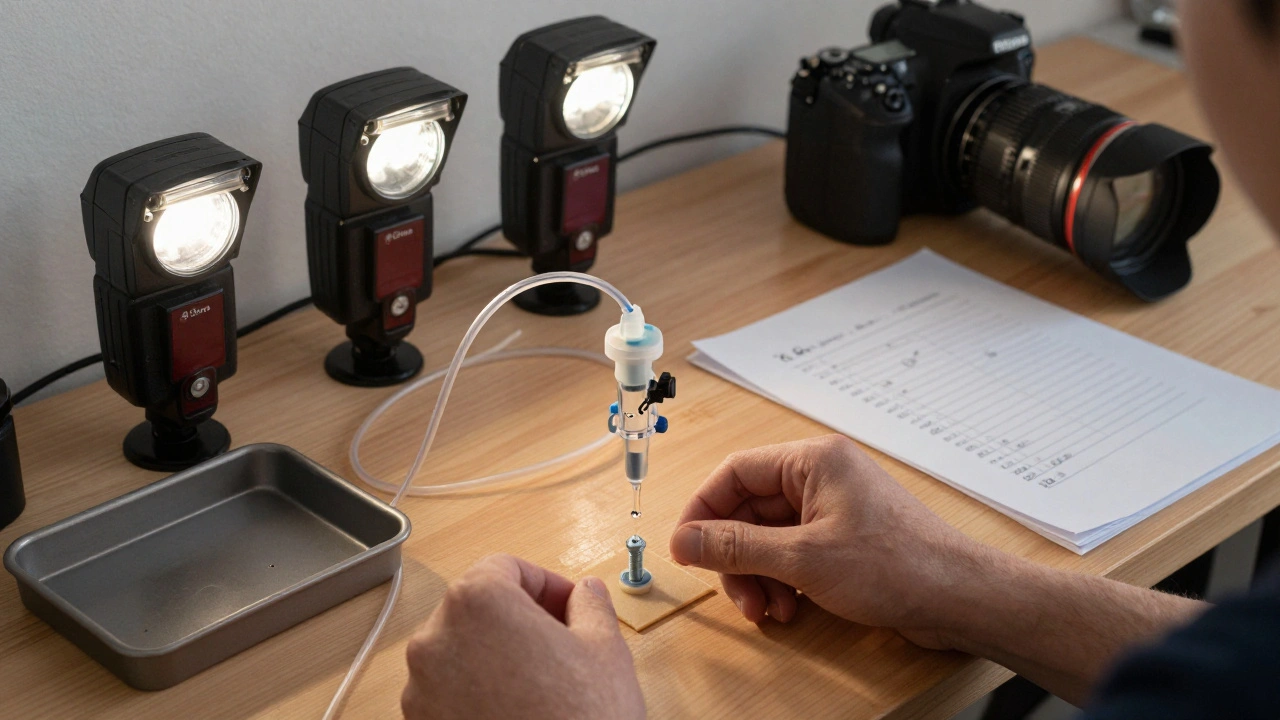
You don’t need fancy gear to start. Some photographers use a simple medical drip valve - the kind used for IV bags - costing less than a euro. Others use programmable controllers like StopShot or MIOPS, which let you set exact timing for up to four droplets. Either way, the principle is the same.Here’s how it works:
- You fill a reservoir with water (or colored liquid).
- A valve opens for a set time - say, 45 milliseconds - and releases a single drop.
- After a delay - often around 90 milliseconds - the second valve opens, releasing another drop.
- Both drops fall toward a shallow tray below.
The goal? Have them collide exactly halfway down. Too close to the nozzle? The drops haven’t gained enough speed. Too close to the tray? They’ve already hit the water and splashed before the second drop even leaves the valve.
Most successful setups use a drop height between 15 and 20 inches (40-50 cm). Higher drops mean more force, bigger splashes, but tighter timing. Lower drops are easier to control but produce smaller, less dramatic results.
Focus: The Most Critical Step
You can have perfect timing, perfect lighting, perfect fluid - but if your focus is off by a millimeter, the image is useless. That’s because depth of field at macro distances is razor-thin. At f/60, you might have only 2-3 millimeters of sharp focus.Here’s the trick: you don’t focus on the droplets. You focus on a reference point.
Place a small object - a bolt, a pen, even a pencil - vertically on the bottom of the catch tray. Position it exactly where you want the droplets to collide. Then, switch your camera to manual focus and set it precisely on that object. Once locked, you cannot move the tray, the camera, or the nozzle. Any shift means you start over.
Some photographers use a magnetic mount or putty to hold the reference object steady. Others use a small socket wrench for better height control. The key is consistency. Every single collision must happen at the same spot.
Flash Setup: Two Lights, One Shot
Lighting makes or breaks this technique. You need two flashes:- Backlight: Positioned behind the collision point, inside a softbox or diffusion panel. This reveals the inner structure of the droplets - the ripples, the thinning threads of water, the air bubbles trapped inside.
- Frontlight: Placed in front of the setup, aimed directly at the collision. This highlights surface details, color, and texture.
Use low flash power settings - around 1/16 or 1/32. Why? Lower power = shorter flash duration. A flash set to 1/128 power might fire in 1/50,000th of a second. At full power? It could be 1/1,000th - too slow to freeze the splash.
Many photographers use remote-controlled flashes like the Nikon SB-700 or Sunpak pz40x-ne. Place them as close as possible to the collision zone - within 12 inches. Distance kills light intensity, and at these speeds, you can’t afford to lose even a fraction of brightness.
Timing: The Secret Numbers
This is where most people fail. You can’t guess timing. You have to measure it. Here’s a working sequence that works for a standard 15-inch drop height with water:- First drop release: 45 milliseconds
- Delay before second drop: 85 milliseconds
- Second drop release: 45 milliseconds
- Delay before flash trigger: 100 milliseconds
That’s it. The flash fires 100 milliseconds after the second drop leaves the valve - right as the two droplets meet. This sequence gives you a clean, symmetrical splash. But here’s the catch: it won’t work on your setup.
Why? Because every nozzle, every fluid, every tray, every temperature changes the physics. A drop of colored water behaves differently than plain water. A taller drop changes the fall time. A warmer room makes the water less viscous. You’ll need to test dozens of combinations.
One photographer took 312 attempts before getting one perfect shot. That’s normal. Keep notes. Write down every setting. Change only one variable at a time. Was the splash too flat? Try increasing the delay between drops. Too messy? Lower the drop height. Was the flash too dim? Move it closer or raise the power slightly.
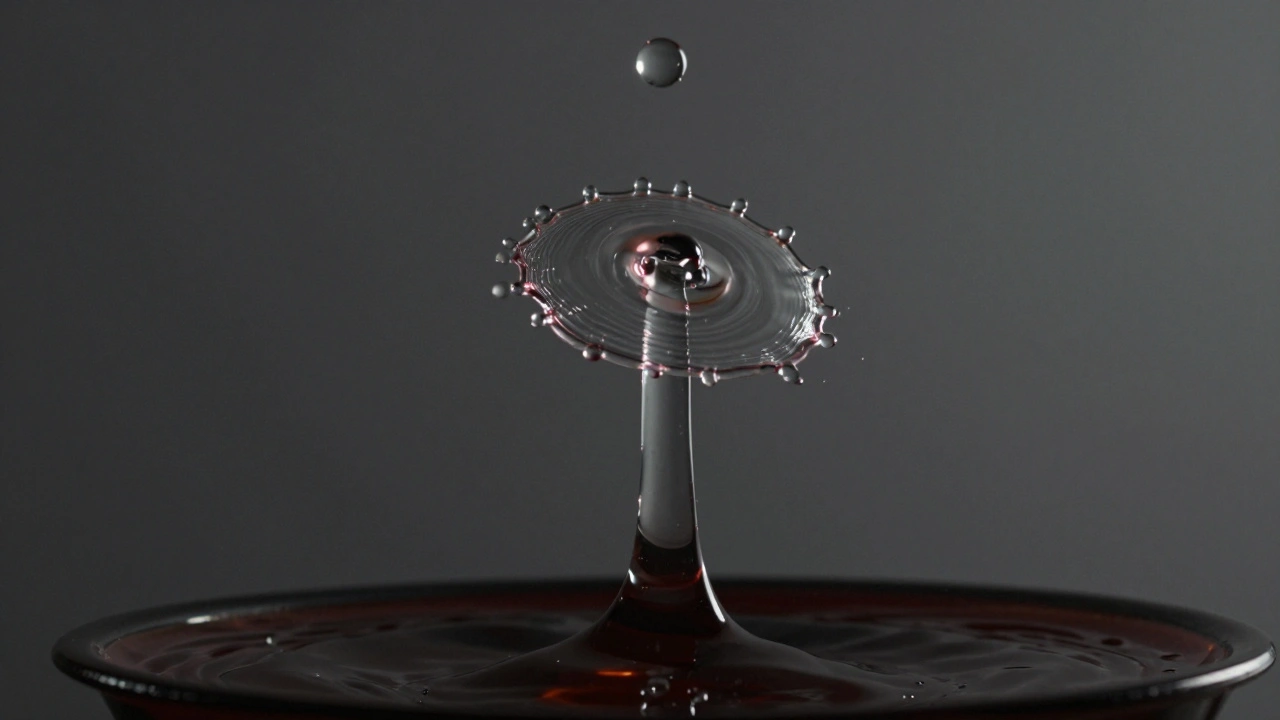
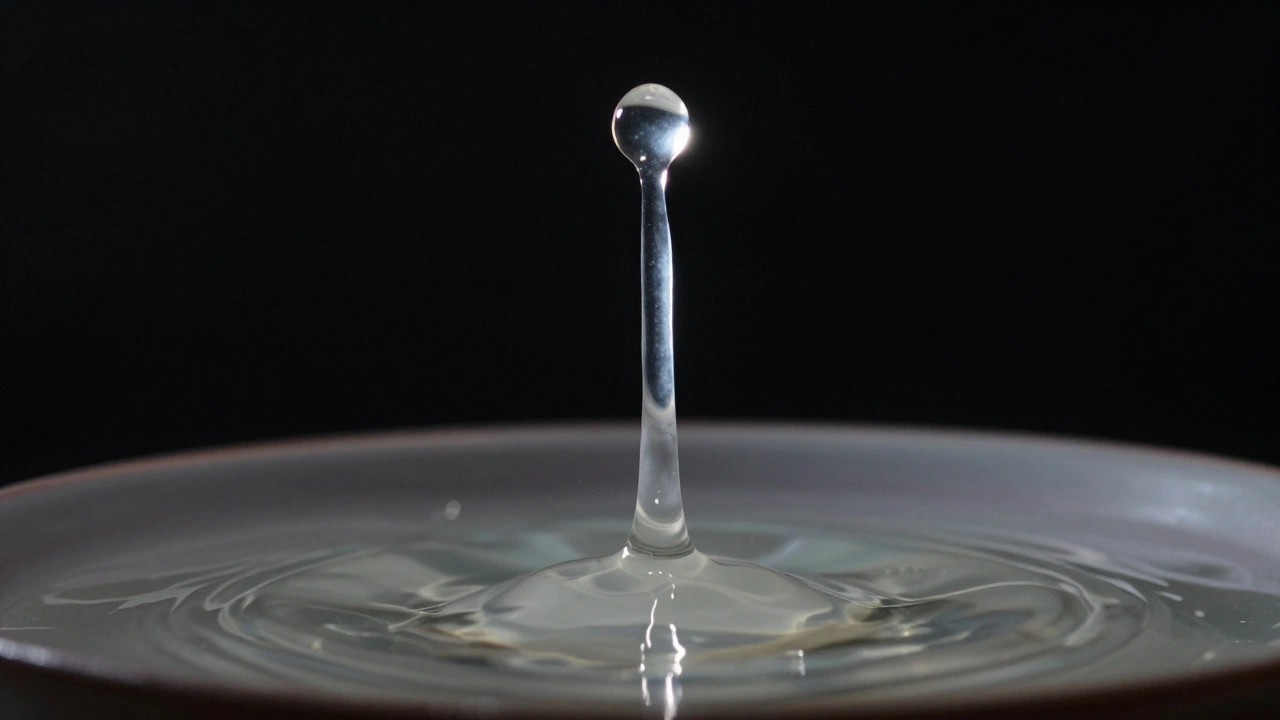
The Worthington Jet: Going Deeper
Once you’ve nailed basic collisions, try the Worthington jet - a tall, needle-like spire of water that shoots upward after a droplet hits the surface. It’s the holy grail of splash photography.To get it, you need two drops in quick succession. The first drop hits the tray. The second drop lands on the rebounding jet before it collapses. The energy multiplies. The result? A vertical column of water that can reach 3-4 inches high.
Try this timing:
- First drop: 40 milliseconds
- Delay: 80 milliseconds
- Second drop: 40 milliseconds
- Flash trigger: 115 milliseconds
This setup requires a very still surface. Even a tiny ripple ruins the jet. Some photographers use a thin layer of oil on the tray to calm the water. Others use a shallow tray with a smooth, polished surface.
Composition and Shooting
Shoot vertically. Always. Why? Because the splash goes up. A horizontal frame cuts off the best part of the image. Vertical lets you capture the full height of the spray. You can crop to horizontal later - but you can’t add back what the frame didn’t catch.Use manual mode. Set ISO to 100. Use the smallest aperture your lens allows - f/5.6 or smaller. You need maximum depth of field. Set the shutter to bulb mode. Hold the shutter open with a cable release or remote. Then let the controller trigger the droplets and flash. Release the shutter after the flash fires.
Don’t use autofocus. Don’t use auto-exposure. This isn’t a snapshot. It’s a controlled experiment.
Fluids and Color
Water is fine to start. But once you get consistent results, experiment. Add food coloring. Try milk. Try glycerin for slower, silkier splashes. Try saltwater - it changes surface tension. Each fluid behaves differently.One photographer used a mix of water and corn syrup to get long, stretching threads that looked like molten glass. Another used red wine and got deep, rich splashes with natural gradients. Don’t be afraid to play. The most stunning images come from unexpected combinations.
What You’ll Need (Budget-Friendly Starter Kit)
- Camera with manual and bulb mode (any DSLR or mirrorless)
- Macro lens (90mm or 100mm ideal)
- Two remote-controlled flashes
- Softbox or white paper for diffusion
- Medical drip valve or StopShot/MIOPS controller
- Shallow tray (a baking dish works)
- Small bolt or metal rod for focus reference
- Putty or magnetic mount
- Dark room or blackout curtains
You can build this for under $300. The most expensive part is the controller. If you’re on a budget, start with the medical valve and a smartphone timer app. It’s not precise - but it’s enough to learn the rhythm.
Expect to Fail - A Lot
This isn’t like portrait photography. You won’t get a great shot on the first try. Or the tenth. Or even the fiftieth. That’s the point. The beauty of droplet collision photography is that every failure teaches you something. A blurry splash tells you the flash was too slow. A misaligned jet tells you the timing is off. A dark image tells you the flash is too far.Keep a log. Record every setting. Celebrate the small wins. A single perfect frame after 200 attempts? That’s a victory.