Have you ever stood in the middle of a busy intersection, surrounded by towering glass buildings and rushing traffic, and felt completely lost? That’s where urban landscape photography is a genre that captures the built environment-skylines, bridges, parks-with an emphasis on form, light, and atmosphere rather than individual people begins. It isn’t just about snapping a picture of a famous landmark. It’s about finding order in chaos, beauty in concrete, and silence in noise.
Unlike street photography, which chases the human moment, or architectural photography, which demands technical precision and straight lines, urban landscape sits somewhere in between. It treats the city as nature does. You look for patterns, leading lines, and dramatic skies. Whether you are chasing the golden hour glow on a skyscraper or the long-exposure blur of water under a bridge, your goal is to tell a story about how we live within these massive structures.
The Three Pillars: Skylines, Bridges, and Parks
To master this genre, you need to understand its three main subjects. Each requires a different mindset and often a different lens. Think of them as distinct chapters in the same book.
Skyline Photography: The Big Picture
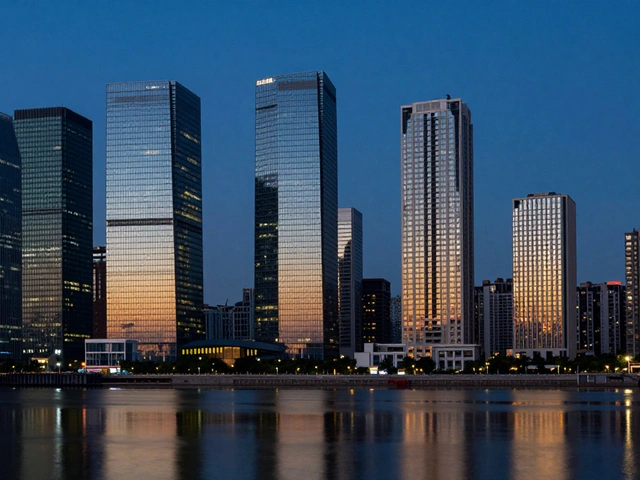
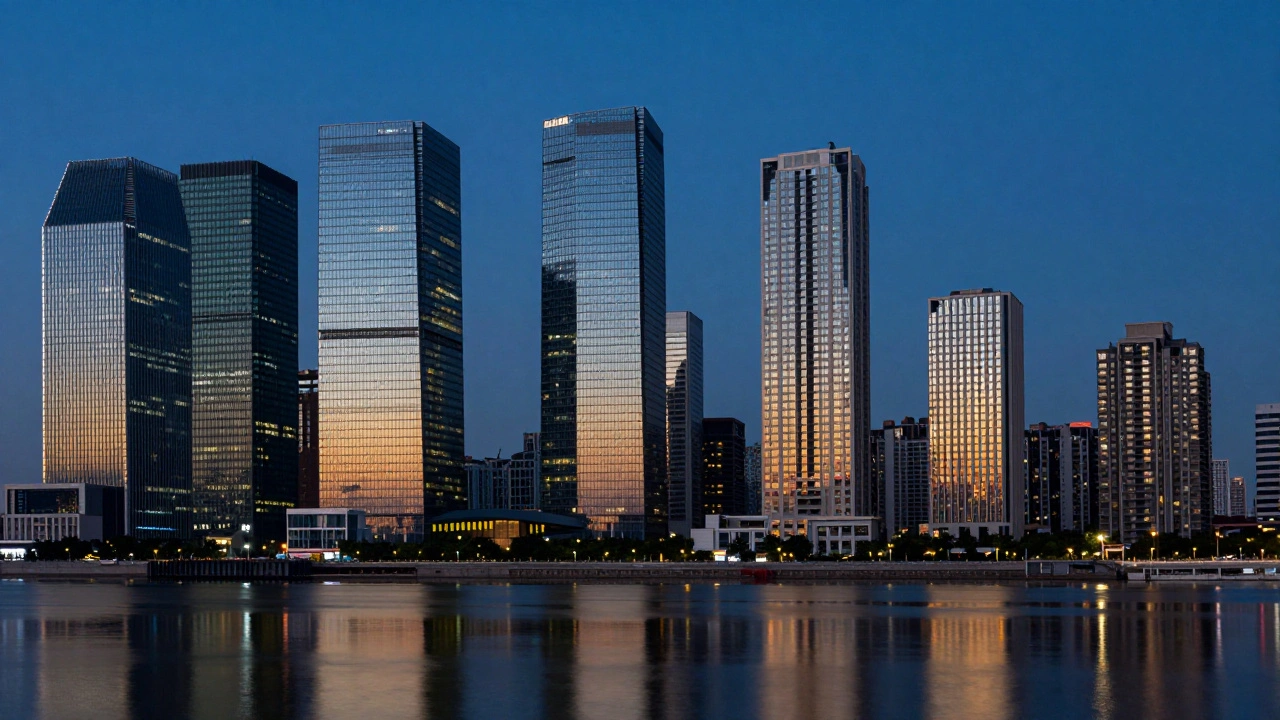
Skyline photography focuses on the external silhouette of a city, typically captured from elevated vantage points or across bodies of water. This is the postcard view. But to make it compelling, you need more than just height. You need timing. The "golden hour" (shortly after sunrise or before sunset) and the "blue hour" (just after sunset when the sky turns deep blue) offer the best contrast between artificial city lights and natural sky color.
When shooting skylines, focal length matters immensely. If you want an immersive, wide-angle feel that pulls the viewer into the scene, use an ultra-wide lens like a 14-24 mm. However, if you want to compress the layers of buildings-making distant skyscrapers appear stacked tightly against closer ones-you need a telephoto lens, such as a 70-200 mm or longer. Photographers like James Maher have spent decades perfecting this compression technique, turning New York’s dense architecture into layered abstracts.
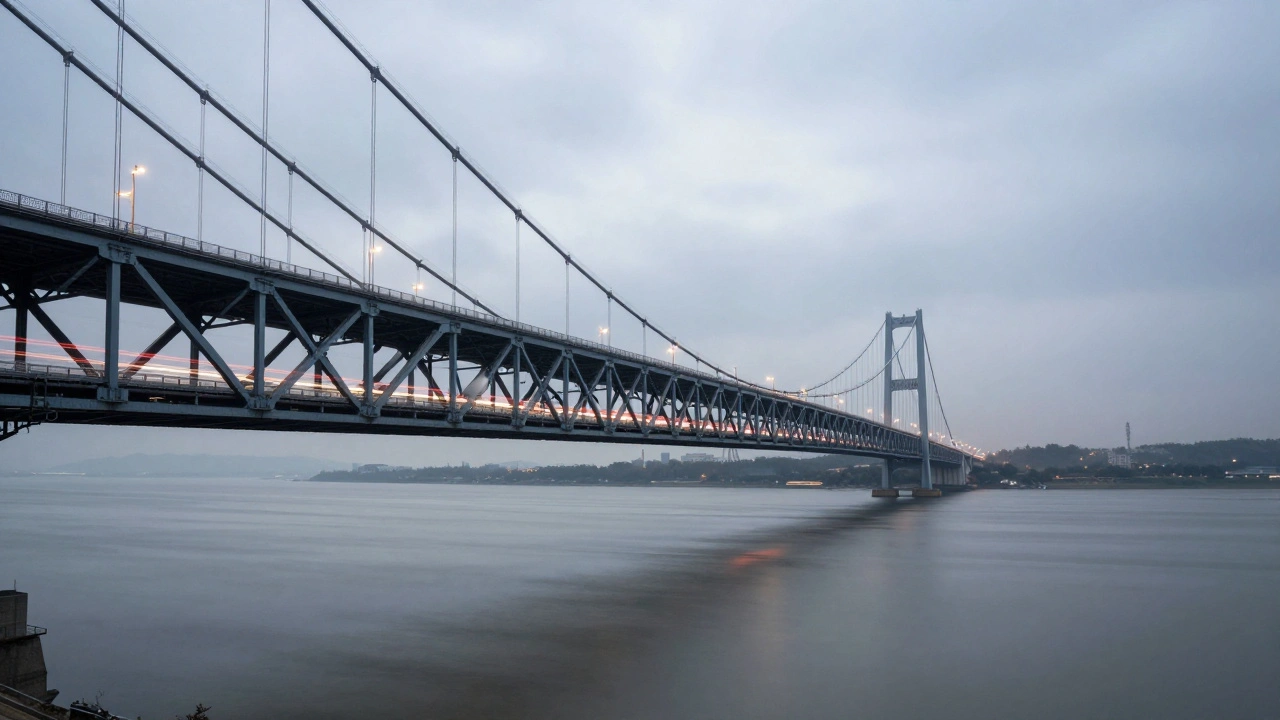
Bridge Photography: Engineering as Art
Bridges are nature’s leading lines. They guide the eye through the frame and connect two points of interest. Bridge photography emphasizes engineering structures as compositional anchors and leading lines, often using long exposures to smooth water and streak traffic lights. Iconic structures like the Brooklyn Bridge or Golden Gate Bridge are popular, but don’t ignore local overpasses or pedestrian walkways.
The secret weapon here is the tripod and a neutral density filter. By slowing your shutter speed to 10-60 seconds, you can turn rushing river water into silky mist and erase moving cars, leaving only their light trails. This creates a surreal stillness in a bustling environment. Aim for apertures between f/8 and f/16 to keep the entire structure sharp from foreground to background.
City Park Photography: Nature in the Concrete Jungle
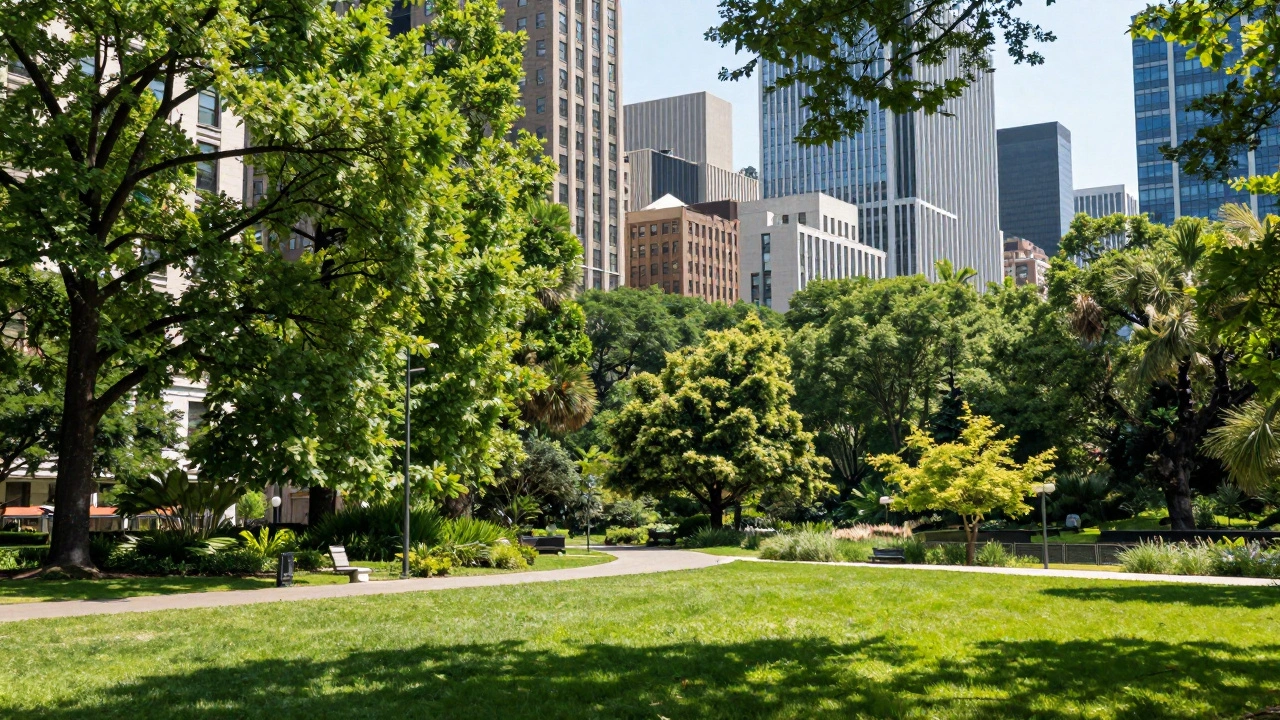
Cities aren’t just steel and glass; they’re also green spaces. City park photography blends urban context with natural elements such as trees, lawns, and water features, framing parks with surrounding architecture. Places like New York’s High Line or Chicago’s Millennium Park show how nature reclaims urban space.
For these shots, you want to balance the organic shapes of trees with the rigid geometry of nearby buildings. A standard zoom lens, around 24-35 mm on a full-frame camera, works well here. It allows you to include enough context so the viewer understands the location while keeping the natural elements prominent. Shoot during daylight with an ISO of 100-400 to maintain image quality, especially if leaves are moving in the wind.
Gear Essentials: What You Actually Need
You don’t need the most expensive camera to take great urban photos, but you do need the right tools. Here is the practical kit used by professionals:
- Camera Body: A full-frame mirrorless or DSLR is ideal because of its dynamic range. Urban scenes have bright highlights (streetlights) and deep shadows (alleys). Sensors with 13-15 EV of dynamic range help recover details in both areas. Brands like Sony (Alpha series), Canon (EOS R series), and Nikon (Z series) dominate this space.
- Lenses: Start with three focal lengths. An ultra-wide (14-24 mm) for grand skylines, a standard zoom (24-70 mm) for flexible park and street scenes, and a telephoto (70-200 mm) for compressing architectural details.
- Tripod: Essential for long exposures. Look for one that supports at least 3-5 kg and is sturdy enough to withstand city winds. Carbon fiber models are lighter but pricier; aluminum is durable and affordable.
- Filters: Neutral Density (ND) filters reduce light entering the lens, allowing for slower shutter speeds even in daylight. A 3-stop or 6-stop ND filter is a good start. Circular Polarizing (CPL) filters help cut glare from glass buildings and enhance sky colors.
| Lens Type | Focal Length | Best For | Key Benefit |
|---|---|---|---|
| Ultra-Wide Zoom | 14-24 mm | Skylines, tall buildings | Immersive perspective, includes foreground |
| Standard Zoom | 24-70 mm | Parks, streets, bridges | Versatility, natural field of view |
| Telephoto Zoom | 70-200 mm | Compressed layers, details | Isolates subjects, flattens distance |
Technical Mastery: Exposure and Composition
Getting the exposure right in cities is tricky. Your camera’s meter will try to average out the bright windows and dark alleys, often resulting in a muddy gray image. To fix this, shoot in RAW format. This preserves maximum data for editing later.
Use the histogram to check your exposure. Ensure the left side (shadows) isn’t clipped off the edge, and the right side (highlights) isn’t blown out. If the contrast is too high for a single shot, use HDR (High Dynamic Range) techniques. Take 3-5 bracketed exposures spaced 1-2 EV apart-one underexposed, one normal, one overexposed-and merge them in software like Lightroom or Photoshop.
Compositionally, rely on the rule of thirds and leading lines. Place the horizon line in the upper or lower third of the frame, not dead center. Use roads, railings, or rivers to lead the viewer’s eye toward your main subject, whether it’s a bridge tower or a cluster of skyscrapers.
Post-Processing: From Document to Art
Raw urban photos often look flat. Post-processing is where you inject mood. Most photographers start in Adobe Lightroom Classic. Use the Masking panel to selectively adjust parts of the image. For example, darken the sky to make it more dramatic, or brighten the shadows on a building facade to reveal texture.
AI tools have changed the game. Features like "Select Sky" or "Select Subject" allow you to isolate elements instantly. Afterward, move to Photoshop for cleanup. Remove power lines, trash cans, or distracting tourists using the Spot Healing Brush. Finally, add micro-contrast using clarity or structure sliders to make textures pop. Tools like Luminar Neo offer AI-driven enhancements for relighting and sky replacement, speeding up this workflow significantly.
Legal and Ethical Considerations
Before you set up your tripod, know the rules. In many public spaces, photography is legal. However, private plazas, transportation hubs, and certain parks may prohibit tripods or require permits. Always ask permission if unsure.
If you plan to sell your images on stock platforms like Adobe Stock or Shutterstock, be aware of model and property releases. Recognizable faces usually require a model release. Distinctive private buildings or branded logos might need a property release for commercial use. For fine-art prints sold directly, these restrictions are looser, but ethical considerations remain. Respect privacy and avoid intrusive behavior.
Drones add another layer of complexity. Agencies like the FAA in the US enforce strict altitude limits (usually 400 feet) and no-fly zones near airports. Always check local regulations before flying. Ignoring these rules can result in heavy fines.
Getting Started: A Practical Plan
Don’t buy all the gear at once. Start with what you have. Pick one location-a local park, a bridge, or a viewpoint with a skyline view. Visit it multiple times. Go at sunrise, then sunset, then on a foggy day. Learn how the light changes. Practice your composition without worrying about perfection. Within 3-6 months of regular practice, you’ll notice a significant improvement in your ability to capture sharp, well-exposed, and emotionally resonant urban landscapes.
What is the difference between urban landscape and cityscape photography?
While often used interchangeably, "cityscape" typically refers to wide, recognizable views of a city's skyline or buildings. "Urban landscape" is broader and more artistic, focusing on the relationship between humans and the built environment. It can include abstract details, empty streets, parks, and moody atmospheres, not just iconic landmarks.
Do I need a tripod for urban landscape photography?
A tripod is highly recommended, especially for low-light situations like sunrise, sunset, or night photography. It allows you to use slow shutter speeds for long exposures, which smooths water and creates light trails. It also ensures maximum sharpness. For daytime shots in bright light, handheld shooting with a fast shutter speed is possible.
Which lens is best for beginners in urban photography?
A versatile zoom lens like a 24-70 mm or 24-105 mm is ideal for beginners. It covers wide-angle views for skylines and tighter frames for details, allowing you to experiment with different compositions without changing lenses. Once you specialize, you might add an ultra-wide (14-24 mm) or telephoto (70-200 mm).
How do I remove people from my urban landscape photos?
There are two main methods. First, use a long exposure (10-30 seconds) on a tripod. Moving people will blur out or disappear entirely. Second, take multiple photos of the same scene and stack them in Photoshop using median blending. This algorithmically removes transient objects like pedestrians while keeping static elements sharp.
Is it legal to take photos of buildings in public?
In most countries, including the US and UK, photographing public spaces and visible buildings from public land is legal. However, selling these images commercially may require property releases for distinctive private structures. Always respect signs prohibiting photography and avoid trespassing on private property.