Ever looked at a stunning underwater photo and wondered why it felt flat? The culprit is usually the lack of a strong foreground subject. In the vast, uniform expanse of blue water, your eye needs an anchor. Without one, the image dissolves into a single tone of azure. But when you place a distinct object or creature in the front third of your frame, everything changes. You create instant depth, guide the viewer’s gaze, and transform a simple snapshot into a compelling story.
This technique isn't just about aesthetics; it's a fundamental rule of visual hierarchy that works even more powerfully underwater. Because water absorbs light and color rapidly, contrast becomes your best friend. A dark silhouette against bright blue, or a vibrant coral against pale sand, creates a dynamic tension that keeps people looking. Let’s break down how to harness this effect effectively.
Why the Foreground Matters Underwater
On land, we have trees, buildings, and shadows to provide context. Underwater, the environment is often featureless. This is where Visual Depth comes into play. It is the perceived distance between objects in a two-dimensional image. When you add a foreground element, you are essentially creating a reference point. Your brain compares the sharpness, size, and clarity of the front object with the softer, hazier background. This comparison instantly tells you how deep the scene is.
Consider a shot of a sea turtle gliding over open ocean. If the turtle is centered and there is nothing else in the frame, it looks like a sticker on a blue card. Now, imagine adding a cluster of bubbles rising from the bottom left corner, slightly out of focus. Suddenly, the turtle feels distant, majestic, and part of a living ecosystem. The bubbles act as a bridge between the viewer and the subject, pulling you into the scene rather than letting you observe it from the outside.
Selecting the Right Foreground Elements
Not every object works as a foreground anchor. You need elements that offer contrast in shape, texture, or color. Here are some reliable choices:
- Bubbles: They are natural, dynamic, and add a sense of movement. Try exhaling slowly before taking the shot to create a controlled stream.
- Coral Reefs: Use branches or fans that extend into the frame. Be careful not to block the main subject, but let them frame the edges.
- Sand Swirls: If you disturb the seabed gently, the resulting cloud can act as a mysterious, textured layer in the lower third of your image.
- Small Fish Schools: A tight group of small fish in the foreground provides scale and energy without distracting from larger subjects.
The key is balance. If the foreground is too busy, it competes with the main subject. If it’s too subtle, it might be missed entirely. Aim for elements that occupy roughly 10-20% of the frame’s area, positioned along the rule of thirds lines.
Managing Light and Color Contrast
Water acts as a filter, stripping away reds and oranges first, then yellows, leaving blues and greens. This means your foreground and background will naturally differ in color saturation. You can exploit this by choosing subjects with inherent contrast. For example, a black-and-white striped moray eel in the foreground pops dramatically against a soft, turquoise background. The high contrast in value (light vs. dark) ensures the subject remains visible even if colors fade.
If you’re using artificial lighting, such as strobes, be mindful of how they affect the foreground. Over-lighting a close object can blow out details and create harsh shadows. Instead, use a balanced exposure that allows the foreground to retain texture while keeping the background naturally lit by ambient sunlight. This mix of artificial and natural light often creates a professional look that separates the layers of the image.

Practical Techniques for Sharp Focus
One common mistake is focusing on the background subject and letting the foreground go blurry. While intentional blur can be artistic, accidental blur looks like a technical error. To keep both layers readable, try these methods:
- Use Aperture Priority Mode: Set your aperture to f/8 or f/11. This increases your depth of field, ensuring that both the foreground and mid-ground remain relatively sharp.
- Focus Peaking: If your camera has this feature, enable it. It highlights the sharpest parts of the image, helping you verify that your foreground element is in focus.
- Manual Focus with Live View: Zoom in digitally on your LCD screen to check focus precision. This is especially useful for macro shots where the depth of field is razor-thin.
Remember, you don’t need everything to be tack sharp. A slight softness in the extreme foreground can actually enhance the feeling of depth, simulating the way our eyes perceive nearby objects. The goal is clarity, not perfection.
Common Pitfalls to Avoid
Even experienced photographers make mistakes when working with layered compositions. Here are three traps to watch out for:
| Mistake | Why It Fails | How to Fix It |
|---|---|---|
| Cluttered Foreground | Distracts from the main subject | Isolate a single strong element; remove others via cropping or positioning |
| Low Contrast | Foreground blends into background | Choose darker or brighter objects; use backlighting to create silhouettes |
| Poor Spacing | Elements feel cramped or disconnected | Apply the rule of thirds; ensure negative space exists between layers |
Clutter is the biggest enemy of clean composition. If you see five different types of coral in the foreground, your eye doesn’t know where to rest. Pick one. Make it strong. Let the rest fade into the background haze. Similarly, poor spacing can make an image feel chaotic. Give your foreground element room to breathe. Negative space is just as important as the subject itself.
Post-Processing Tips for Enhanced Depth
While getting the shot right in-camera is crucial, post-processing can fine-tune the effect. Slightly increasing the clarity or structure slider in editing software can help separate the foreground from the background. Be gentle, though. Too much sharpening introduces noise, which ruins the smoothness of the water. You can also adjust the white balance independently for different layers if you’re using multiple exposures. However, for most standard shots, a global adjustment to boost blue tones in the background while preserving natural colors in the foreground works wonders. This mimics the natural attenuation of light in water and reinforces the sense of distance.
Frequently Asked Questions
What is the best focal length for foreground subjects?
A wide-angle lens, typically between 14mm and 24mm on full-frame cameras, is ideal. It allows you to get close to the foreground while still capturing enough of the background to show depth. Longer lenses compress perspective, which can flatten the image and reduce the impact of the foreground layer.
Should the foreground be in focus?
It depends on your intent. For maximum clarity, yes, keep it sharp. For artistic depth, a slight blur can work well. The key is consistency. If the blur looks accidental, fix it. If it looks intentional, embrace it. Always test both approaches during your dive.
How do I deal with backscatter in the foreground?
Backscatter occurs when particles in the water reflect light back into your lens. To minimize it, angle your strobes inward toward the subject rather than straight forward. Also, try to shoot during times when water visibility is highest, such as after rain has settled or in deeper, calmer waters.
Can I use my hand or gear as a foreground element?
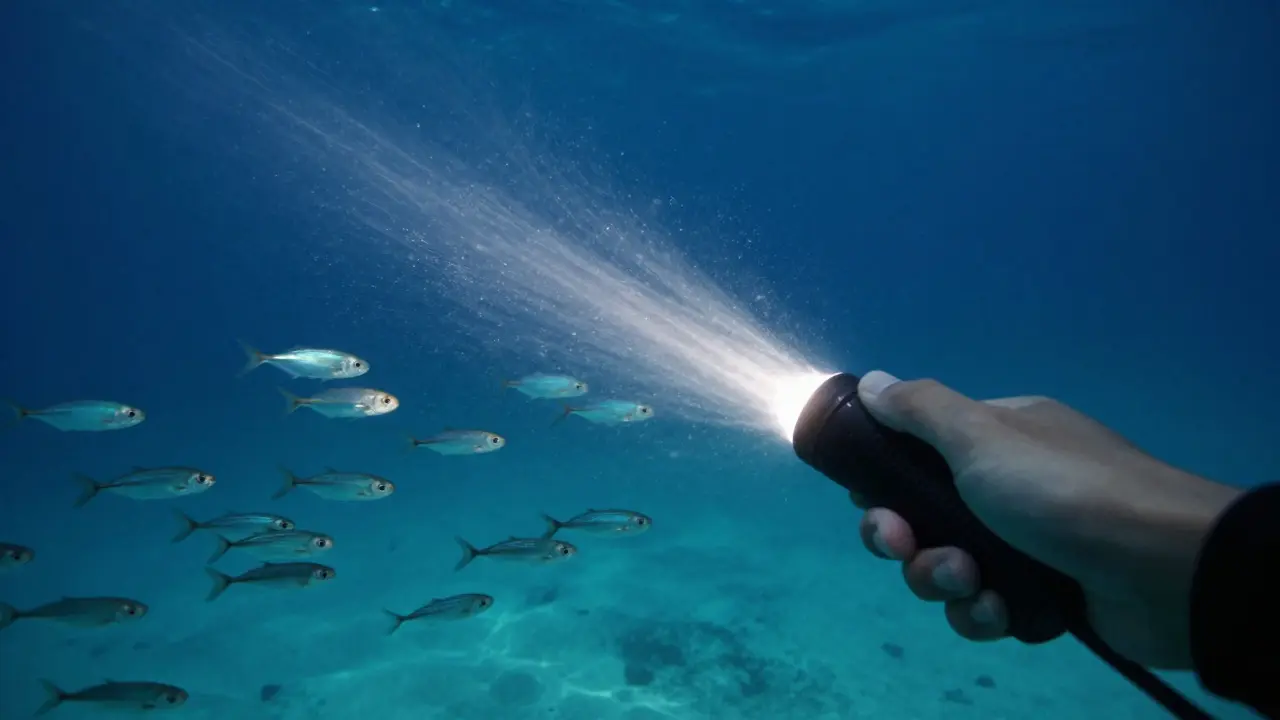
Yes, this is a popular technique known as 'self-portrait' or 'gear-in-shot' photography. Holding a flashlight or pointing at a subject can add human interest and scale. Just ensure the gear is clean and doesn’t obscure the main subject. It adds a personal touch that many viewers find relatable.
Does this technique work in murky water?
In murky water, depth is already limited, so foreground elements become even more critical. They help define the boundaries of the visible space. Use high-contrast subjects and avoid trying to capture distant backgrounds, which will likely be lost in the haze. Focus on close-up interactions instead.