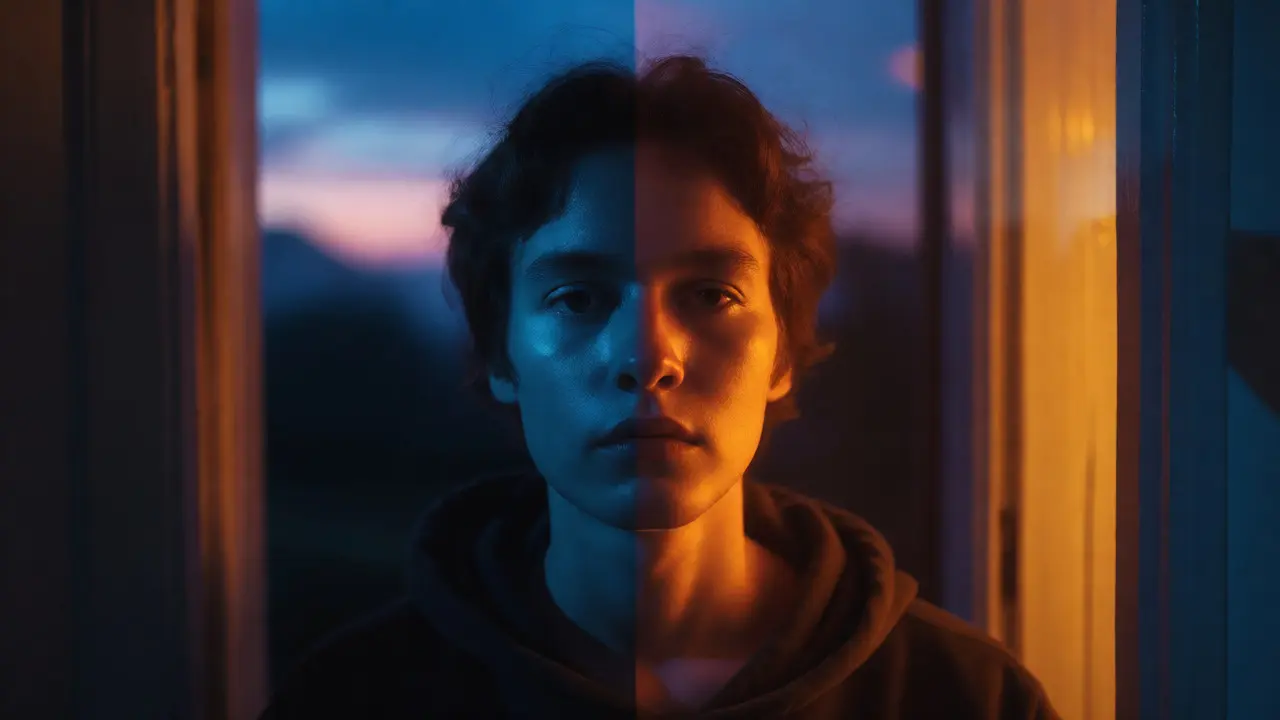
You’re shooting a portrait indoors. Sunlight pours through the window on the left, casting a cool, blue hue. On the right, a practical lamp glows with that warm, orange tungsten warmth. Your camera’s auto-white-balance tries to pick a side, but the result looks muddy-skin tones turn greenish or magenta, and the image feels disjointed. This is mixed lighting, one of the most common headaches for photographers working in real-world environments.
It doesn’t have to be a nightmare. Whether you are using high-end studio strobes or just relying on available light from your home, understanding how to handle different color temperatures can save your shot. The key isn't always to eliminate mixed sources; sometimes it's about embracing them creatively while keeping the subject looking natural. Here is how you tackle the clash between tungsten, LED, and daylight without losing your mind.
Understanding the Color Temperature Spectrum
To fix mixed lighting, you first need to speak its language. Light isn't just bright or dark; it has a color signature measured in Kelvin (K). Daylight sits around 5500K-6500K, appearing neutral to slightly blue. Tungsten bulbs hover near 2700K-3200K, emitting a strong orange-yellow cast. Modern LEDs vary wildly depending on their manufacturing quality, often falling anywhere between these extremes or even outside them due to poor spectral rendering.
When you mix these sources, your sensor gets confused. If you set your white balance to "Tungsten" to neutralize the lamp, the daylight streaming in will look icy blue. If you choose "Daylight," the lamp turns deep orange. There is no single setting that makes both look perfect simultaneously unless you correct them in post-production or physically modify the lights before they hit the scene.
The Three Main Culprits: Tungsten, LED, and Daylight
Each light source brings its own baggage to the party. Knowing their quirks helps you predict problems before you press the shutter.
- Tungsten: These traditional incandescent bulbs produce a continuous spectrum, meaning colors render accurately once you correct the white balance. They are dim compared to modern options and get hot fast, but their color consistency is reliable.
- LEDs: Light Emitting Diodes are efficient and cool, but cheap ones suffer from a jagged spectral output. This causes skin tones to look sickly or unnatural, even after white balance correction. Look for LEDs with a high CRI (Color Rendering Index) of 90+ if you plan to use them as primary lights.
- Daylight: The sun is your most powerful free light source, but it changes constantly. Cloud cover shifts the temperature, and time of day alters the angle. It’s broad and flattering, but unpredictable.
A quick comparison helps visualize the challenge:
| Light Source | Approx. Temp (Kelvin) | Color Cast | Best Use Case |
|---|---|---|---|
| Full Sun | 5500K - 6000K | Neutral/Cool | Outdoor portraits, harsh shadows |
| Overcast Sky | 6500K - 8000K | Blue | Soft, diffused light |
| Standard LED Panel | Variable (often 4000K-5000K) | Green/Magenta tint | Video interviews, controlled studios |
| Tungsten Bulb | 2700K - 3200K | Orange/Yellow | Cozy interiors, practical lights |
Strategy 1: Prioritize Your Key Light
Stop trying to make every light source match perfectly at the capture stage. Pick a winner. Usually, this should be the strongest light hitting your subject’s face-the key light. If the window light is illuminating the model, set your camera’s white balance to daylight (around 5500K). Now, the window light looks natural. What about that annoying tungsten lamp in the background? Let it stay warm. In fact, a warm background against a neutral subject adds depth and separation. This technique, often called "motivated lighting," uses the contrast to tell a story rather than fighting physics.
If you must have the tungsten light affect the subject’s face, then flip the script. Set your white balance to tungsten (3200K). Now the lamp looks white. The window light will turn blue, which can actually look cinematic if you want a moody, evening vibe. Just be aware that blue skin tones can look cold or ill if overdone.
Strategy 2: Gel Your Lights
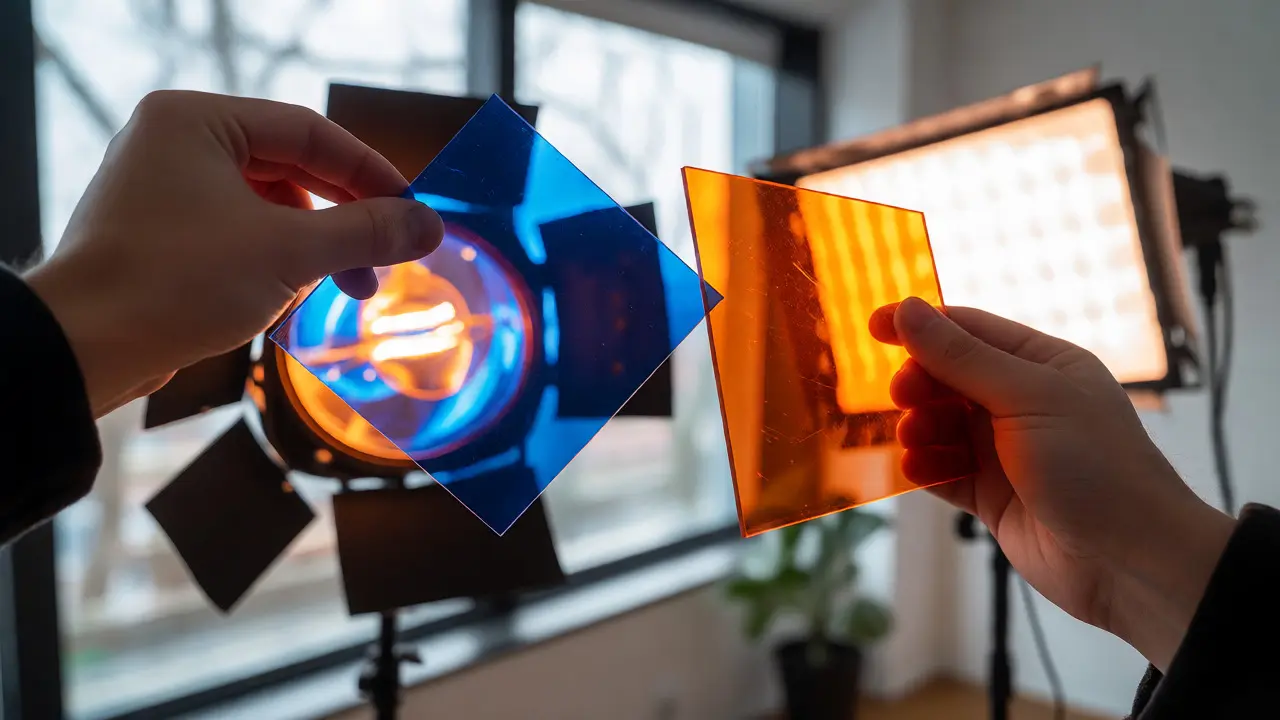
If you need all lights to match exactly-for example, in a product shoot where color accuracy is non-negotiable-you have to change the light itself, not just the camera settings. This is where gels come in. Gels are thin sheets of colored plastic that go over your lights to shift their temperature.
Suppose you have a daylight-balanced LED panel and a tungsten bulb in the same frame. You want everything to look like daylight. Put a CTB (Color Temperature Blue) gel over the tungsten bulb. This cools down the orange light to match the 5500K of the LED. Conversely, if you want a warm, cozy look, put a CTO (Color Temperature Orange) gel over your daylight source to warm it up to match the tungsten.
Don’t forget the cost. Gels reduce light output. A full CTO gel might cut your light intensity by 1-2 stops. You’ll need to open your aperture wider or raise your ISO to compensate. Always test your setup before the client arrives.
Strategy 3: The Post-Production Safety Net
Sometimes, you don’t have time to gel lights or move furniture. You shoot RAW, knowing you’ll fix it later. This is valid, but tricky. When you import into software like Adobe Lightroom or Capture One, you can adjust the global white balance. But what if half the image is still off?
Use local adjustments. Most modern editors allow you to brush in white balance corrections. Paint over the tungsten-lit area and drag the temperature slider until it matches the daylight side. It’s not magic-if the original file was severely underexposed or noisy, this won’t work well-but for minor mismatches, it saves the day. Remember, correcting extreme color casts in post can introduce noise or banding, so getting it close in-camera is always better.
Dealing with Green Tints from Cheap LEDs
This is the silent killer of digital photography. Many budget LEDs emit a green spike in their spectrum that standard white balance tools ignore. Your camera thinks it’s balanced, but skin tones look swampy. You cannot fix this with the temperature slider alone because that only moves along the blue-orange axis.
You need to adjust the tint (green-magenta axis). If your LEDs are green-heavy, add magenta tint in-camera or in post. Better yet, buy better lights. Professional video LEDs now offer adjustable tint controls directly on the unit. If you are stuck with bad LEDs, consider using a green gel on other lights to match the mismatch, though this is rarely ideal for portraits.
Creative Uses of Mixed Lighting
Who says mixed lighting has to be fixed? Some of the best images embrace the chaos. Cyberpunk aesthetics rely heavily on clashing neon blues and oranges. A portrait with half the face lit by cool moonlight (or a blue LED) and the other by warm candlelight creates drama and visual interest.
Try this experiment: Shoot a subject standing in a doorway. Have them facing the interior (tungsten) while the exterior is twilight (blue hour). Don’t try to balance them. Instead, expose for the brighter side and let the shadows fall into the complementary color. The resulting split-tone effect draws the eye across the face and adds emotional weight to the image. It’s not a mistake; it’s a style choice.
Practical Checklist for On-Location Shoots
Before you start shooting, run through this mental checklist to avoid disasters:
- Identify all sources: Walk the room. Note windows, lamps, overhead fluorescents, and computer screens.
- Kill the competition: Turn off any lights that aren’t essential. Fluorescents are notorious for ugly green spikes. If you can’t turn them off, gel them or move away.
- Set a baseline: Decide which light is your key. Set your custom white balance based on that source using a gray card.
- Check the edges: Look at the background. If there’s a weird color spill, see if you can block it with black flags or bounce cards.
- Shoot a reference: Take a photo of a color checker chart under the mixed light. This gives you a precise target for color correction in post.
Mixed lighting isn’t an enemy to be defeated; it’s a variable to be managed. By understanding the science behind color temperature and having a few physical tools (gels, flags) and digital techniques (local adjustments) in your kit, you can turn potential failures into creative opportunities. Next time you walk into a room with conflicting lights, don’t panic. Assess, prioritize, and decide whether to harmonize or highlight the difference.
Can I fix mixed lighting entirely in Photoshop?
You can improve it significantly, but you can't create data that wasn't captured. Severe color casts, especially those caused by low-quality LEDs with poor spectral rendering, may leave artifacts or require extensive masking. Shooting RAW and getting close in-camera is always preferable to heavy post-processing fixes.
What is the best white balance setting for mixed indoor/outdoor shots?
There is no single 'best' setting. Choose the setting that matches your primary light source (the one hitting the subject's face). If the subject is lit by window light, use Daylight (5500K). If they are lit by a lamp, use Tungsten (3200K). Accept that the secondary light source will appear colored, which can often enhance the mood of the photo.
Why do my skin tones look green under LED lights?
Cheap LEDs often have a discontinuous spectrum with a strong peak in the green range. Standard white balance algorithms focus on blue/orange correction and miss this green spike. To fix it, you must adjust the 'Tint' slider toward Magenta in your editing software, or use higher-quality LEDs with a high Color Rendering Index (CRI).
Do I need special gels for my flash?
Yes, if you want your flash to match ambient light. Speedlights are typically daylight balanced (5500K). If you are shooting indoors with tungsten lamps, put a CTO gel on your flash to warm it up, or lower your camera's white balance to tungsten to keep the background warm while the subject remains neutral.
Is it better to use daylight or tungsten as the base for mixed lighting?
It depends on the desired mood. Daylight bases feel fresh, clean, and modern. Tungsten bases feel cozy, intimate, and nostalgic. For commercial work involving products, matching the actual color of the object is crucial, so you might need to gel all lights to a neutral standard. For artistic portraits, choosing the 'wrong' balance can create compelling atmosphere.