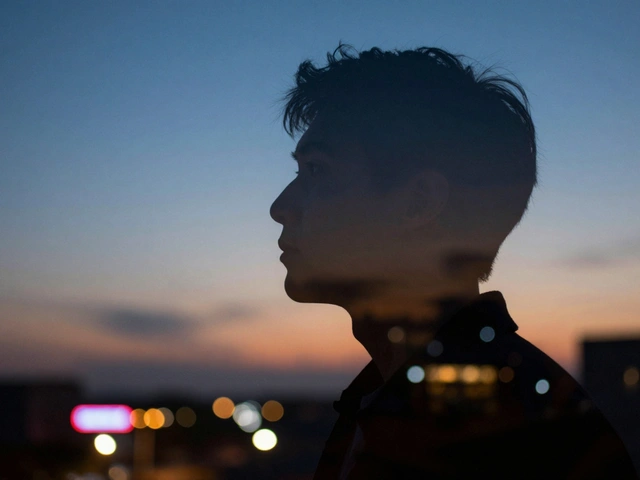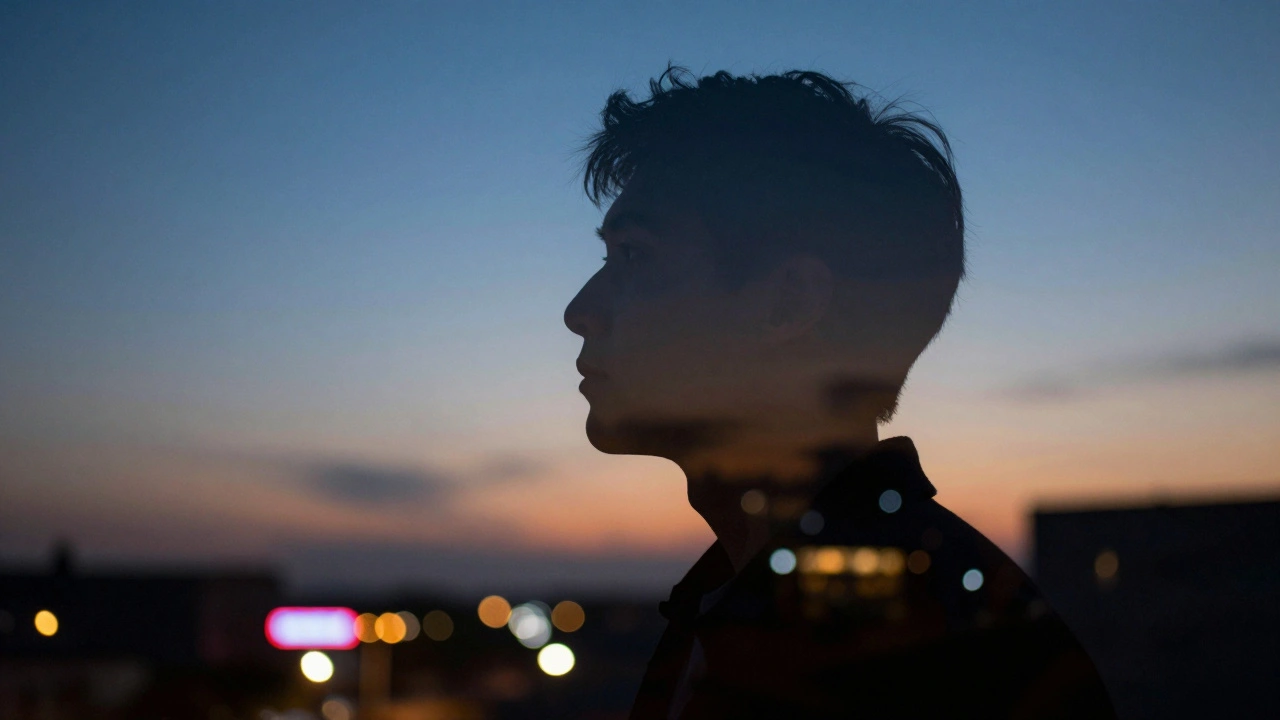
Ever seen a portrait where the subject’s face is woven into a forest of glowing city lights, or a silhouette fused with swirling clouds, all in one shot? That’s not Photoshop. That’s in-camera multiple exposure - and it’s one of the most powerful creative tools you’re probably not using. Unlike stacking images later on a computer, this technique combines two or more exposures right inside your camera, giving you a single, raw image that feels alive with texture, mystery, and motion. It’s not just a retro trick from film days. Modern digital cameras now let you preview, tweak, and control these blends with precision - no editing software needed.
How In-Camera Multiple Exposure Actually Works
In-camera multiple exposure isn’t magic. It’s physics. Your camera’s sensor captures light from one scene, then captures another, and blends them before saving the final file. The key difference from post-processing? You’re working with real-time light, not pixels. What you see in the viewfinder or on the screen as you shoot is what you get - no guesswork later.
Early photographers did this by accident. They’d forget to advance the film, or reload a roll and shoot over the same frames. The results were unpredictable - sometimes beautiful, often unusable. Today, cameras like Nikon, Canon, Fuji, and Panasonic have built-in menus that let you choose exactly how many exposures to combine, and how they should blend. You can do three, five, even ten exposures in one shot. And unlike film, you can preview each layer as you go.
Blend Modes: The Secret Sauce
Here’s where digital really outshines film. With film, every exposure just adds more light. The result? A washed-out, glowing mess if you’re not careful. Digital cameras give you control over how those layers interact. Each brand uses slightly different names, but the core modes are universal:
- Additive Mode: The classic double exposure. Every pixel’s brightness is added together. Great for glowing effects, but risky - you can easily overexpose.
- Average Mode: The camera calculates the average brightness of each pixel across all exposures. Perfect for balancing light and shadow. Most beginners should start here.
- Lighten Mode: For each pixel, the camera keeps the brightest version from any of the shots. Ideal for overlaying textures - think branches over a face, or neon signs on a silhouette.
- Darken Mode: Keeps only the darkest pixel. Use this to hide bright backgrounds and emphasize dark shapes - like turning a busy street into a shadowy frame around a person.
These modes let you do things film never could. Want a portrait with a galaxy swirling behind it? Use Lighten Mode. Want a ghostly figure fading into mist? Try Average. Experimenting with these isn’t optional - it’s the heart of the technique.
How to Shoot a Great On-Body Blend
Let’s say you want to blend a person’s face with a textured background - a wall of graffiti, a field of wildflowers, or a skyline at dusk. This is called an on-body blend because the subject’s body (or face) becomes the canvas for the second image.
Here’s the workflow that works every time:
- Start with a dark subject. Shoot your person or object against a bright, simple background - like a white wall or clear sky. Keep it slightly underexposed. Why? Because the second exposure will add light. If the first image is already bright, you’ll blow out the final result.
- Use a silhouette if you can. A dark outline with no detail (like a profile shot in front of a sunset) gives the second image room to breathe. The edges stay sharp, and the texture flows naturally into the negative space.
- Shoot the background second. This is critical. The background image should be rich in color, contrast, and texture. City lights, falling leaves, flowing water, or a crowded street at night all work. Avoid flat, dull backgrounds.
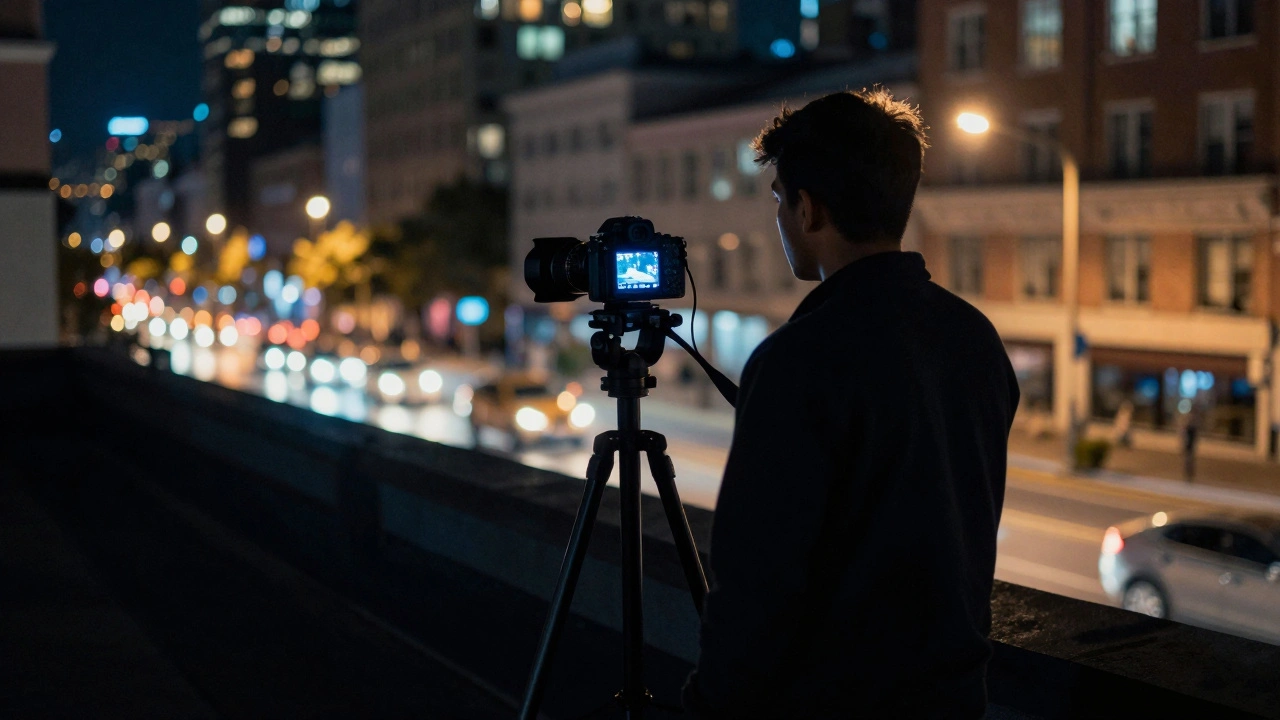
- Lock your camera on a tripod. Even a 1mm shift between shots will blur the blend. If you don’t have a tripod, brace the camera against a wall or table. Stability isn’t optional.
- Set your ISO low. ISO 100 or 200. Higher ISO adds noise, and when you stack exposures, that noise multiplies. You want clean, sharp layers.
- Turn on preview. On Nikon Z series or Canon R5, you can see the blend after the first shot. Use that. Adjust your second angle, tweak your exposure, or change the blend mode before you commit.
What Cameras Do This Best?
You don’t need a pro camera to do multiple exposures. Even entry-level mirrorless models from Canon, Sony, and Fuji have it. But some systems make it easier:
- Nikon DSLRs (like D750 or D850): Great controls, but you can’t use Live View while shooting multiple exposures. Also, there’s a 30-second delay between shots - if you shoot too fast, it resets to single exposure. Annoying, but fixable with patience.
- Nikon Z mirrorless (Z5, Z6, Z8): No Live View restrictions. Real-time preview. Auto gain feature automatically balances exposure. Best overall experience.
- Canon EOS R5/R6: Clean menu, intuitive controls. Lighten/Darken modes are labeled as “Bright” and “Dark.” Works great with touchscreen preview.
- Fuji X-T5/X-S20: Film simulation modes + multiple exposure = magic. Try Velvia + Lighten Mode for hyper-saturated textures.
- iPhone (iOS 17+): Yes, even phones. Use the built-in camera app’s “Multiple Exposure” mode. It’s limited, but handy for quick, artistic shots.
Older film cameras? Lomography’s instant cameras have a dedicated MX (Multiple Exposure) button. You can shoot the same frame five times in a row - perfect for playful, experimental shots. No settings. Just press and shoot.
Why Skip Post-Processing?
You could do this in Photoshop. Layer two images. Lower opacity. Play with blend modes. Easy, right? So why bother with the camera?
Because control kills creativity. When you’re stuck behind a screen, you overthink. You tweak shadows. You mask edges. You spend an hour on one image. In-camera, you’re forced to think in real time. You move the camera. You change the angle. You feel the light. The result isn’t perfect - but it’s honest. It has energy.
Also, you get a raw file that’s physically unique. No one else has this exact blend. No one else will ever capture it the same way. That’s the soul of photography.
Common Mistakes (and How to Fix Them)
- Mistake: Shooting two bright scenes. Fix: Always start with a dark subject. Your first exposure should be underexposed. Let the second exposure bring the life.
- Mistake: Using a busy background first. Fix: Save the texture for the second shot. The first image needs space - simple, clean, quiet.
- Mistake: Forgetting to use a tripod. Fix: If you’re handheld, use a shutter speed of 1/125 or faster. Anything slower and you’ll get ghosting from movement.
- Mistake: Not checking the histogram. Fix: After each exposure, glance at the histogram. If it’s pushed to the right (overexposed), dial down your exposure compensation by 1 stop.
- Mistake: Using high ISO. Fix: Stick to ISO 100-400. Noise in one layer becomes noise in ten layers.
What to Try Next
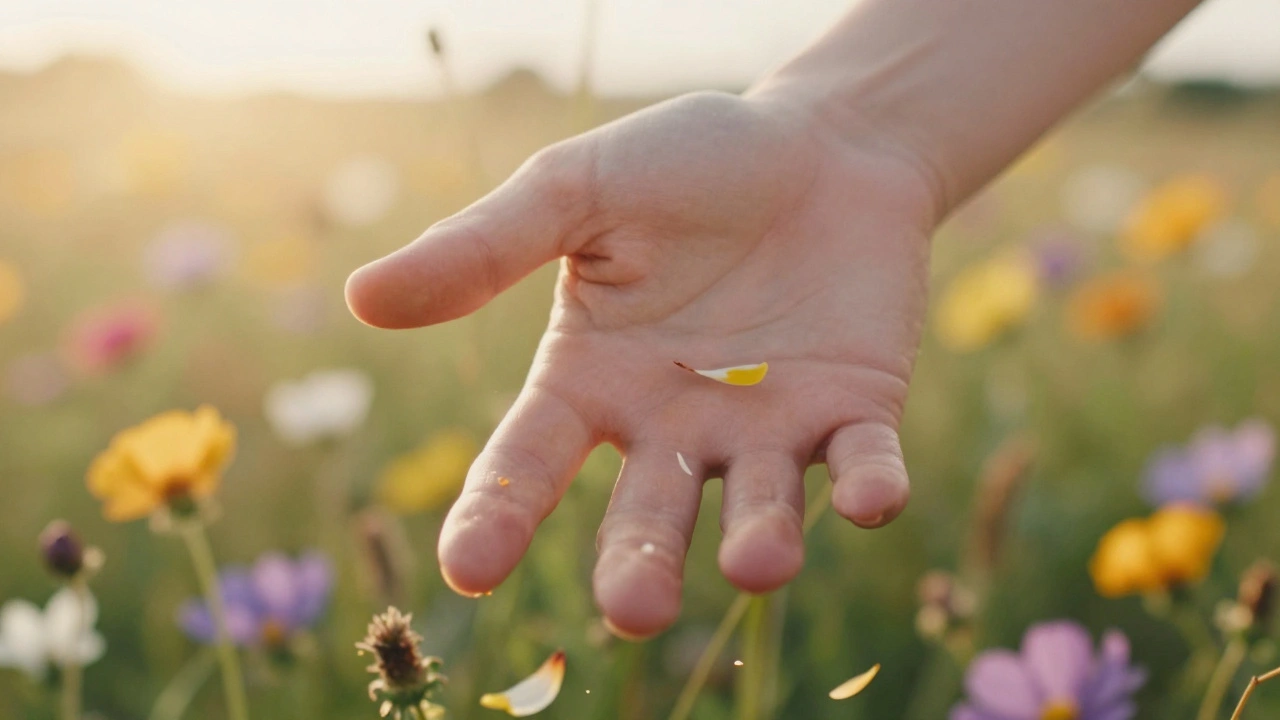
Try this: Shoot a person in silhouette against a bright window. Then, without moving the camera, shoot a close-up of a flower field. Set the blend mode to Lighten. The result? A face made of petals. Or shoot a city skyline at dusk, then overlay a shot of your own hand reaching out. Suddenly, the viewer doesn’t just see a photo - they feel a story.
Don’t wait for perfect conditions. Shoot in the rain. Shoot at midnight. Shoot through a window. The magic isn’t in the gear. It’s in the willingness to let two worlds collide - right inside your camera.
Can I use in-camera multiple exposure with any lens?
Yes, any lens works. But wide-angle lenses (24mm or wider) are easiest because they capture more context, making blending smoother. Telephoto lenses can work too - just make sure your subject and background are far enough apart to avoid unintended overlap.
Do I need to use manual mode?
Not necessarily. Auto mode can work, but you’ll get inconsistent exposure between shots. Manual mode gives you full control. Set your aperture and shutter speed for the first shot, then keep them locked. Adjust ISO if needed. If you’re unsure, use Aperture Priority with exposure compensation set to -1 stop for the first image.
Can I do multiple exposures with flash?
Yes, but it’s tricky. Flash can overpower the second exposure. If you use flash, reduce its power significantly - try 1/4 or 1/8 output. Better yet, use ambient light for the first shot and flash only for the second, if you’re adding highlights. Test it with one shot before committing.
Why does my Nikon say “Multiple Exposure” is disabled when I turn on Live View?
Nikon DSLRs disable multiple exposure mode when Live View is active. It’s a firmware limitation. To fix it, turn off Live View before enabling multiple exposure. If you need to frame your shot, use the optical viewfinder instead. Nikon mirrorless cameras don’t have this issue.
What if I want to erase one of the exposures?
You can’t erase a layer once it’s captured. That’s the point - it’s final. But most cameras let you save each individual exposure along with the final blend. Enable “Save Individual Images” in the menu. That way, if the blend doesn’t work, you still have the raw files to try again.