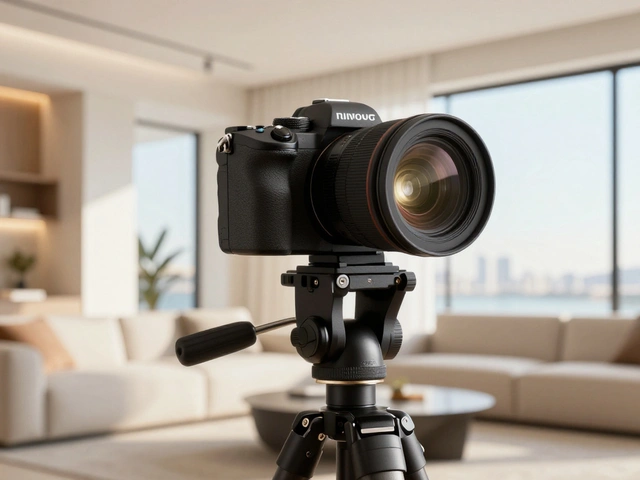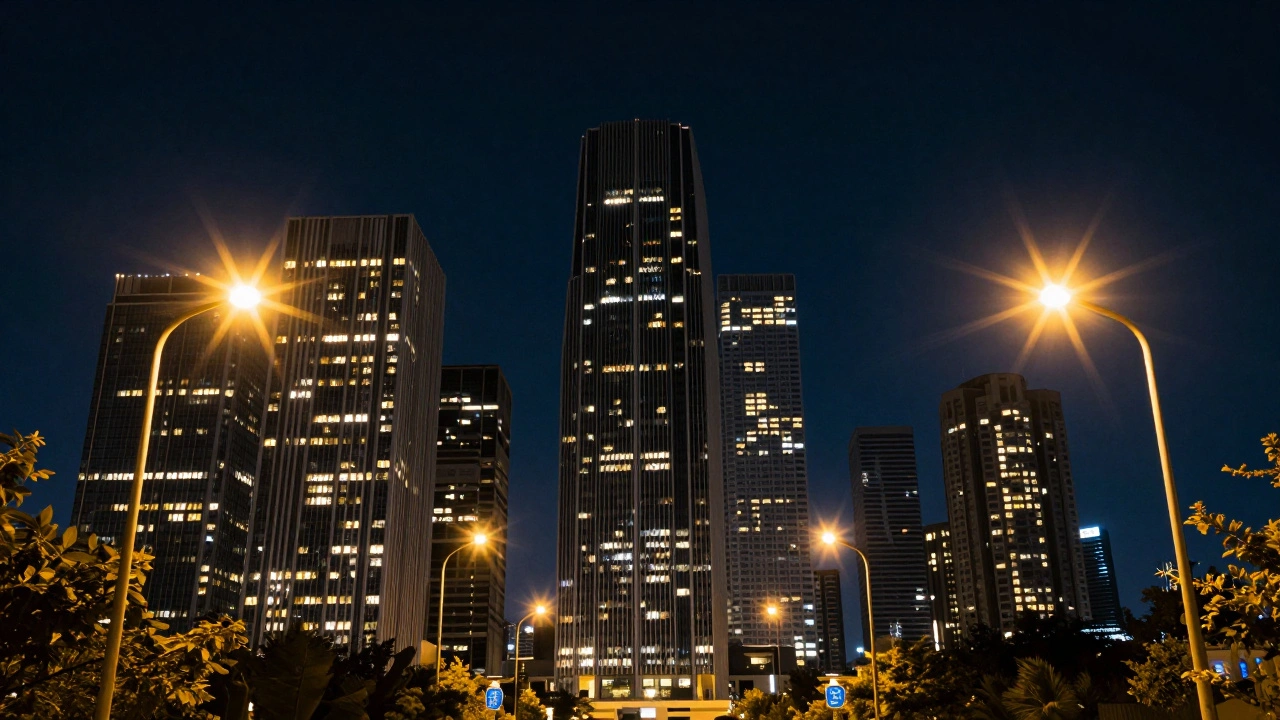
Ever looked at a professional shot of a city skyline or a piece of jewelry and wondered how those bright lights have those perfect, crisp radiating spikes? Most people assume it's a post-processing trick or a specific lens, but the secret is often a simple piece of glass. Star Filters is a specialized type of optical glass filter used in photography to create starburst or sunburst effects from bright point light sources through the principle of diffraction. By adding these to your gear, you can turn a boring street lamp into a cinematic feature without spending hours in Photoshop.
Quick Summary of Star Filter Essentials
- How it works: Etched grooves on the glass bend light to create radiating spikes.
- Common Types: 4-point, 6-point, and 8-point filters are the standard.
- Best Aperture: Wide apertures (f/2.8 to f/4) work with filters; narrow (f/11+) are for natural starbursts.
- Key Use Cases: Night cities, jewelry, concerts, and high-glam fashion.
- Pro Tip: Rotate the filter to change the angle of the light spikes.
The Science of the Sparkle: How It Works
To understand why these filters work, you have to look at Diffraction is the process where light waves bend or spread as they pass through a small opening or around an obstacle. A star filter isn't just a piece of clear glass; it has microscopic grooves etched into the surface. When a bright, concentrated light source hits these grooves, the light is forced to spread outward in specific directions.
The number of points you see in your photo depends entirely on the pattern of those grooves. For example, a 4-point star filter is a filter with grooves forming a cross shape at 90-degree angles, producing a simple "+" effect. If you move up to a 6-point or 8-point version, the grooves are more complex, creating a denser, more intense starburst. Usually, these filters consist of two layers of glass, but only one layer contains the etched lines that do the heavy lifting.
Choosing Your Point Count
Deciding between a 4, 6, or 8-point filter isn't just about preference; it's about the mood of the image. A 4-point filter is often the best starting point because it's subtle and less likely to clutter the frame. It feels modern and clean, making it a go-to for architecture or minimalist city shots.
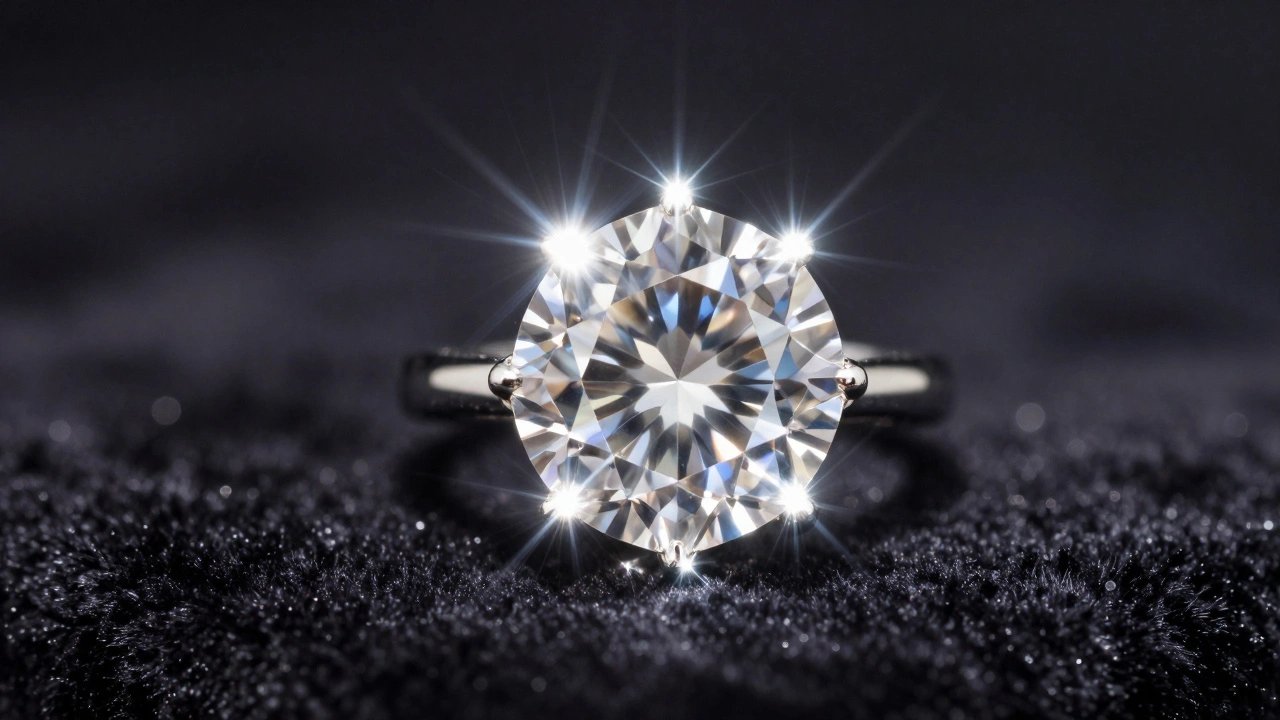
Once you want more drama, the 6 and 8-point filters come into play. These create a much more "explosive" look. If you're photographing a diamond ring or a sequined dress, an 8-point filter can make every tiny reflection pop, creating a sense of luxury and high energy. However, be careful-too many points can sometimes make a busy image feel chaotic.
| Filter Type | Visual Effect | Best Use Case | Intensity |
|---|---|---|---|
| 4-Point | Clean "+" shape | Cityscapes, Architecture | Low/Subtle |
| 6-Point | Symmetrical star | Product shots, Portraits | Medium |
| 8-Point | Dense burst | Jewelry, Glitter, Concerts | High/Dramatic |
Mastering Aperture and Exposure
One of the biggest advantages of using a star filter is that it breaks the traditional rules of the Aperture is the size of the lens opening that controls how much light enters the camera and the depth of field. If you try to get a starburst naturally (without a filter), you have to stop your lens down to f/11 or f/16. This often requires a tripod because your shutter speed drops significantly.
With a star filter, you can achieve those long, dramatic rays even at wide apertures like f/2.8 or f/4. This is a game-changer because it allows you to keep a shallow depth of field-blurring the background while still getting the star effect on your lights. If you want the absolute clearest and most prominent stars, some pros suggest pushing to f/8 or f/11, but for most, the f/2.8 to f/4 range provides that perfect balance of bokeh and sparkle.
To make the stars really "bite," try underexposing your shot slightly. If you're using aperture-priority mode, use negative exposure compensation. By darkening the image a bit, the bright highlights of the starburst stand out more sharply against the background, preventing the rays from looking washed out.
Lighting Conditions for Maximum Impact
Star filters don't work on everything. They require Point Light Sources is small, concentrated sources of bright light, such as a light bulb, a distant star, or a reflection on a metallic surface. If you use a massive softbox that floods the whole room with light, you won't see any stars. You need hard light.
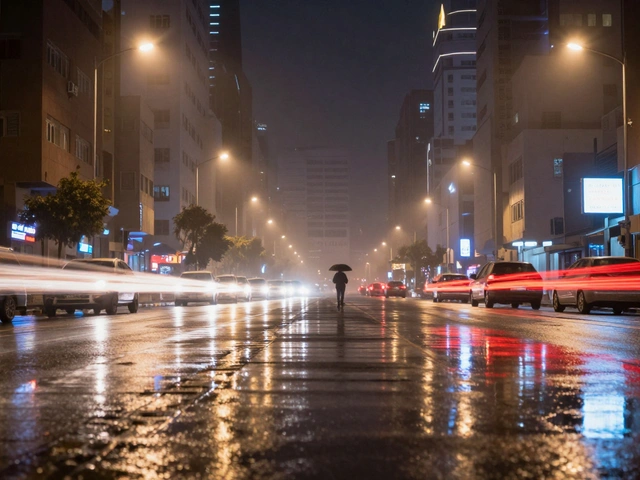
For studio work, ditch the softboxes and try bare strobes, grids, or spot lights. Grids are particularly effective because they stop light from spilling everywhere, focusing it into a tight beam that the filter can then transform into a star. In the real world, look for neon signs, street lamps, or the sun when it's low on the horizon. Pro tip: partially obstructing a light source (like hiding the sun behind a tree branch) can actually increase the contrast and make the refraction more interesting.
If you're doing fashion or product photography, think about materials. Glitter makeup, gemstones, and metallic jewelry are essentially tiny mirrors. Each one becomes a point light source, meaning a single star filter can turn a handful of sequins into a galaxy of stars.
Practical Application Across Genres
Where should you actually use these? Let's look at a few scenarios:
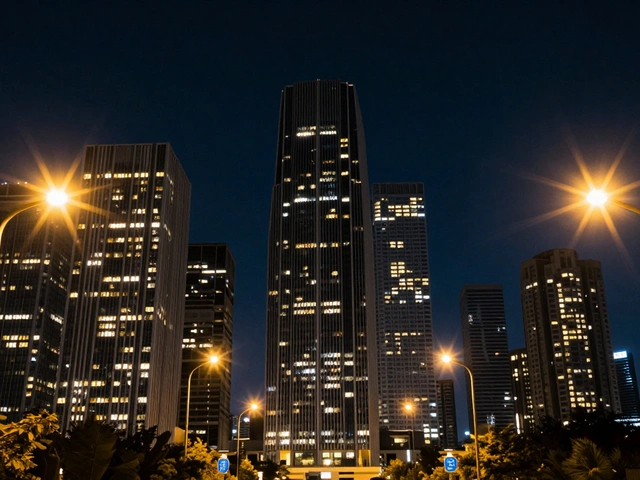
- Night Photography: Urban environments are a playground for star filters. Turn every street lamp into a focal point and give your city shots a stylized, cinematic vibe.
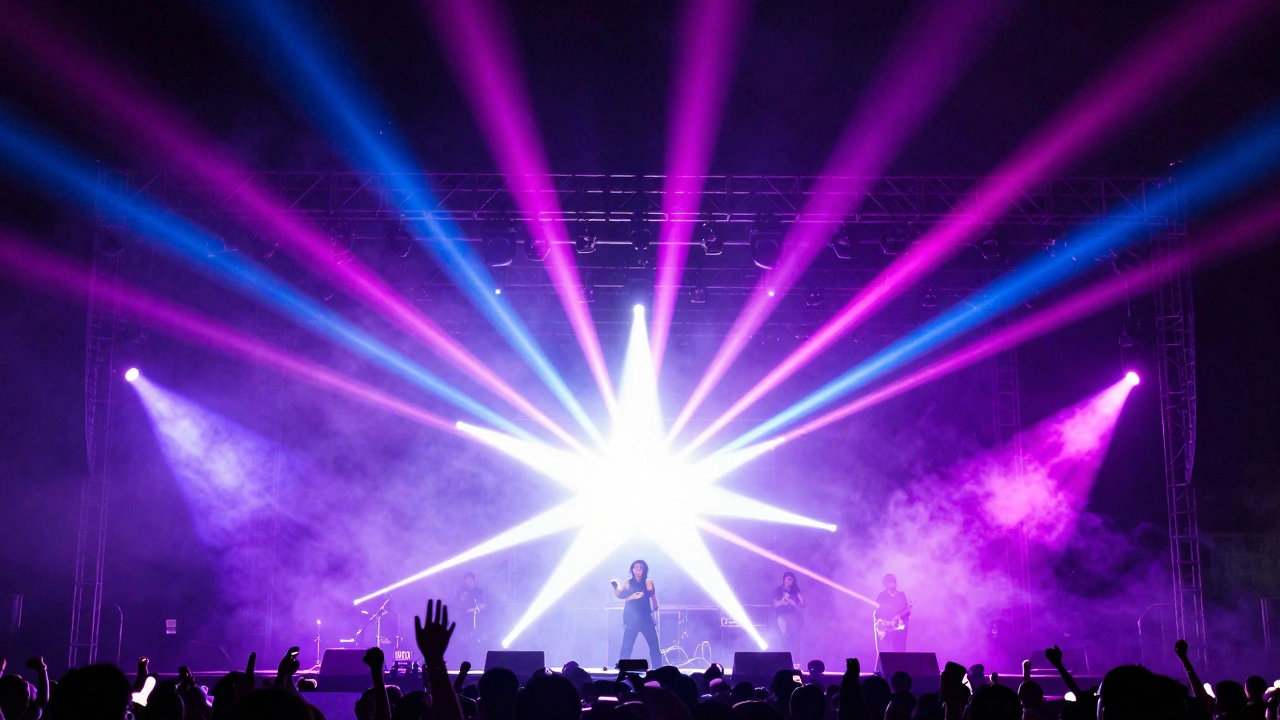
- Concert Photography: Stage lights are perfect for this. The high intensity of the spotlights creates massive stars that add energy and movement to the frame.
- Jewelry Photography: This is where the 8-point filter shines. It enhances the "fire" of a diamond or the sparkle of a gold watch, making the product look more expensive and vibrant.
- Daylight Shoots: Don't pack your filters away when the sun comes out. Sunlight can create unique streaks and patterns, especially during the golden hour.
Common Pitfalls and Pro Tips
The most fun part of using a star filter is the rotation. Since the filter threads into your lens, you can spin it. By rotating the glass, you change the angle of the star's rays. Spend a few minutes experimenting with this for every shot; sometimes a slight tilt makes the composition feel more organic and less like a "preset" effect.
Avoid stacking too many filters. If you have a UV filter on and then add a star filter, you might notice the quality of the rays diminishes. For the cleanest results, remove any unnecessary glass between your lens and the star filter. Also, be aware that video is trickier. Because video requires higher shutter speeds to avoid motion blur, you need significantly more light to make the starbursts appear vivid and stable.
If you're on a budget, you don't even need to buy a commercial filter right away. Many hobbyists create DIY versions using graph paper with etched lines or thin plastic with precise cuts. While not as sharp as a glass filter from a brand like K&F CONCEPT or Prism Lens FX, it's a great way to see if you actually like the aesthetic before investing in professional gear.
Can I create this effect in Photoshop instead?
Yes, you can use plugins or manual masking to create starbursts, but it's time-consuming and often looks fake. A physical star filter captures the light organically, meaning the rays follow the actual physics of the light in your scene, which is much harder to replicate perfectly in post-production.
Do I need a tripod when using a star filter?
Not necessarily. Unlike natural starbursts that require a narrow aperture (like f/16) and thus longer shutter speeds, star filters allow you to use wider apertures (like f/2.8). This lets more light in, allowing for faster shutter speeds that can be handheld. However, for night shots, a tripod is still recommended for overall image sharpness.
Will a star filter work on a matte surface?
No. Star filters require specular reflections or point light sources. A matte surface diffuses light, meaning there is no single "point" for the filter to diffract. You need shiny, reflective, or glowing objects to see the effect.
What is the difference between a Cross Screen and a Star Filter?
They are essentially the same thing. "Cross Screen" is a common term for a 4-point star filter. They both use etched lines to create a cross-shaped flare from bright lights.
Which point count is best for beginners?
Start with a 4-point filter. It is generally the most affordable option and provides a subtle, classic look that doesn't overwhelm the photo, making it easier to learn how rotation and aperture affect the result.
Next Steps for Your Gear Bag
If you're just starting, grab a 4-point filter and head to a city center at night. Experiment with your aperture-start at f/4 and move toward f/11 to see how the ray length and sharpness change. Once you've mastered the basics, look into "North Star" or "Hollywood Star" designs for more stylized, non-symmetrical effects. If you find yourself shooting a lot of jewelry or high-glam fashion, upgrading to an 8-point filter will give you that high-end, sparkling finish that clients love.