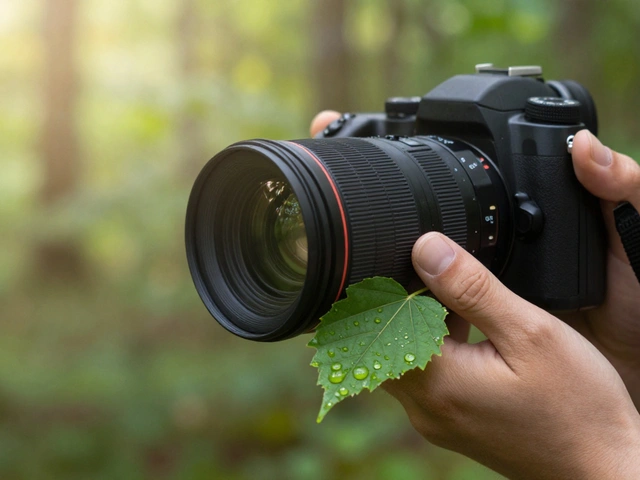
For decades, the unwritten rule of macro photography was simple: if you wanted sharp images, you needed a tripod. The shallow depth of field and extreme magnification made even the slightest camera shake disastrous. But technology has shifted the ground beneath our feet. With modern In-Body Image Stabilization (IBIS) and high-speed burst shooting, handheld macro photography is no longer just a workaround for convenience-it’s a viable, professional workflow that offers speed and adaptability tripods simply cannot match.
You don’t have to wait for the perfect light or spend ten minutes setting up a rig to capture a fleeting moment in nature. By mastering the "Stability Trinity"-camera tech, body positioning, and flash-you can shoot sharp, detailed close-ups while moving freely. Here is how you can break free from the tripod and still get razor-sharp results.
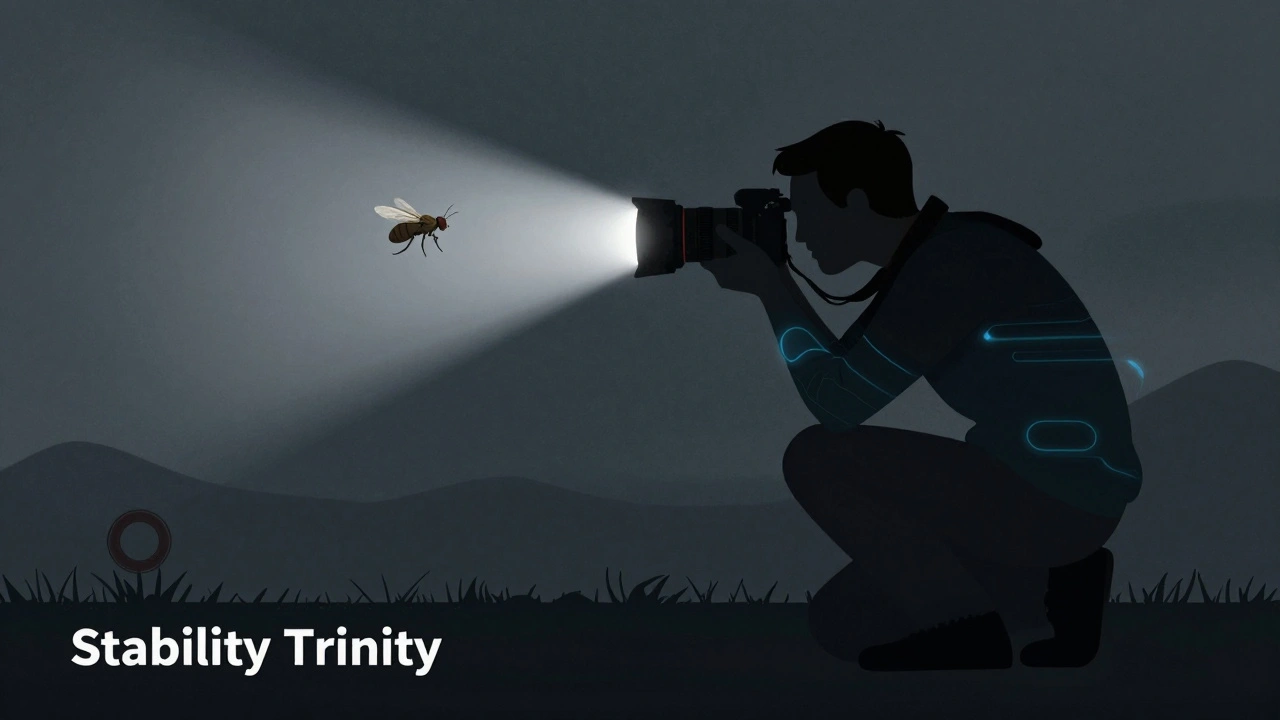
The Stability Trinity: Tech, Body, and Light
Successful handheld macro work isn't about luck; it's about combining three specific elements. Photographer McGinnis calls this the "Stability Trinity." It consists of advanced camera technology, deliberate field craft, and flash-based subject freezing. You need all three working together to overcome the natural instability of holding a heavy lens at high magnification.
The technology side relies on multi-axis In-Body Image Stabilization combined with lens-based optical stabilization. For example, using an OM-1 Mark II camera with five-axis IBIS paired with a 90mm F3.5 Macro IS Pro lens creates a powerful synergy. This combination allows for viable handheld shooting at shutter speeds as slow as 1/100th of a second. That is incredibly slow for macro work. Usually, you’d need 1/400th or faster to avoid blur. The dual stabilization system compensates for your hand movements, giving you a buffer that older systems simply didn’t have.
However, tech alone isn’t enough. The second pillar is field craft. You must become a "non-mechanical tripod." This means using your body to create stability. If you are shooting ground-level subjects, lay flat on the ground. Nothing is more stable than the earth itself. For slightly higher subjects, plant one knee down to create a solid base. Lean into trees or rocks when possible. Your arms should be tucked in tight against your torso, with one hand supporting the bottom of the lens and the other gripping the camera body firmly. These small physical adjustments make a massive difference in image sharpness.
Shutter Speeds and the Role of Flash
When shooting handheld macro, shutter speed selection operates under different rules than standard landscape or portrait work. While stabilization helps with camera shake, it does nothing for subject movement. A bug might hover for a second, but its wings beat hundreds of times per second. To freeze that motion, you rely on flash.
Flash serves two purposes here: illumination and freezing. The duration of a typical flash burst is extremely short, ranging from 1/200th to 1/10,000th of a second depending on the power setting. This brief burst effectively stops subject motion regardless of your ambient shutter speed. So, even if you are shooting at 1/100th of a second to keep your ISO low, the flash freezes the insect in mid-air. This allows you to use slower shutter speeds without sacrificing sharpness on the subject itself.
There is a trade-off, though. Shooting with flash adds complexity. Managing focus stacking while coordinating flash bursts can lead to higher failure rates. Some flash systems also limit burst-mode capabilities when firing continuously. If you find flash too cumbersome, you can rely purely on stabilization and faster shutter speeds, but you’ll lose the ability to freeze fast-moving subjects as cleanly. For static subjects like flowers or mushrooms, natural light with stabilization often suffices. For insects, flash is usually non-negotiable.
Focus Stacking Without a Tripod
The biggest challenge in macro photography is depth of field. At 1:1 magnification, your depth of field might be only a few millimeters deep. Even at f/16, much of your subject will be out of focus. The solution is focus stacking-taking multiple shots at different focus distances and blending them together in post-processing or in-camera.
Doing this handheld seems impossible, but it’s not. The key is to stop adjusting the focus ring after you take the first shot. Instead, move the entire camera. Start by focusing on the closest part of your subject. Then, initiate continuous burst shooting (high frames-per-second mode). As you fire the camera, slowly move the camera forward or backward relative to the subject. This changes the distance between the sensor and the subject, shifting the plane of focus incrementally.
Cameras like the Nikon Z9 or the OM-1 Mark II excel here because they can shoot 20+ frames per second. You might capture 15-20 frames in a single smooth motion. The OM-1 Mark II even has an in-camera focus stacking feature that automatically composites up to 15 frames into a final image instantly. This immediate feedback is crucial. You can review the result on the back of the camera, check for sharpness at 100% zoom, and adjust your technique for the next subject right away. If you’re doing manual stacking, you’ll need software later, but the principle remains the same: move the camera, not the focus ring.

Equipment Choices for Handheld Work
Your gear choices matter significantly in this workflow. First, prioritize lenses with built-in stabilization. The 90mm Macro Lens is a popular choice because it offers a good balance of working distance and size. Shorter lenses (like 60mm) require you to get so close that you risk scaring off subjects or blocking the light. Longer lenses (100-200mm) provide more working distance but amplify any shake, making stabilization even more critical.
Second, ensure your camera has a high burst rate. You need to capture many frames quickly to cover the narrow depth of field. Single-point autofocus in continuous-servo mode (AF-C) is generally the most reliable setting for handheld macro. It keeps the focus locked on the specific point you select while you move. Finally, always shoot in RAW format. JPEG compression loses detail that you’ll need when blending focus stacks or recovering shadows from flash exposure. RAW files give you the maximum tonal information for post-processing.
| Feature | Handheld Macro | Tripod Macro |
|---|---|---|
| Setup Time | Near instant | Minutes to set up |
| Mobility | High (move with subject) | Low (stationary) |
| Stability Source | IBIS + Body Positioning | Mechanical Tripod |
| Best For | Active subjects, changing light | Static subjects, studio work |
| Learning Curve | Steep (requires practice) | Moderate |
Practical Tips for Success
If you are new to handheld macro, start indoors with static objects. Practice your body positioning and camera movement without the pressure of a flying insect. Use a stool or kneel to lower your center of gravity. Avoid leaning on unstable surfaces-anthills and electric fences are poor choices, as one photographer humorously noted. Find solid ground or sturdy structures.
When shooting in the field, look for opportunities to rest your elbows or camera on something stable. A rock, a log, or even your own knee can serve as a makeshift support. Remember that ground-level subjects are the easiest because you can lie flat. Elevated subjects are the hardest because you have fewer options for support. In those cases, tighten your grip, hold your breath during the burst, and rely heavily on your camera’s stabilization.
Finally, manage your expectations. Handheld macro requires practice. You will miss shots. Focus stacks may fail if you moved too erratically. But as you gain experience, your success rate will improve. The reward is the freedom to chase light and composition without being tethered to a stand. You can react to the environment in real-time, capturing moments that would otherwise disappear while you fiddle with tripod legs.
What is the best shutter speed for handheld macro photography?
With modern In-Body Image Stabilization (IBIS) and lens stabilization, you can often shoot handheld at 1/100th of a second. However, if you are not using flash to freeze subject movement, you should aim for 1/400th of a second or faster to ensure both camera shake and subject motion are minimized.
Do I need a tripod for macro photography?
Not necessarily. While tripods offer maximum stability for static subjects, handheld macro photography is highly effective for active subjects or when mobility is required. Modern cameras with IBIS and high-speed burst modes allow for sharp handheld shots, especially when combined with proper body positioning and flash.
How do I focus stack handheld?
To focus stack handheld, set your focus on the nearest part of the subject. Do not touch the focus ring again. Instead, switch to continuous burst mode and slowly move the entire camera forward or backward relative to the subject. This captures multiple frames at different distances, which you can then blend in post-processing or in-camera.
Why is flash important in handheld macro?
Flash provides two benefits: it illuminates the subject and, more importantly, freezes motion. The short duration of a flash burst (often 1/10,000th of a second) stops subject movement like wing beats, allowing you to use slower shutter speeds for better exposure without introducing motion blur.
What camera settings should I use for handheld macro?
Use Aperture Priority or Manual mode. Set your aperture based on desired depth of field (often f/8 to f/11). Enable IBIS and lens stabilization. Use AF-C (Continuous Servo Autofocus) with single-point AF. Shoot in RAW format and enable high-speed burst mode for focus stacking sequences.